31 Mar CSS Overflow Property
Use the overflow property in CSS to control overflow text on a web page. Using the property values, clip it, or add a scrollbar, etc. By default, overflow is set to visible, meaning content spills outside the box
Let us see the values of the overflow property and its usage:
- visible: Content is not clipped and may extend outside the element.
- hidden: Content is clipped; overflow is invisible.
- scroll: Always adds scrollbars (horizontal/vertical) even if not needed.
- auto: Adds scrollbars only when necessary.
Let us understand them one by one with examples:
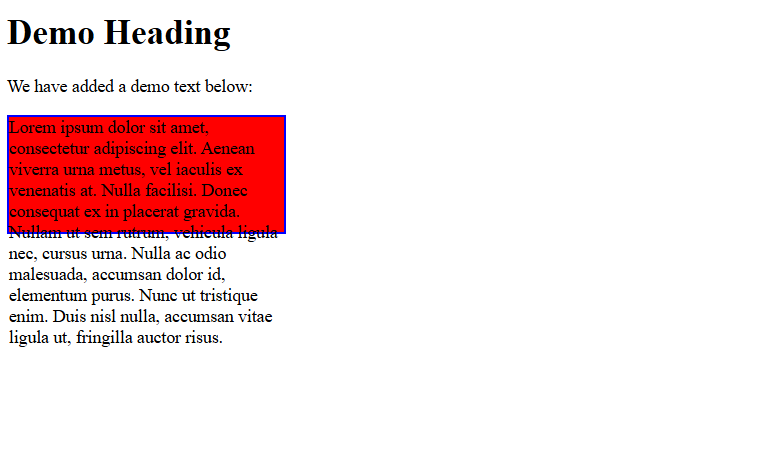
Overflow content
Let us see an example to see the default, i.e., the visible value of the overflow property. This shows how content overflows on a web page:
<!DOCTYPE html>
<html>
<head>
<style>
div {
  background-color: red;
  width: 250px;
  height: 105px;
  border: 2px solid blue;
  overflow: visible;
}
</style>
</head>
<body>
<h1>Demo Heading</h1>
<p>We have added a demo text below:</p>
<div>Lorem ipsum dolor sit amet, consectetur adipiscing elit. Aenean viverra urna metus, vel iaculis ex venenatis at. Nulla facilisi. Donec consequat ex in placerat gravida. Nullam ut sem rutrum, vehicula ligula nec, cursus urna. Nulla ac odio malesuada, accumsan dolor id, elementum purus. Nunc ut tristique enim. Duis nisl nulla, accumsan vitae ligula ut, fringilla auctor risus.
</div>

</body>
</html>
Output
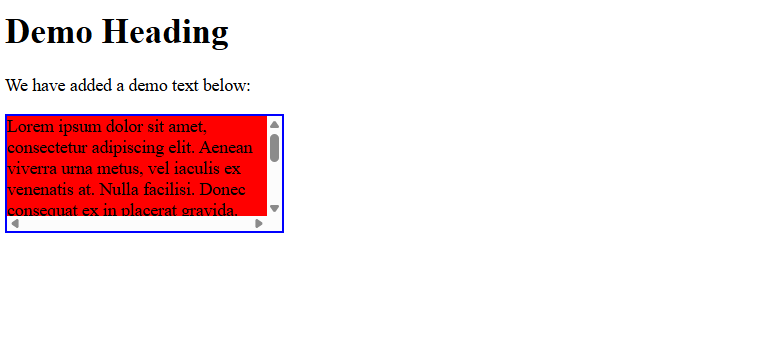
Add scrollbars to avoid overflow
Let us see an example to add a scrollbar for overflow, i.e., the scroll value of the overflow property. This shows how horizontal and vertical scrollbars get added to avoid overflow on a web page:
<!DOCTYPE html>
<html>
<head>
<style>
div {
  background-color: red;
  width: 250px;
  height: 105px;
  border: 2px solid blue;
  overflow: scroll;
}
</style>
</head>
<body>
<h1>Demo Heading</h1>
<p>We have added a demo text below:</p>
<div>Lorem ipsum dolor sit amet, consectetur adipiscing elit. Aenean viverra urna metus, vel iaculis ex venenatis at. Nulla facilisi. Donec consequat ex in placerat gravida. Nullam ut sem rutrum, vehicula ligula nec, cursus urna. Nulla ac odio malesuada, accumsan dolor id, elementum purus. Nunc ut tristique enim. Duis nisl nulla, accumsan vitae ligula ut, fringilla auctor risus.
</div>

</body>
</html>
Output
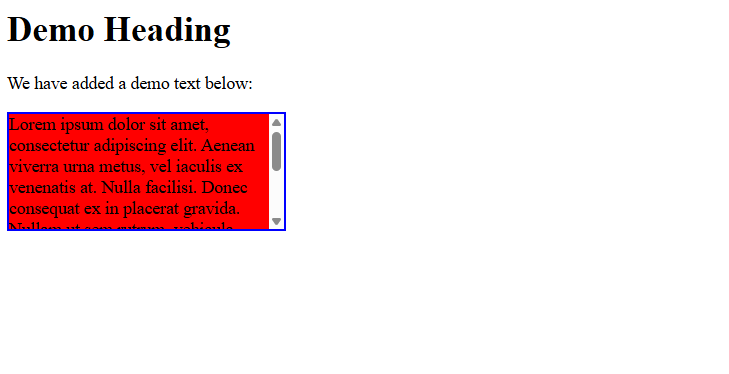
Add scrollbars only if necessary
Let us see an example to add a scrollbar, only when required, i.e., the auto value of the overflow property. This shows how horizontal and vertical scrollbars get added to avoid overflow on a web page:
<!DOCTYPE html>
<html>
<head>
<style>
div {
  background-color: red;
  width: 250px;
  height: 105px;
  border: 2px solid blue;
  overflow: auto;
}
</style>
</head>
<body>
<h1>Demo Heading</h1>
<p>We have added a demo text below:</p>
<div>Lorem ipsum dolor sit amet, consectetur adipiscing elit. Aenean viverra urna metus, vel iaculis ex venenatis at. Nulla facilisi. Donec consequat ex in placerat gravida. Nullam ut sem rutrum, vehicula ligula nec, cursus urna. Nulla ac odio malesuada, accumsan dolor id, elementum purus. Nunc ut tristique enim. Duis nisl nulla, accumsan vitae ligula ut, fringilla auctor risus.
</div>

</body>
</html>
Output
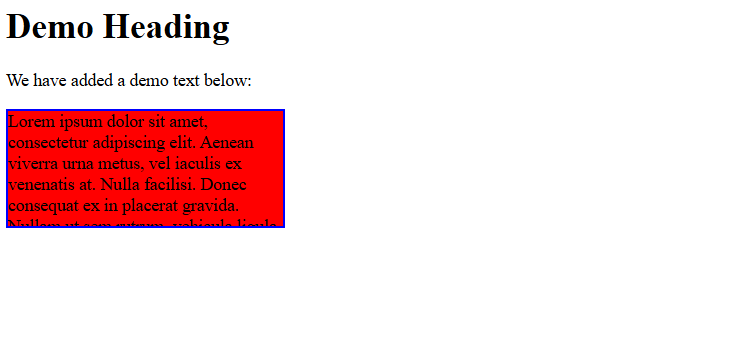
Clip the overflow
Let us see an example to clip the overflow, i.e., the hidden value of the overflow property. This hides the rest of the content (i.e., the overflow) on a web page:
<!DOCTYPE html>
<html>
<head>
<style>
div {
  background-color: red;
  width: 250px;
  height: 105px;
  border: 2px solid blue;
  overflow: hidden;
}
</style>
</head>
<body>
<h1>Demo Heading</h1>
<p>We have added a demo text below:</p>
<div>Lorem ipsum dolor sit amet, consectetur adipiscing elit. Aenean viverra urna metus, vel iaculis ex venenatis at. Nulla facilisi. Donec consequat ex in placerat gravida. Nullam ut sem rutrum, vehicula ligula nec, cursus urna. Nulla ac odio malesuada, accumsan dolor id, elementum purus. Nunc ut tristique enim. Duis nisl nulla, accumsan vitae ligula ut, fringilla auctor risus.
</div>

</body>
</html>
Output
If you liked the tutorial, spread the word and share the link and our website, Studyopedia, with others.
Read More:
No Comments