24 Jul Magento Store Invoices
When the store is setup and the sales start, each sale has an invoice copy. With more orders on the Magento Store, it could become hard to manage these invoices. Do not worry, you can easily manage Magento Store Invoices. Easily check the invoices for the products sold, manage the interface, and set filters for Invoice list.
Check Invoices of orders
A customer purchases a product from your store. With Magento, from the Invoices section you can check the Invoice. Also check the invoice with Invoice Date, Order, and other options.
To check invoices,
Login the store as an admin and reach the Dashboard.
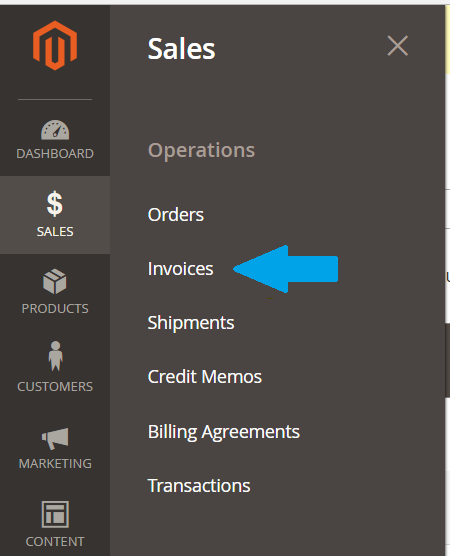
Go to SALES menu and then click Invoices as shown below,
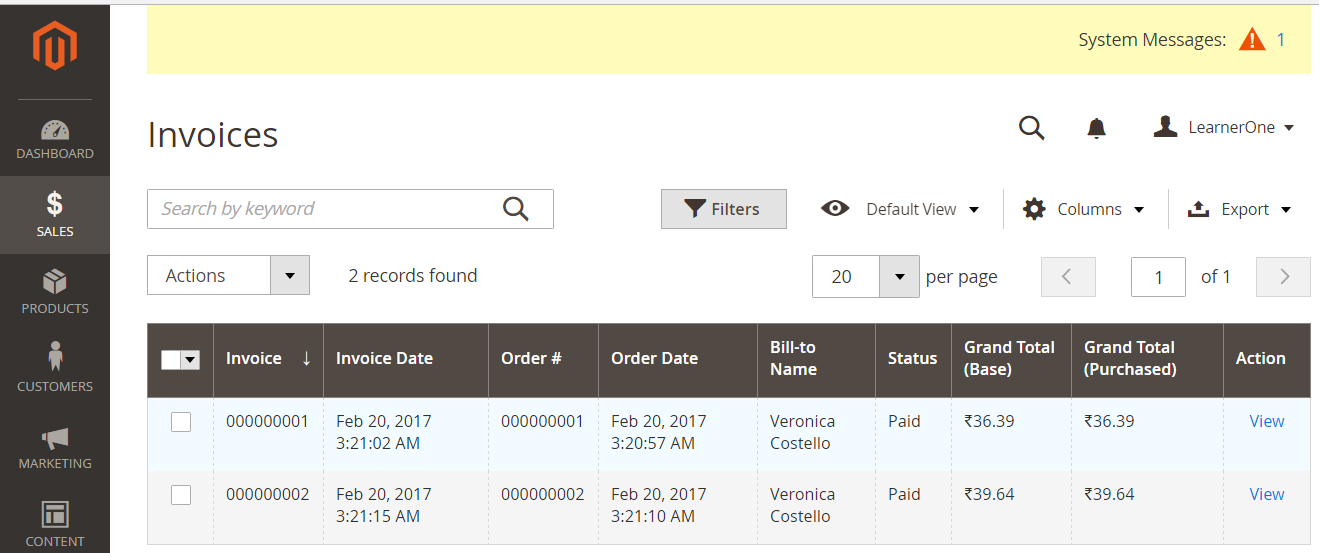
On clicking Invoices you can see all the Invoices for orders are visible. Right now, the invoice for default products is visible,
Add more columns to Invoice list
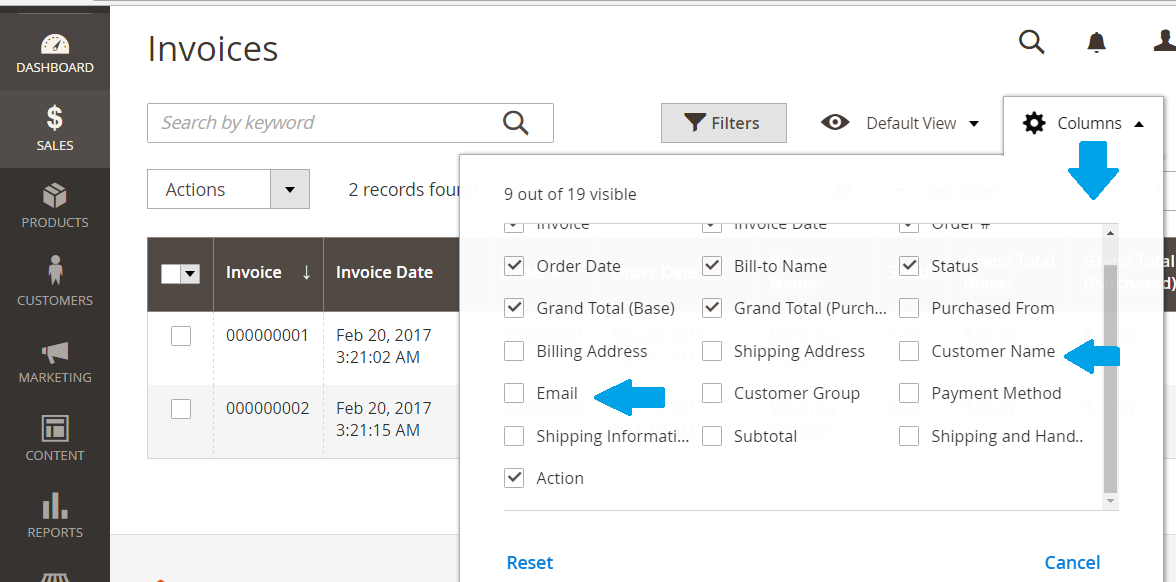
Now, let’s say you want to see more information about a particular Invoice i.e. you can add more columns to invoice. For example, let’ say you need to show the Email address and name of the customer, you can do that by adding new columns for that as shown below,
To add more columns,
Go to SALES menu on the left, and then click Invoices. After that click on the Settings icon tab on the invoice page and you can see the following,
Export the invoice list
Let’s say you have a lot of orders and you want to save the list for future reference. You can easily do that with an option provided by Magento.
To export the invoice list,
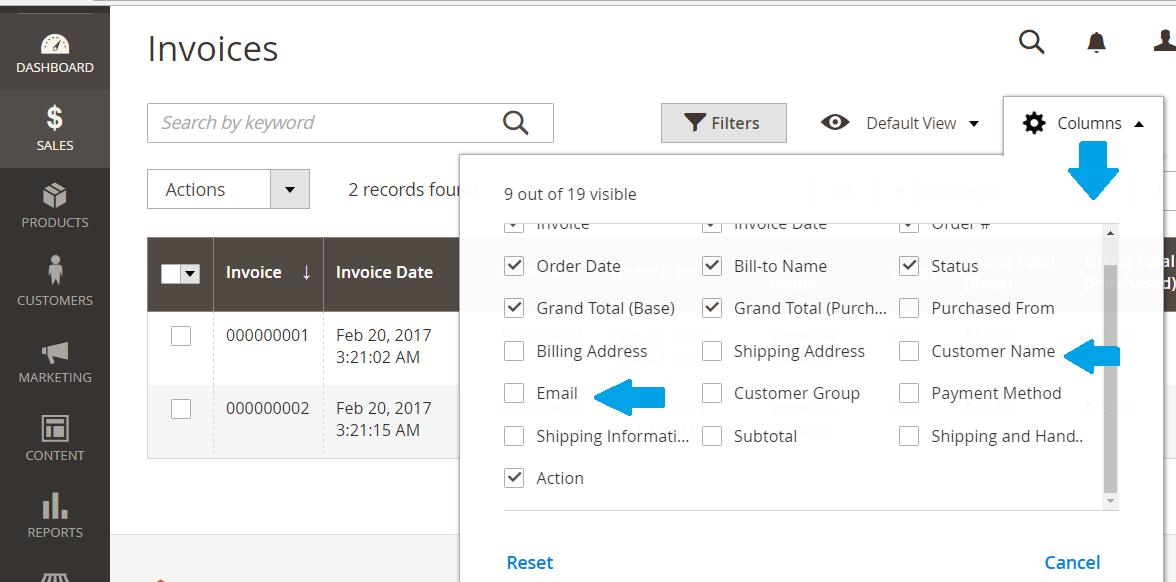
Go to SALES menu on the left, and then click Invoices. After that click on the Export tab and then export the orders list in the form of CSV and Excel XML, as in the following screenshot,
Set Filters for Invoice
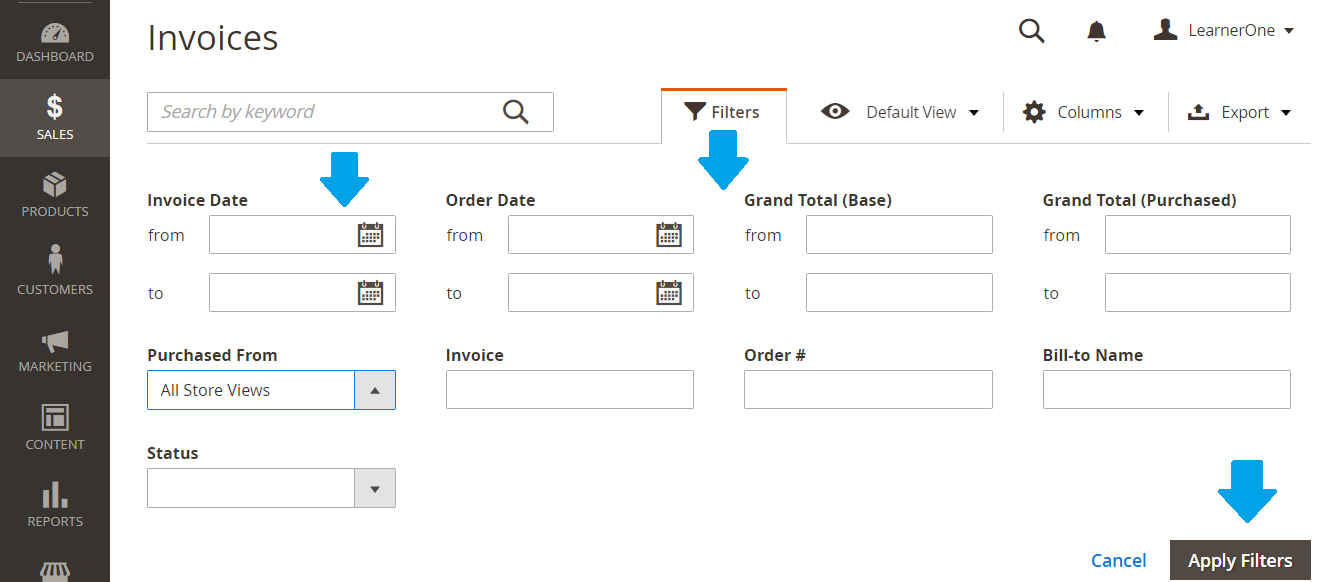
You can also set filters for invoices list. Let’s say if you want to get the invoices for Invoice Date from June 17, 2017 to June 18, 2017 i.e. invoices of orders from on June 17 to June 18. For that, you need to set them as shown below,
To set Filters,
Go to SALES menu on the left, and then click Invoices. After that click on the Filters tab and set them accordingly as shown below.
After that click Apply Filters,


No Comments