24 Jul Install Magento 2 on localhost using XAMPP
Magento is the most popular E-Commerce platform in the world. More than 250,000 merchants around the globe working with Magento for E-Commerce solutions. Magento installation on localhost is quite easy. It has some simple steps, which are shown below. Firstly, we will learn about the software requirements to install Magento for online store development, then move further to install Magento, setup database, etc.
What all you need to install Magento
Here, we will learn the installation on localhost. For installation, we need XAMPP, an open source cross-platform web server solution stack package. XAMPP, developed by Apache Friends, provides a server i.e. Apache, and database i.e. MariaDB (formally MySQL), and PHP.
- XAMPP
- Apache web server
- MySQL database
- Magento
Download and install XAMPP
Let’s start with the installation,
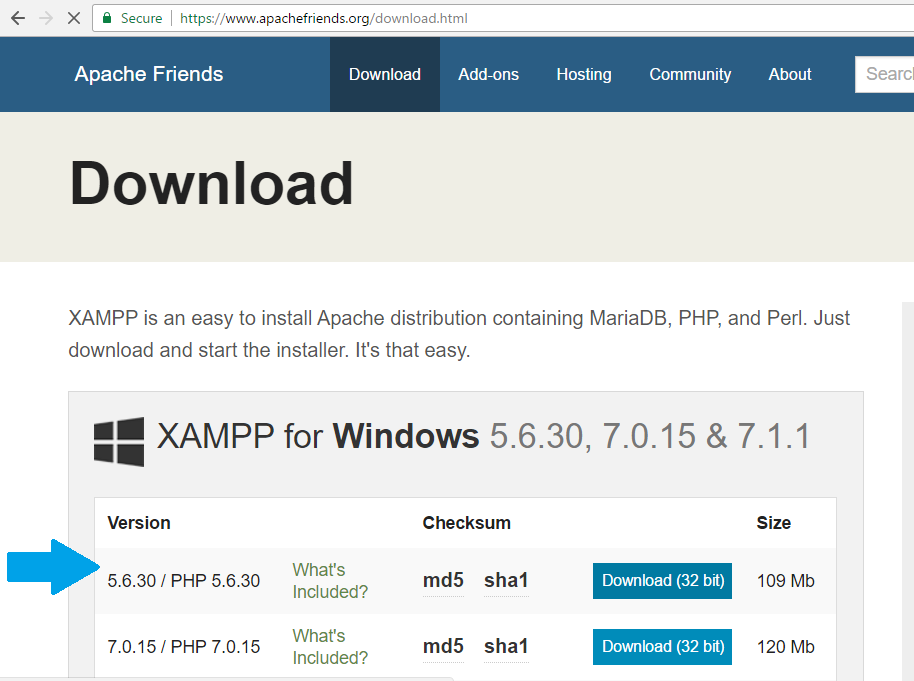
Step 1- Go to the Apache Friends website and download XAMPP,
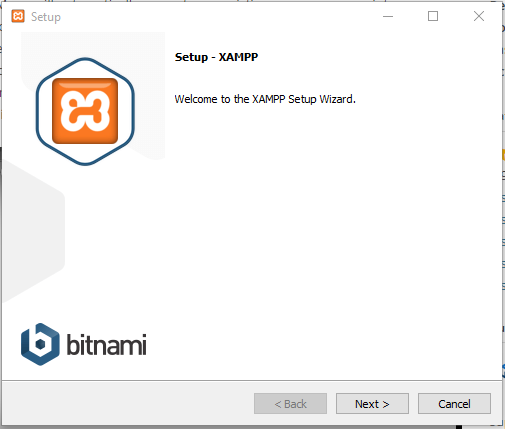
Step 2- Install XAMPP
Now, double click on the exe file, xampp-win32-5.6.30-0-VC11-installer.exe and the installation starts.
Now, after clicking Next, add the installation folder for XAMPP. The installation folder for it is,
C:\xampp
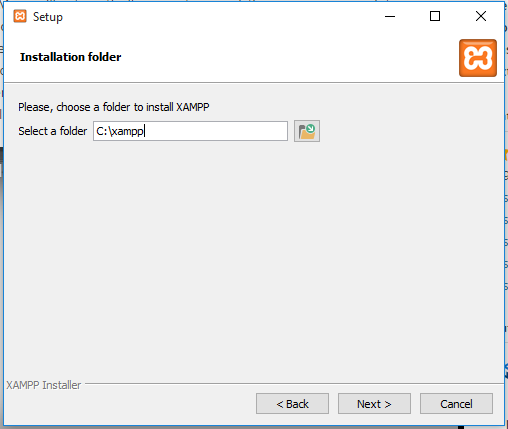
Now, above, click Next
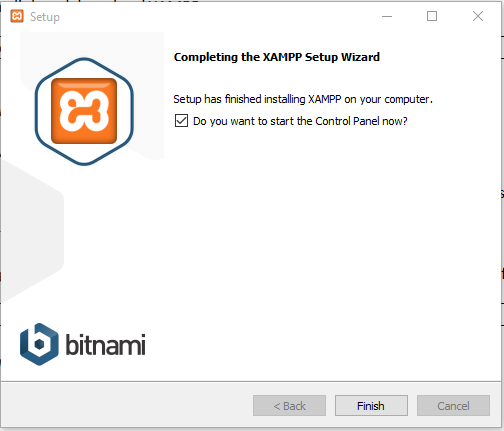
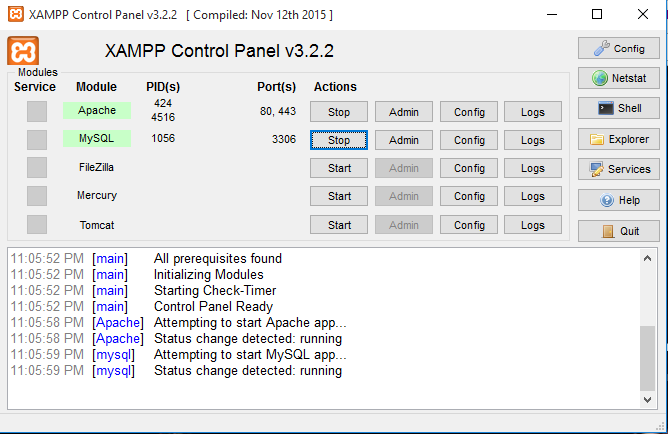
After clicking Finish above, you can see the XAMPP Control Panel starts. Now, start Apache and MySQL,
Apache – Web Server
MySQL – Database
Step 3- Create a folder in htdocs directory, we created Studyopedia.
This will be our project folder,
C:\xampp\htdocs\Studyopedia
Now, let’s install Magento as shown in the next lesson, and move the zip file in the Studyopedia folder.
Download and install Magento
Now, we will move further to install and download Magento,
Step 1- Download Magento
Go to the official website of Magento and download Magento, with sample data, so that it can provide you a sample store as well after installation,
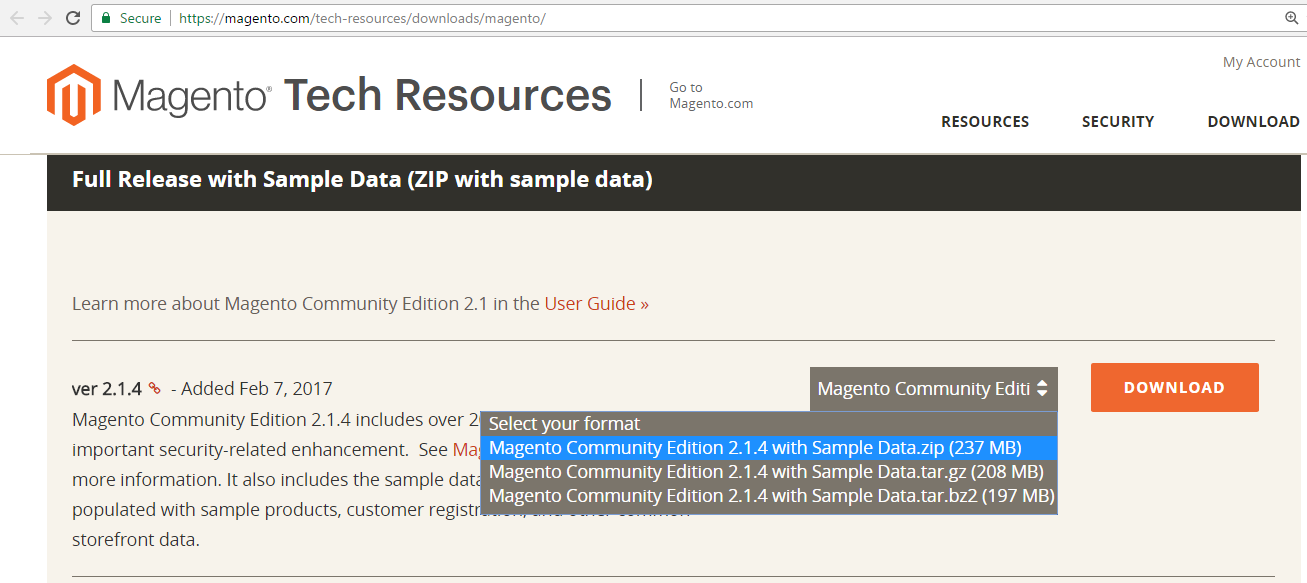
Now, it will ask for Signup, create an account, verify Email-id and download Magento.
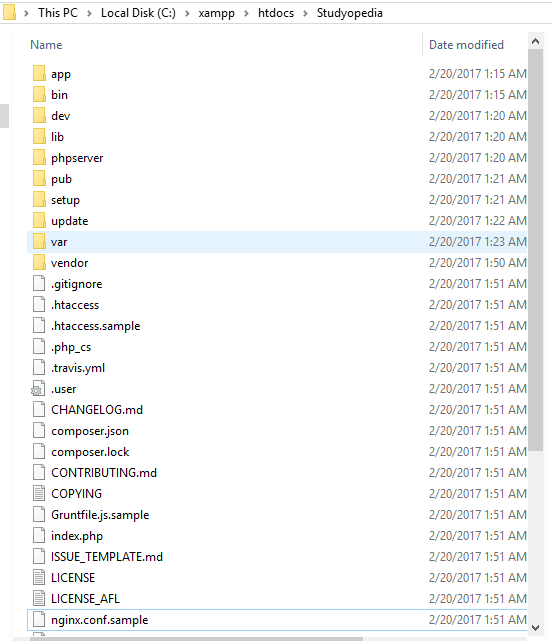
Step 2- Unzip the downloaded Magento zip file in the Studyopedia folder as seen in the previous lesson.
Here’s the location, where you need to unzip Magento zip file.
C:\xampp\htdocs\Studyopedia\
So, now your Magento folder will be visible in the above directory, shown below,
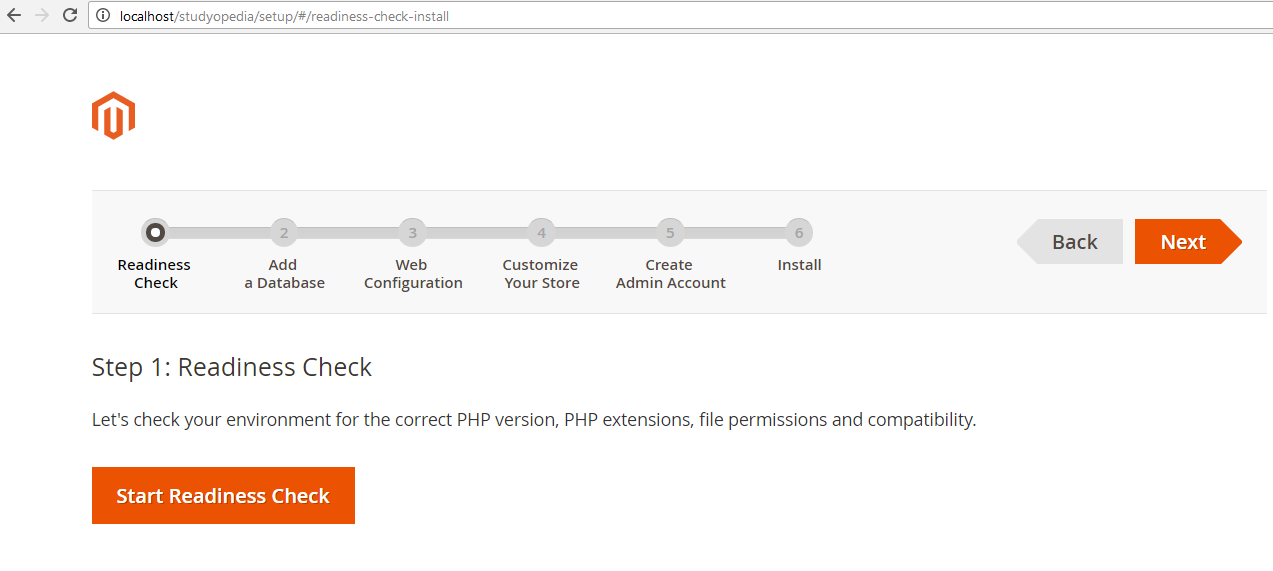
Step 3- Go to the web browser, type http/localhost/Studyopedia and press enter.
Step 4- Now, you can see the following is visible. Click Agree and Set Up Magento

Now, click Start Readiness Check, as shown below. It checks the PHP version, PHP extensions, file permissions and other stuff for environment compatibility,
Errors seen now
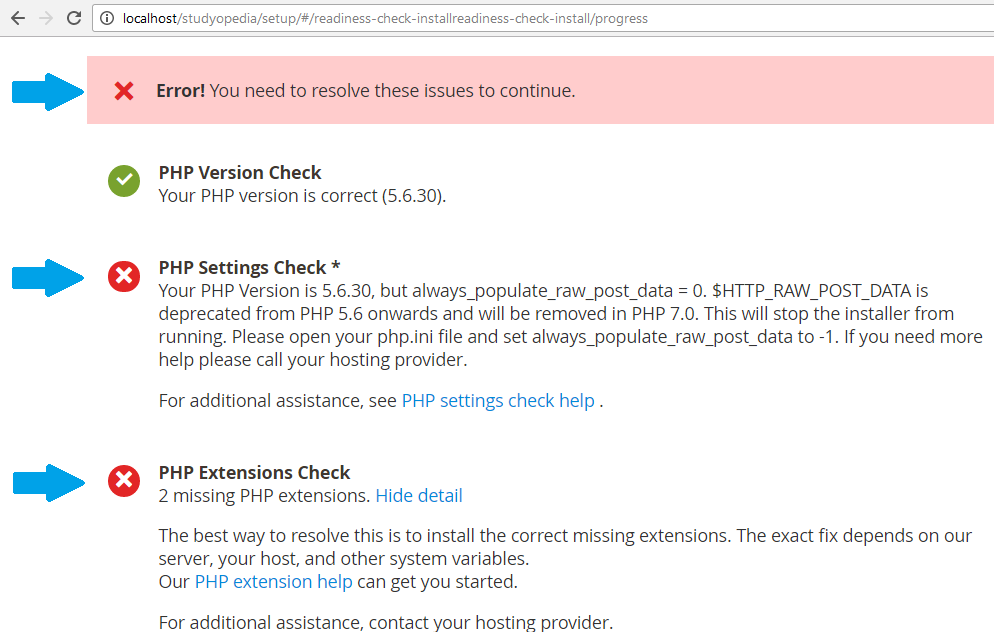
While working on installation, you may find the following installation errors under this step,
- PHP Setting Check
- PHP Extensions Check
Resolve Error 1
Here’s the first error,
Error1-
Your PHP Version is 5.6.30, but always_populate_raw_post_data = 0. $HTTP_RAW_POST_DATA is deprecated
from PHP 5.6 onwards and will be removed in PHP 7.0.
Here’s how to resolve error 1,
Resolve Error 1- Please open your php.ini file and uncomment, always_populate_raw_post_data = -1.
Resolve Error 2
Here’s what we saw above, our 2nd error, PHP missing extensions,
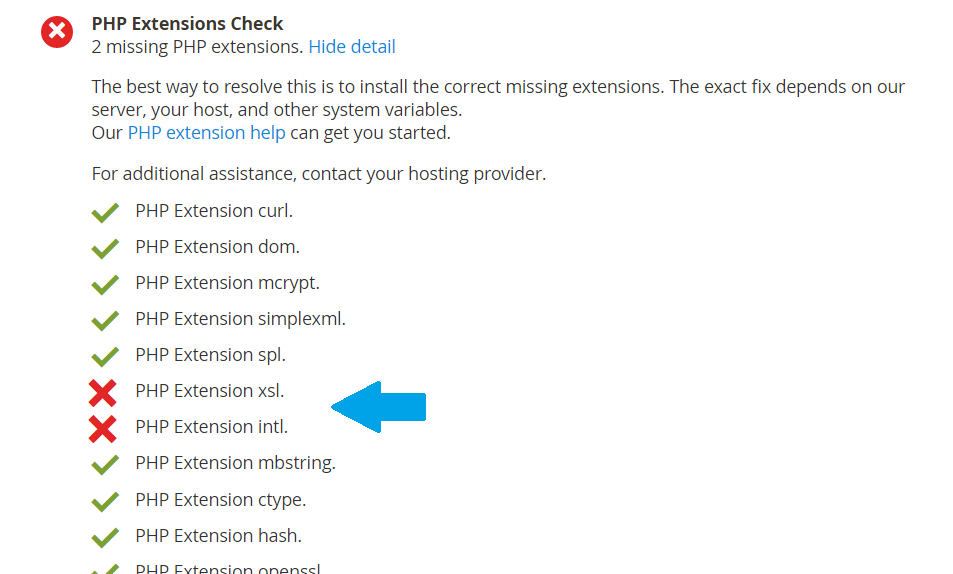
Error2- 2 missing PHP extensions-

    PHP Extension xsl.
    PHP Extension intl.
The best way to resolve this is to install the correct missing extensions. The fix ALSO depends on our server, your host, and other system variables.
Try this fix!
Open php.ini and uncomment, both
extension=php_xsl.dll
extension=php_intl.dll
After above, refresh and now you can see both the errors resolved,
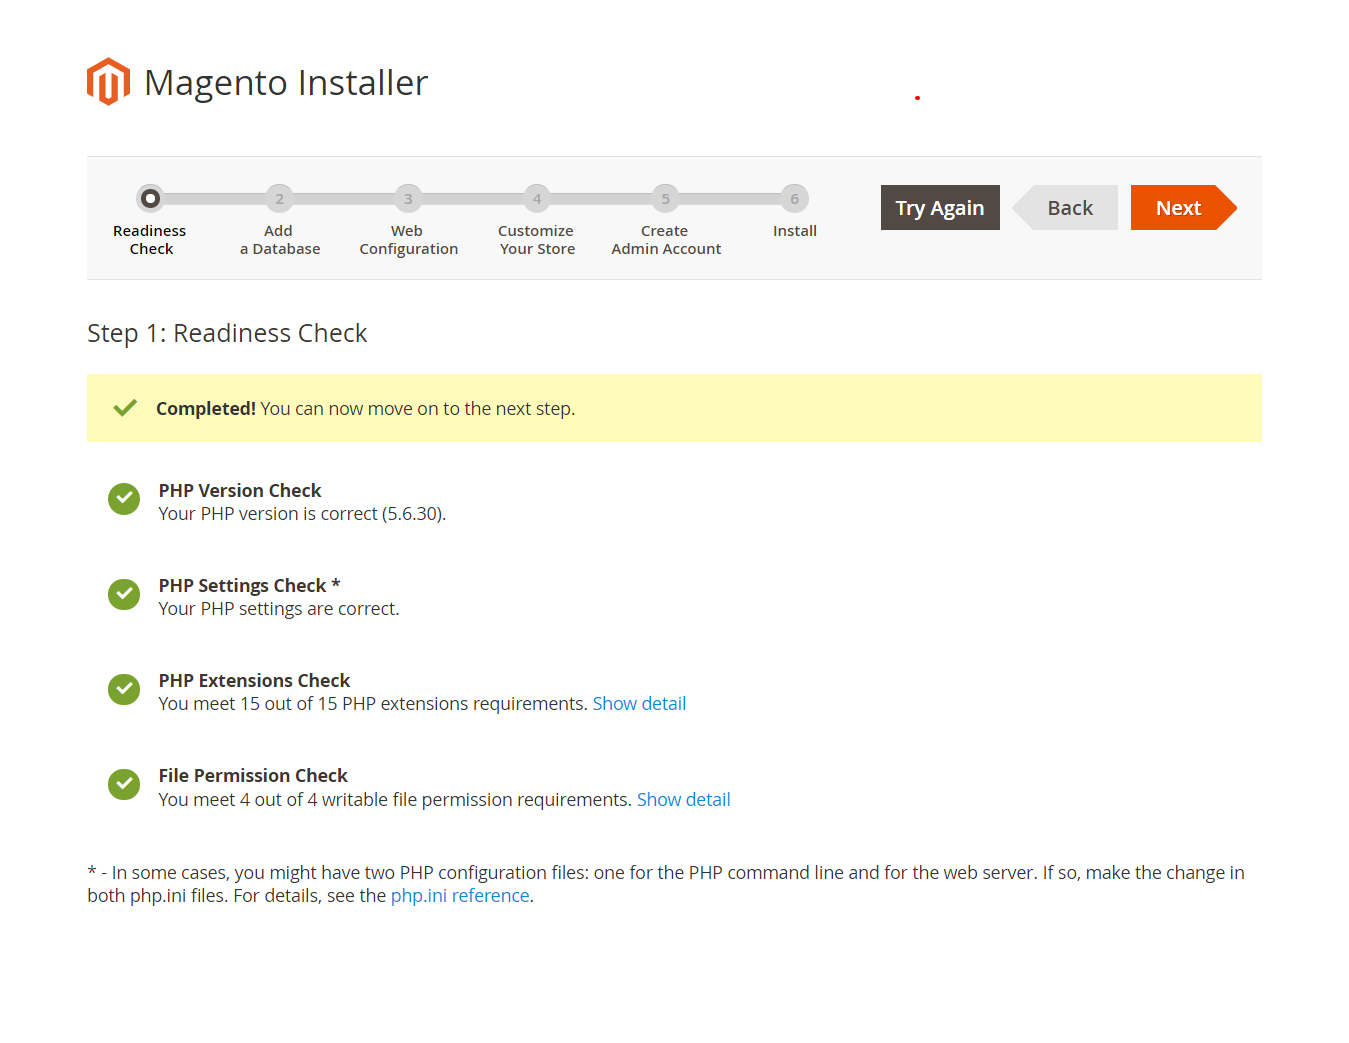
Now, click Next
Step 5- Now, Add a database section is visible.
To create a database, open a new tab and go to the following link,
localhost/phpmyadmin
After that, create a new database as shown below,
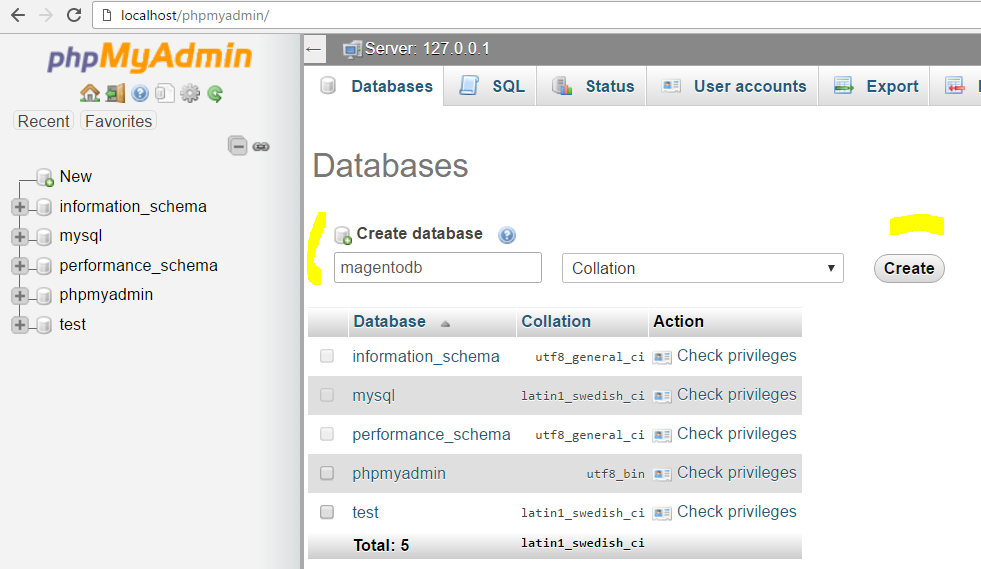
We created a new database, magentodb and then added the following details. It includes details like adding database username, database username and password, etc.
| Field | Value | Description |
|---|---|---|
| Database Server Host | localhost | Add host name |
| Database Server Username | root | Add username |
| Database Server Password | Not always necessary | |
| Database Name | magentodb | Add database name |
| Table prefix | Add table prefix |
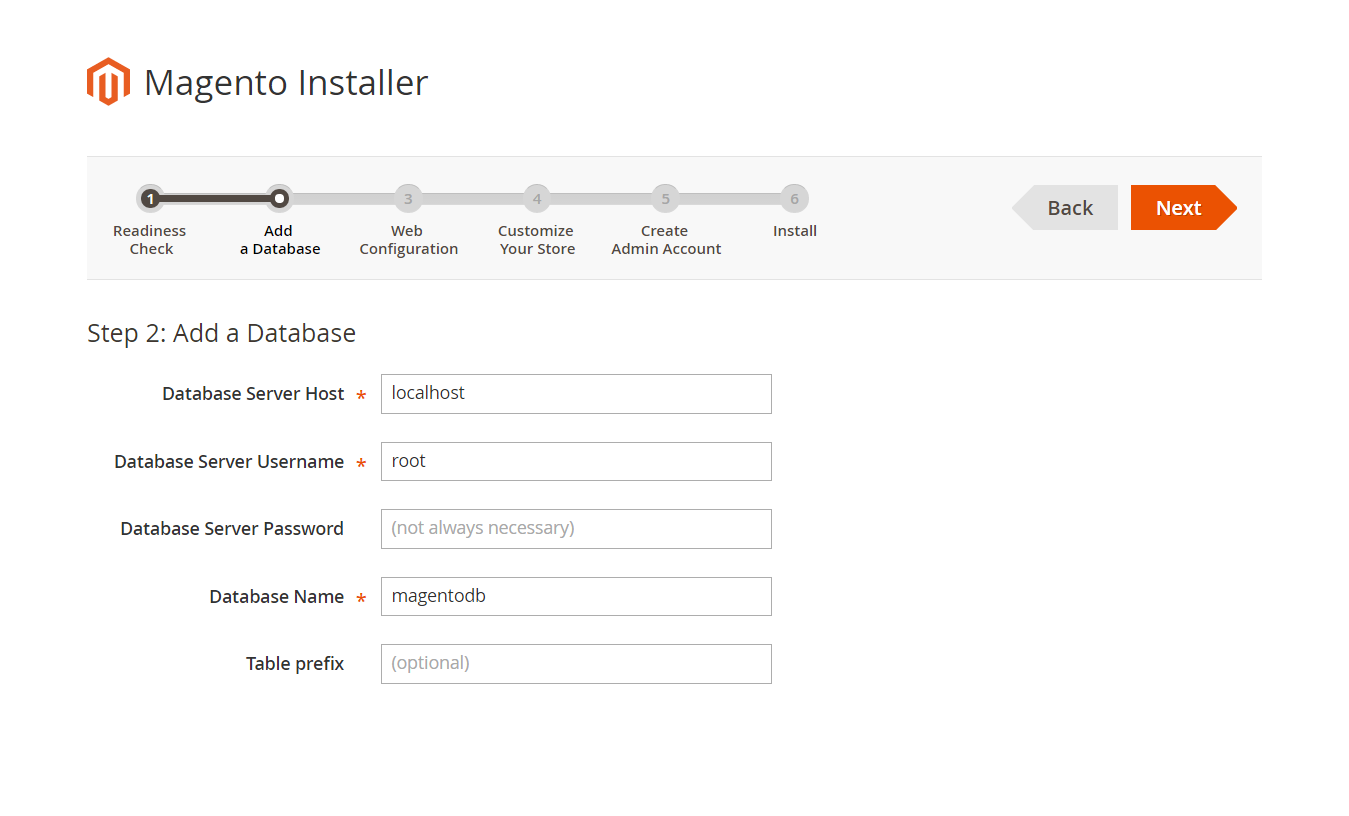
Now, click Next
Step 6- We’ve now reached the Web Configuration step. It includes details like store address, magento admin address, etc.
Here are the details,
| Field | Value | Description |
|---|---|---|
| Your Store Address | http://localhost/Studyopedia/ | |
| Magento Admin Address | admin_learnerone | |
| HTTPS Options | Select to enable the use of Secure Sockets Layer (SSL | |
| Apache Rewrites | Use Apache rewrites, an supported only if you enabled server rewrites when Apache is installed. | |
| Encryption Key | Key to encrypt sensitive data in the database. Generate encryption key from Magento or use your own. | |
| Session Save | How to store session data |
Here’s the screenshot showing the same,
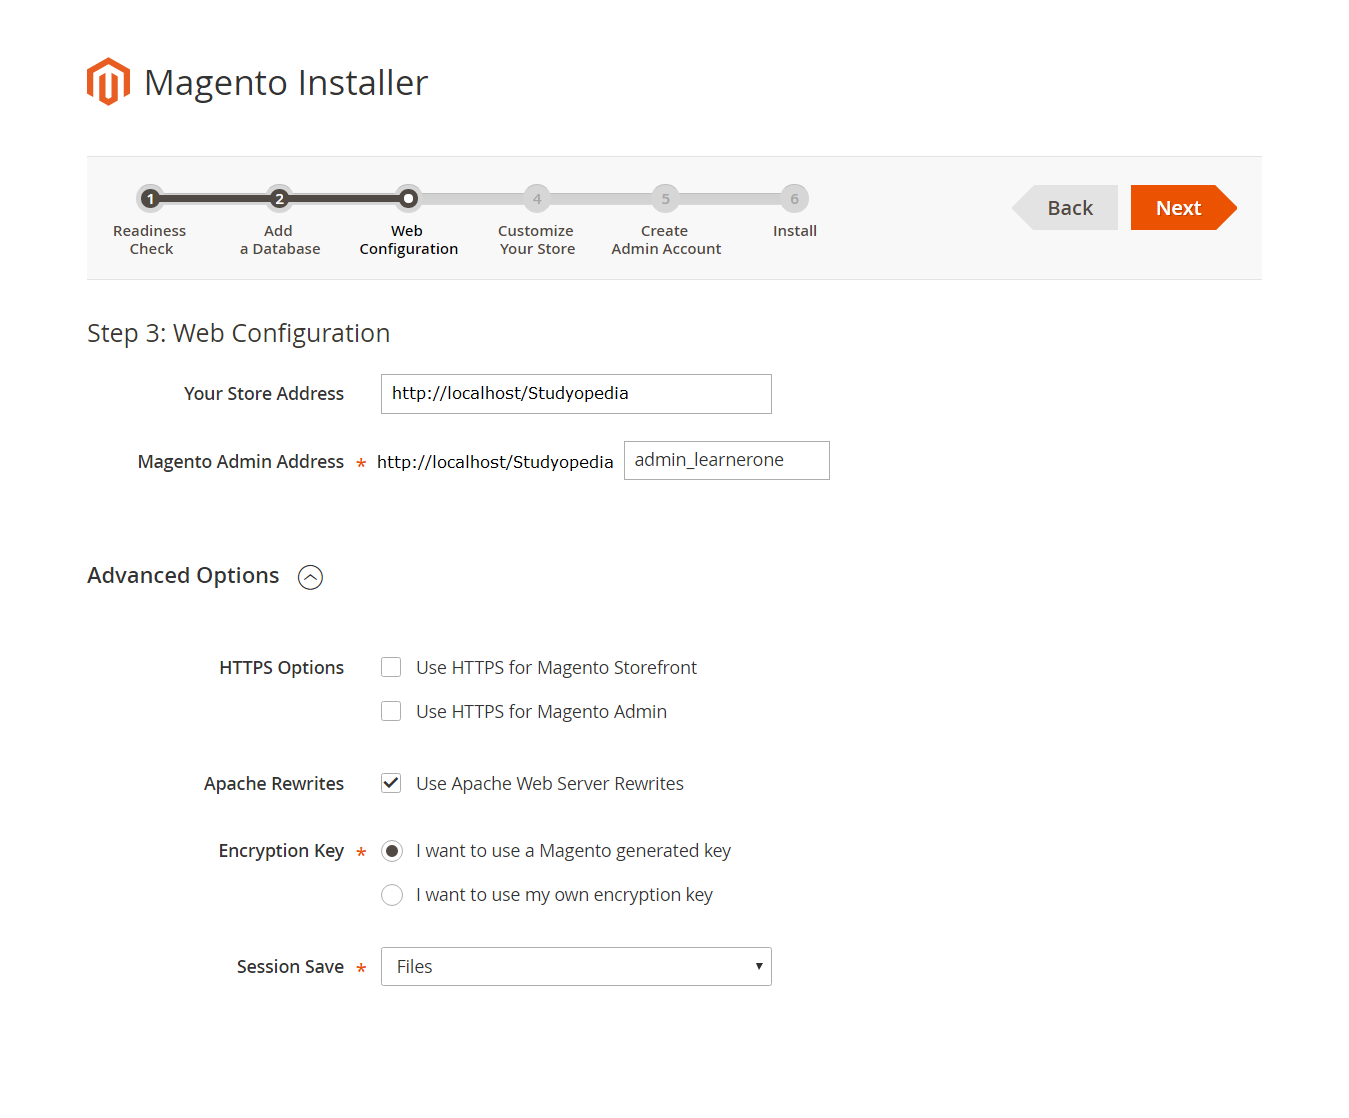
Now, click Next
Step 7- The next step is where you can customize your store i.e. Customize your Store section,
Now, fill the following details,
| Field | Value | Description |
|---|---|---|
| Store Default Time Zone | IST | Set default time zone for Magento store |
| Store Default Currency | INR | Set default currency for Magento store |
| Store Default Language | English | Set default language for Magento store |
| Advanced Modules Configuration | Enable or disable modules before you install Magento , This is optional. |
Here’s the screenshot showing the same,
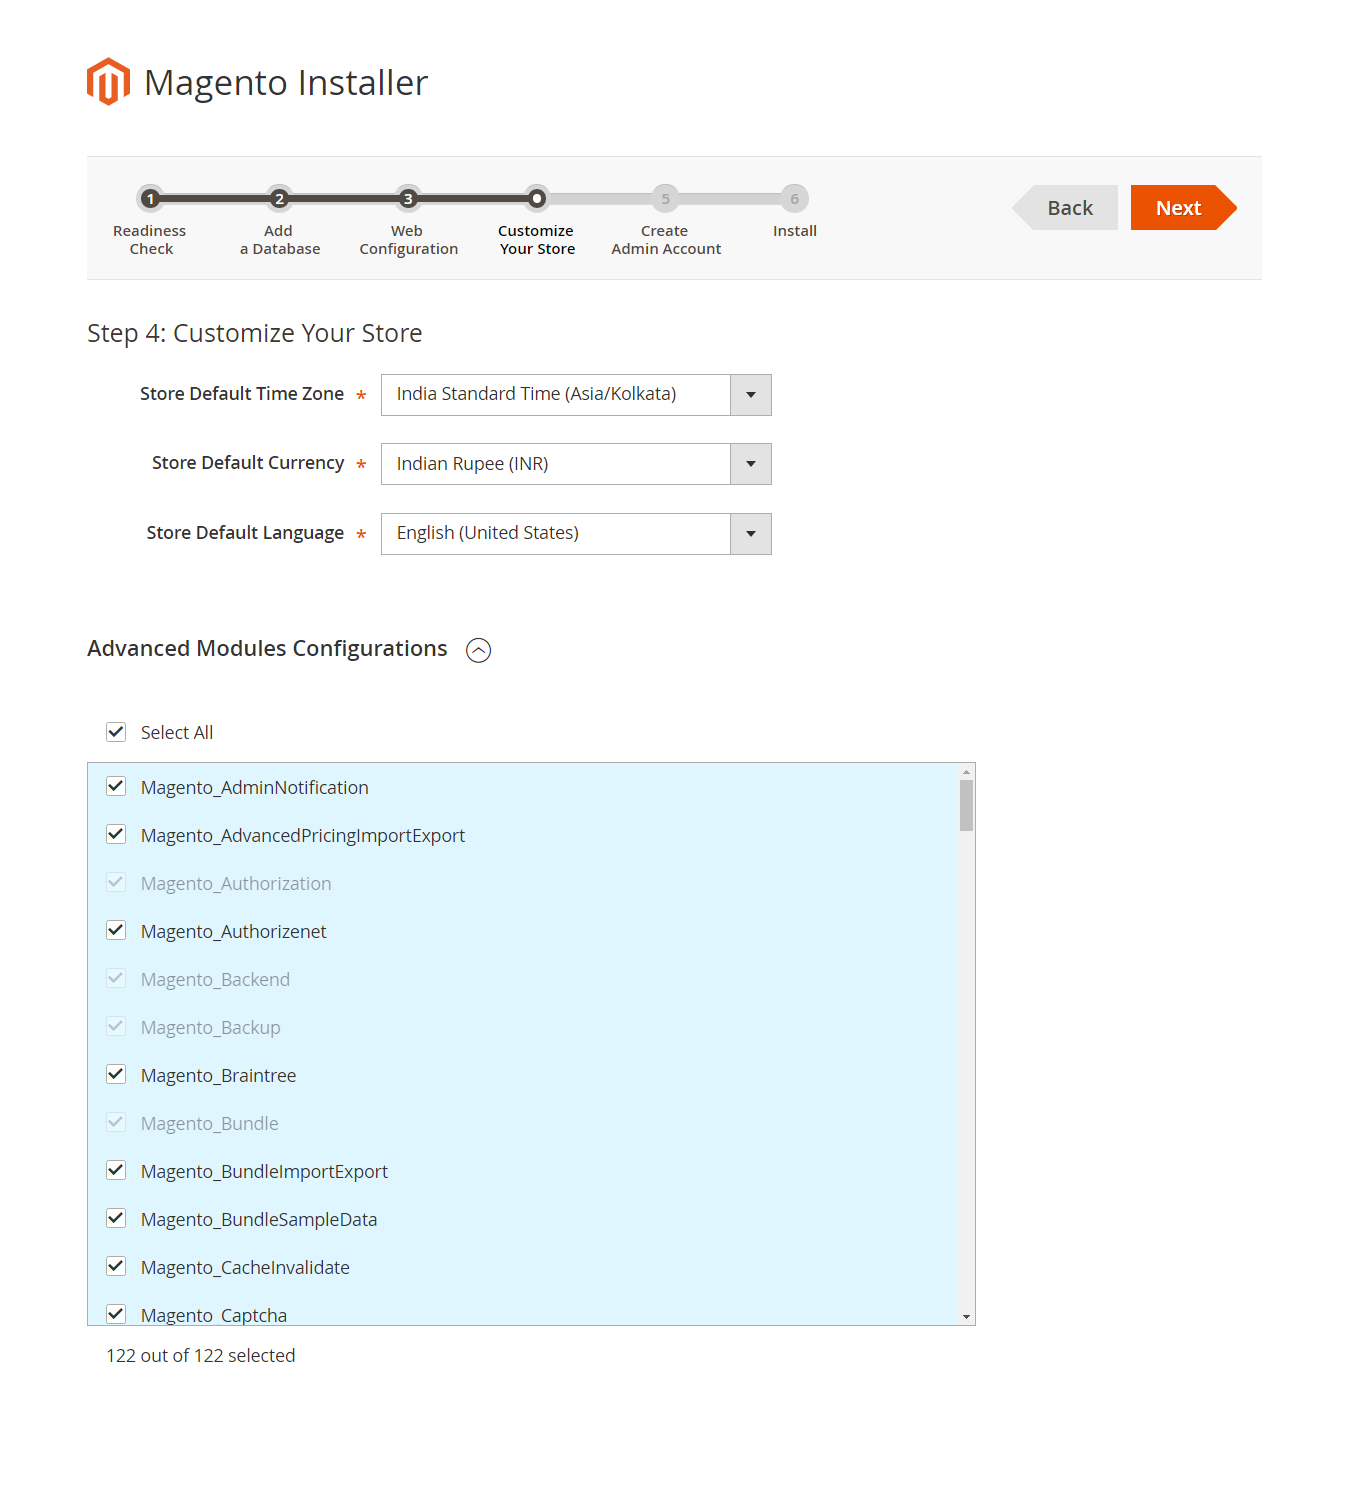 Now, click Next
Step 8- Now a section just before final installation of Magento is Create Admin Account. For developing Magento store, you need to create admin account to enter the dashboard. The administrator has all the permissions on the website and creating an admin store is a step which can’t be skipped.
Administrator develops the store and manages it. Admin also has authority to add other users on the store and give them permissions, such as Editor.
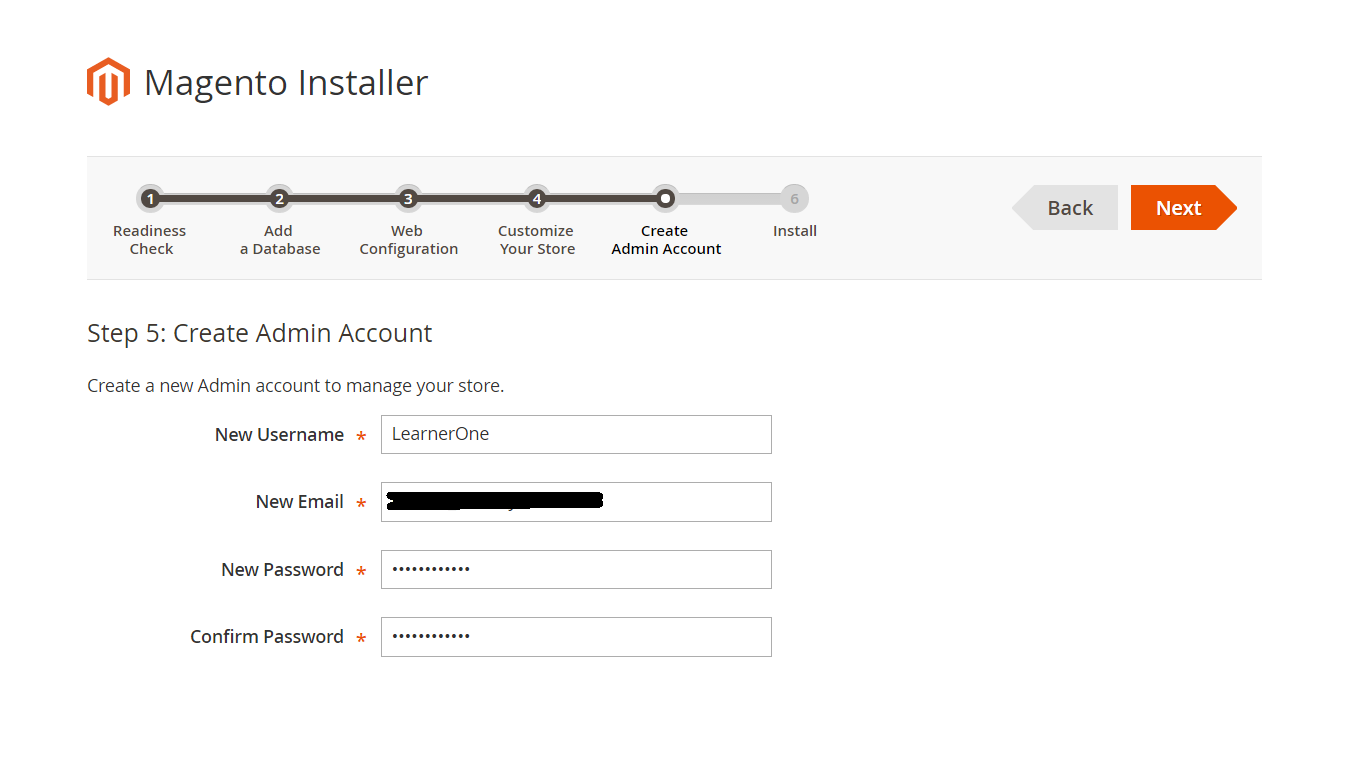
Now, click Next
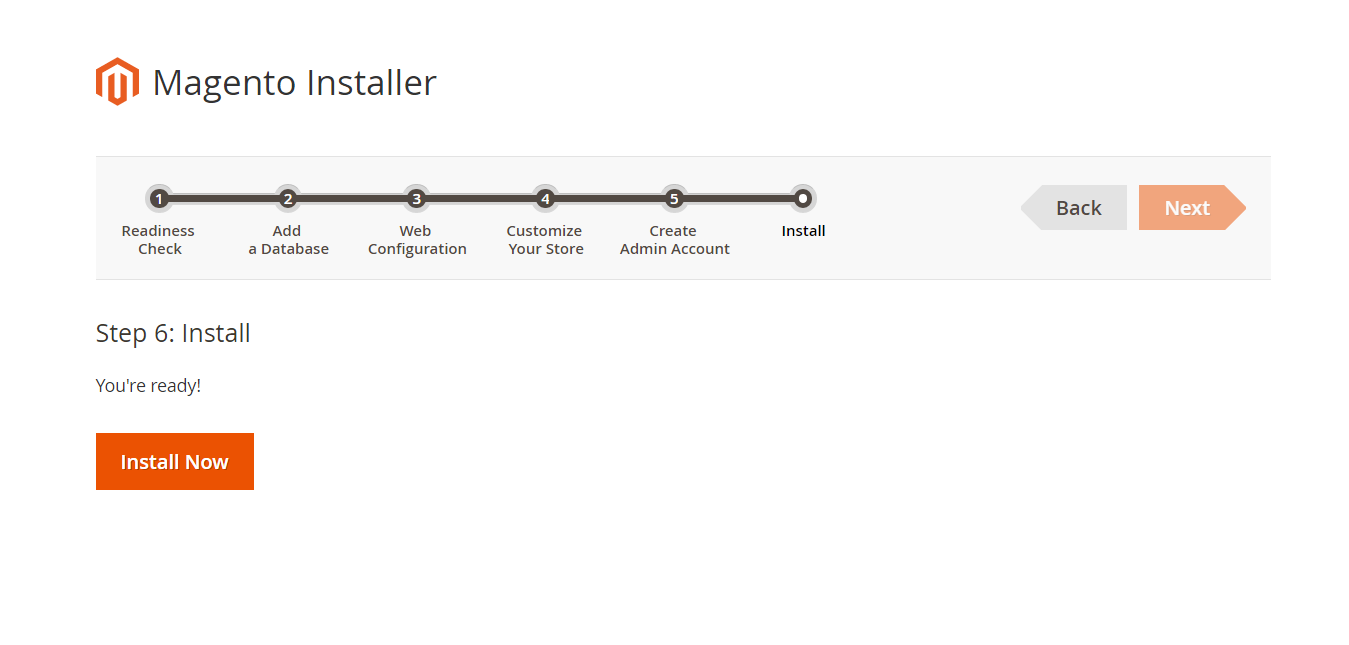
Step 9– The final step is here to install Magento.
Click Install Now,
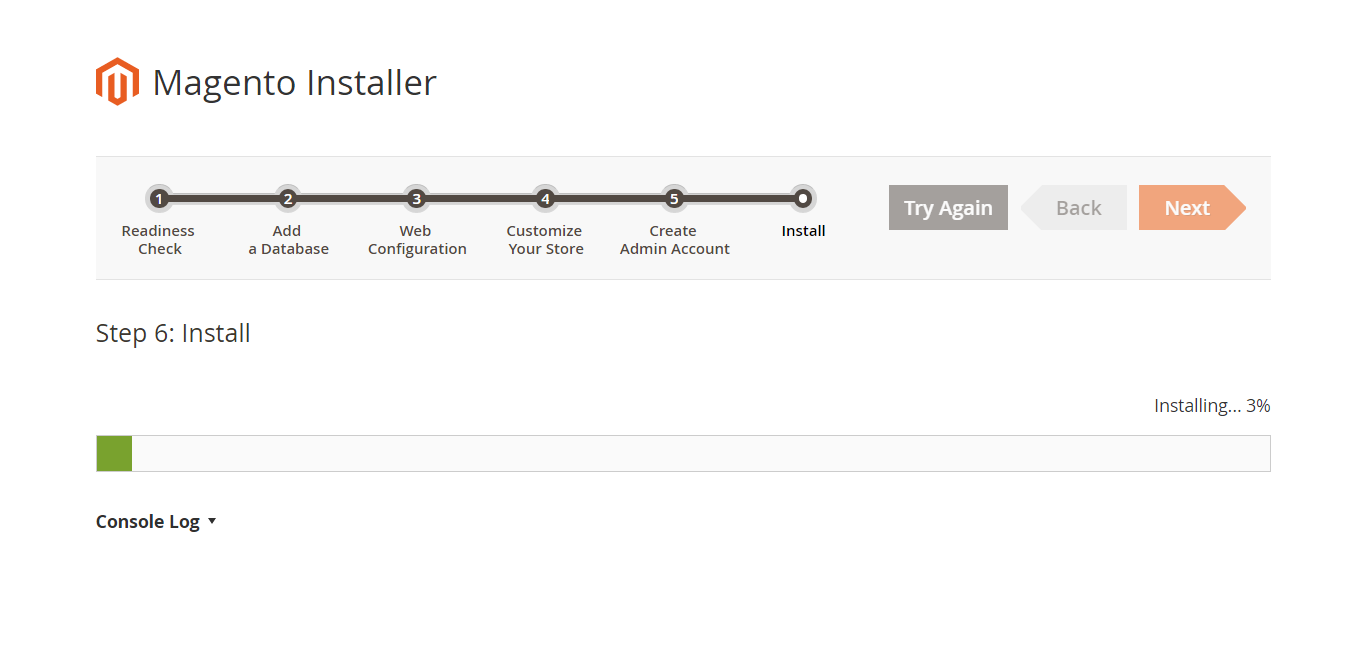
Here, you can see it is installing.
Installed successfully,
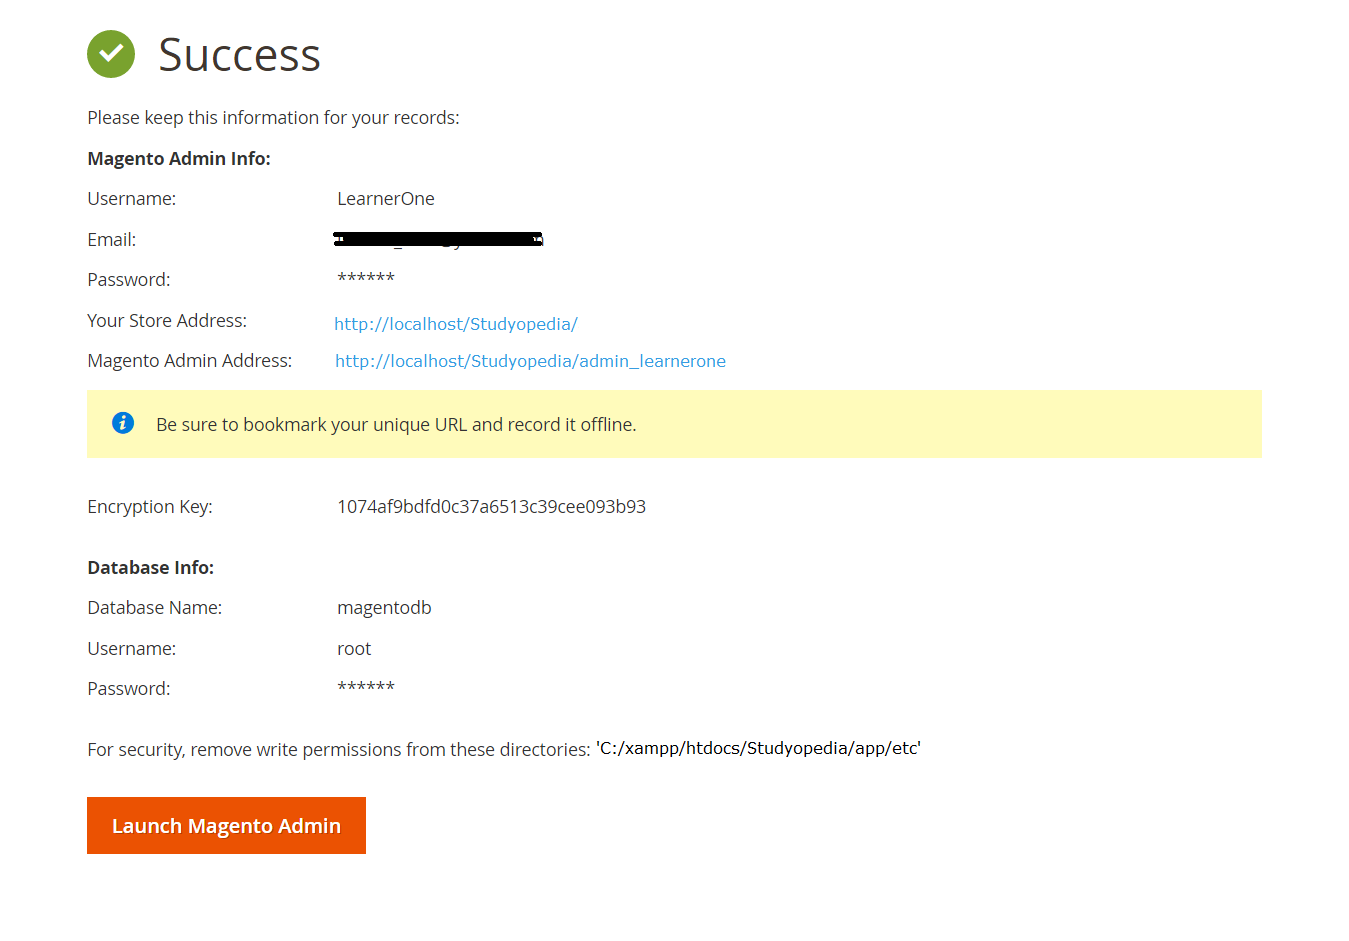
Now, click Launch Magento Admin, which will redirect you to,
http://localhost/Studyopedia/admin_learnerone/
In the next lesson, we will learn how to visit the Magento Store for the first time after installation.
Read More
No Comments