13 Jul Drupal Installation on localhost with XAMPP
Drupal installation is quite easy. It has some simple steps, which are shown below. First, we will learn about the software requirements to install Drupal for website development,
What you need for Drupal Installation
Installation of Drupal is quite easy. Here, we will learn the installation on localhost. For installation, we need XAMPP, which is an open source cross-platform web server solution stack package. Developed by Apache Friends, it provides you with a server i.e. Apache, database i.e. MariaDB (formally MySQL), and PHP.
For starting work on Drupal, you need the following software/ tools on localhost:
- Drupal– Drupal is a free and open source content management system to develop dynamic websites.
- XAMPP: It is a cross platform open source web solution package, that fulfills your need of,
- Web Server
- MySQL
- PHP
Installing Drupal on Localhost using XAMPP
We’re learning Drupal installation from scratch, so first we need to install it on localhost. Here are the steps,,
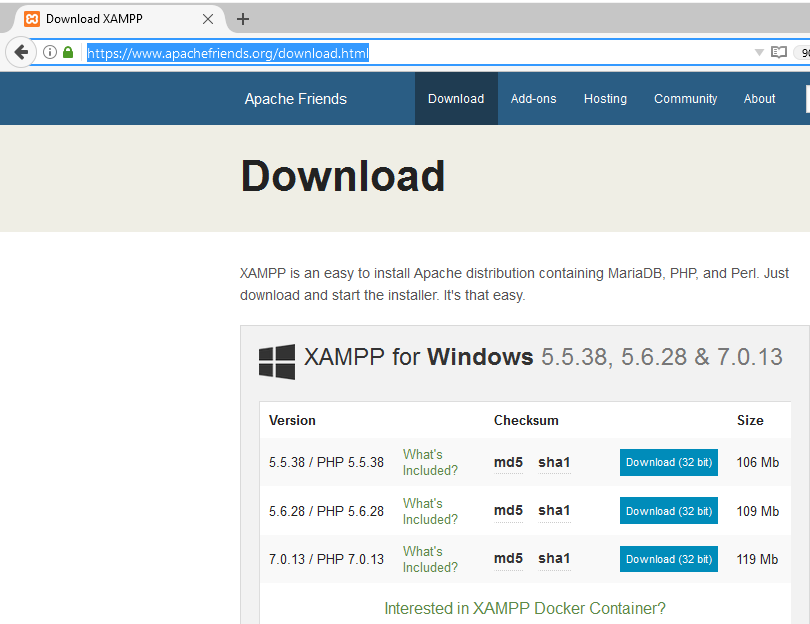
Step1: Go to the official website of Drupal and download XAMPP
Step 2: After downloading, install it in any location. We will install it at the following location i.e. C drive,
C:\XAMPP
Step3: Go to the following htdocs directory and create a new project folder.
C:\XAMPP\htdocs\
Here, my project folder name is studyopedia. It will be located at the following location,
C:\XAMPP\htdocs\studyopedia
Step4: Time to install Drupal!
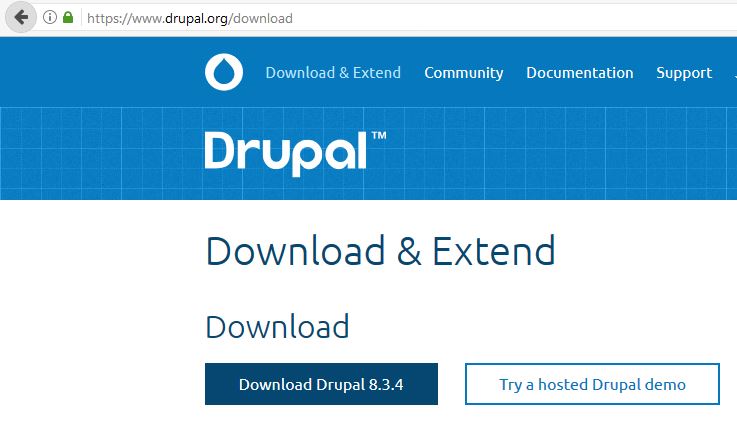
Go to the official website of Drupal and download Drupal’s current version. Here, you can see Drupal 8.3.4 is visible.
Download it on your system.
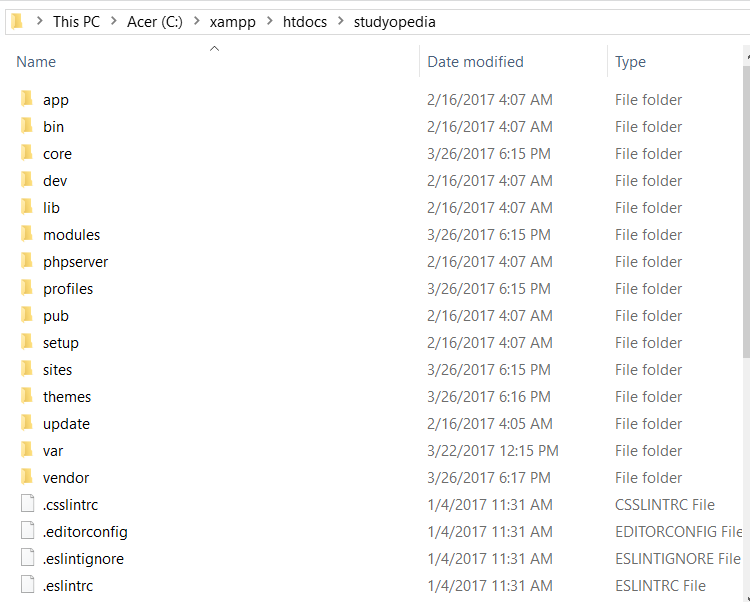
Step5: After downloading, unzip the Drupal folder in the following location,
C:\XAMPP\htdocs\studyopedia
Unzip in a way the final project folder looks like the following,
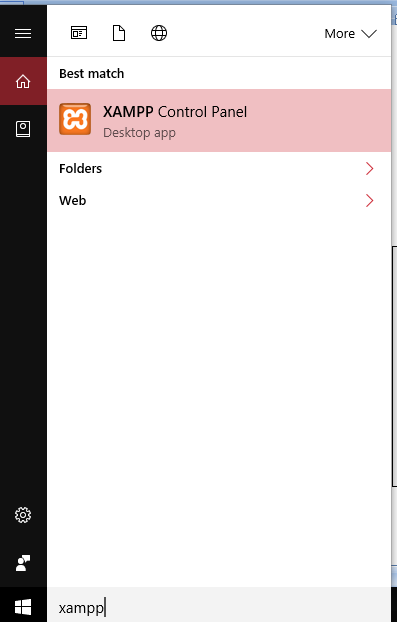
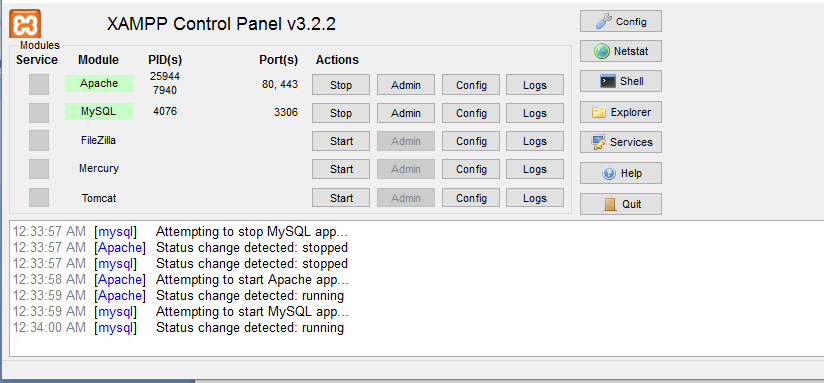
Step6: Now, go to START and type XAMPP Control Panel as in the following screenshot,
XAMPP Control Panel started, now click start for Apache and MySQL
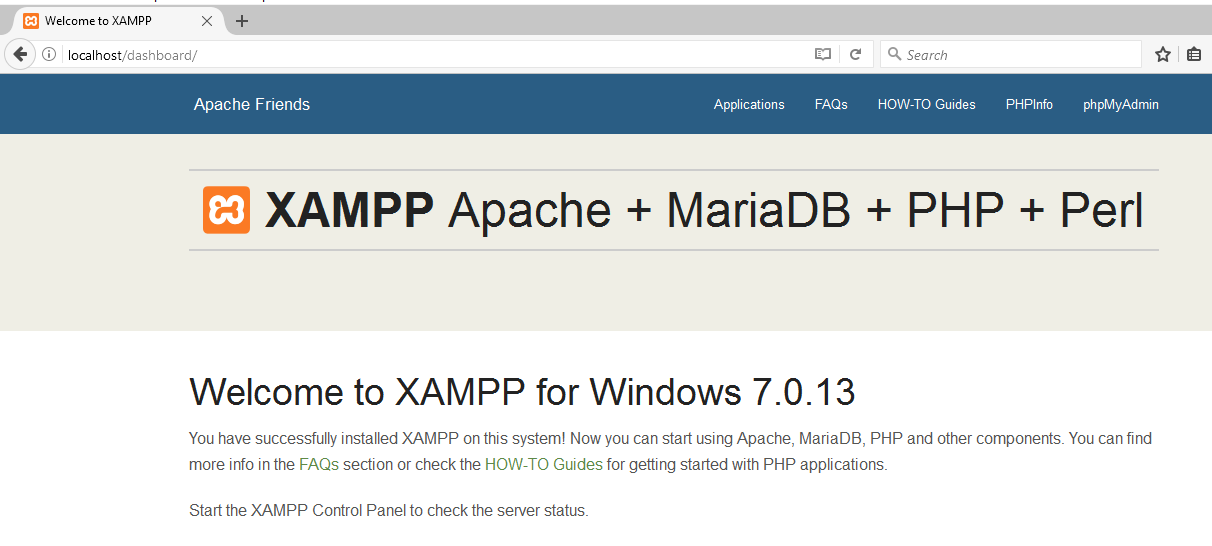
Step7: After following the above steps, go to the browser and type localhost. If the following UI opens, it means the XAMPP installation and everything is fine and we can proceed further,
Step 8: Time to create a new database in MySQL.
Go to localhost/phpmyadmin and click New to create a new database as shown below,
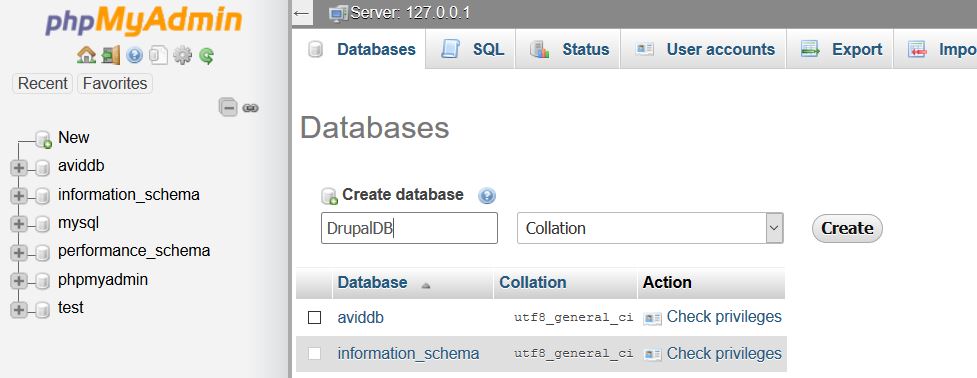
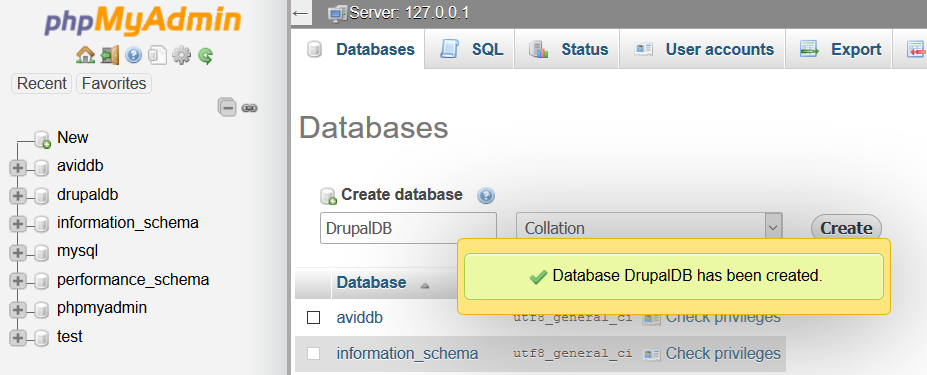
Add the database name and click Create. We have added a name DrupalDB. After clicking Create, the following would be visible. It shows Database DrupalDB has been created,
Step 9: Website creation Initiated! Now go to browser and type the project folder with localhost i.e.
http://localhost/studyopedia/
Step 10: It will get redirected to the following link,
http://localhost/studyopedia/core/install.php
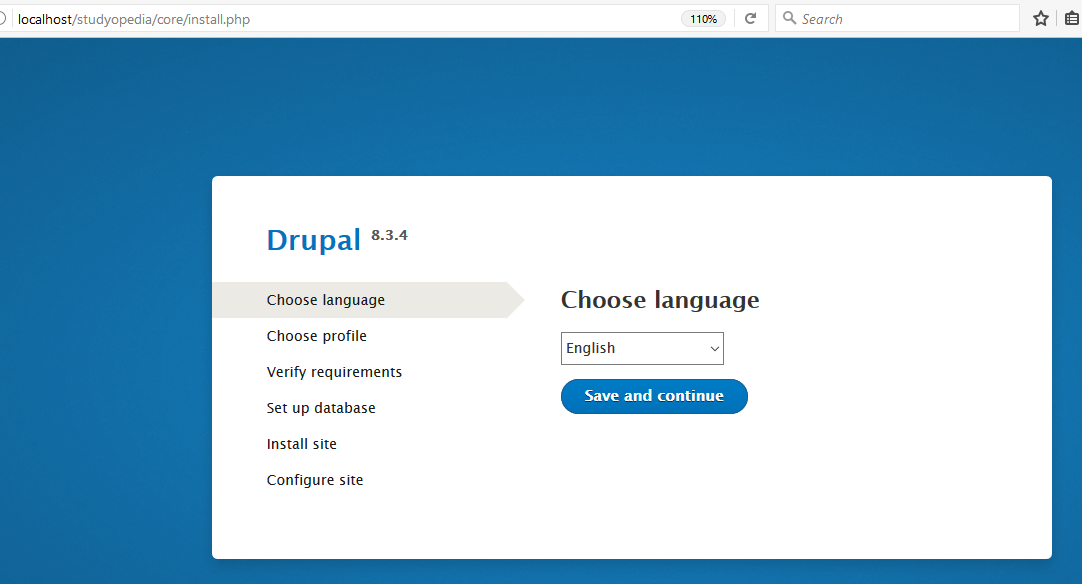
As shown above, choose language.
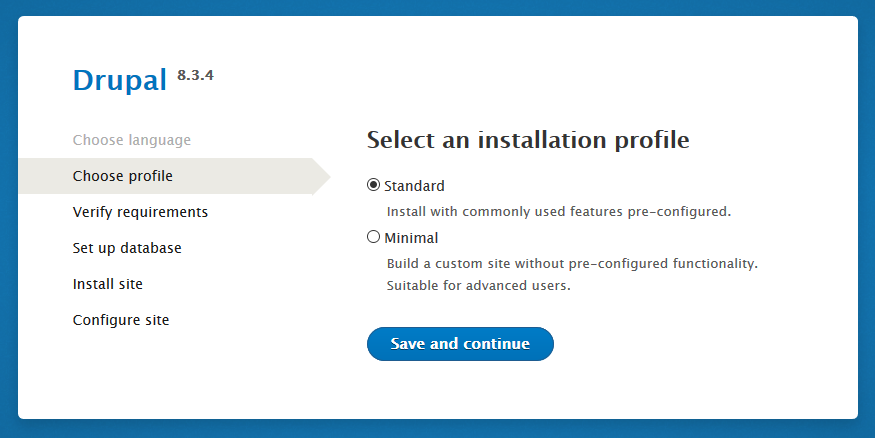
Step 11: Now, select installation profile as shown below,
Since, we are focusing on our first Drupal website, so select Standard,
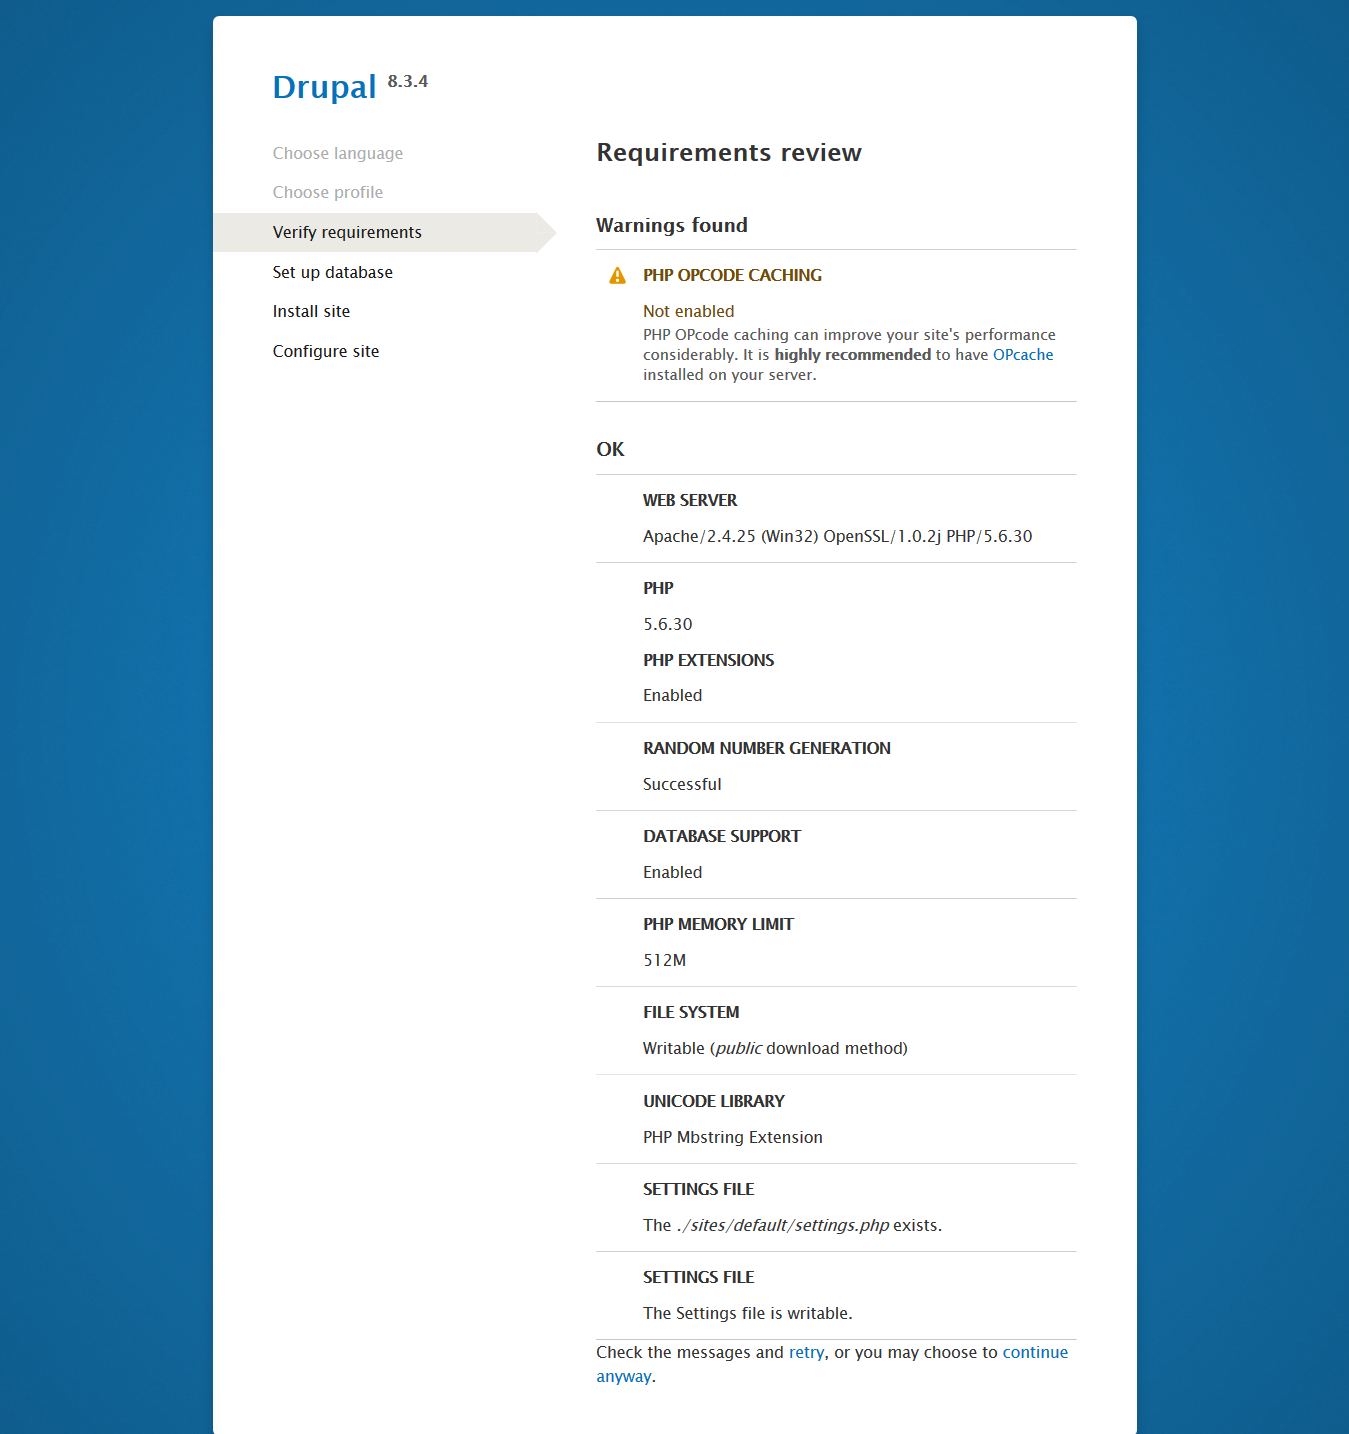
Step 12: Now, you can see an error is visible under Verify Requirements section i.e.
PHP OPcode caching Not enabled. PHP OPcode caching can improve your site's performance
considerably. It is highly recommended to have OPcache installed on your server.
To resolve the error, follow the steps,
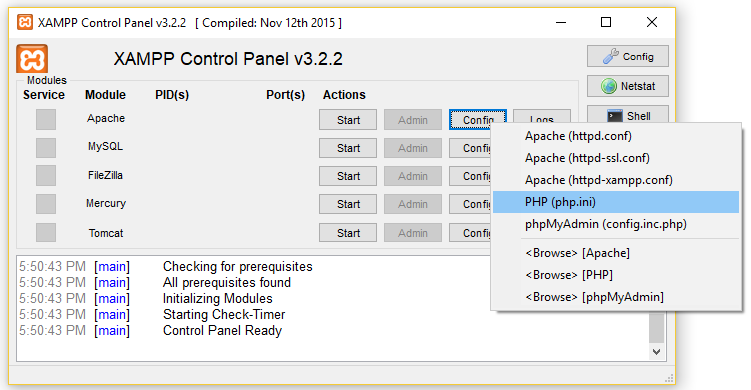
Step 12.1: Go to XAMPP Control Panel and click config under Apache as shown below. This
will open php.ini
Step 12.2: Now, enable OPcode caching by adding the following code in php.ini,
[opcache]

zend_extension=php_opcache.dll

;Determines if Zend OPCache in enabled

opcache.enable=1
Step 12.3: Now, save the above file and restart the server by clicking stop and then start on Apache.
Step 12.4: Now, reload the page where you saw error under Verify Requirements. If it redirect to the Set up database page, it means error is resolved.
Step 13: As we saw above, after resolving the error, it redirected to Set up database page. So, now, we will add the field values as shown below,
| Field | Value | Description |
|---|---|---|
| Database name | DrupalDB | Name of database |
| Database username | Root | As we are working on localhost |
| Database password | Keep it as blank | |
| Host | Localhost | As we are working on localhost |
| Port Number | 3306 | This is the port number for configuration. Keep what automatically comes. |
| Table name prefix | wp_ | A prefix gets added to the table. You can leave it blank. |
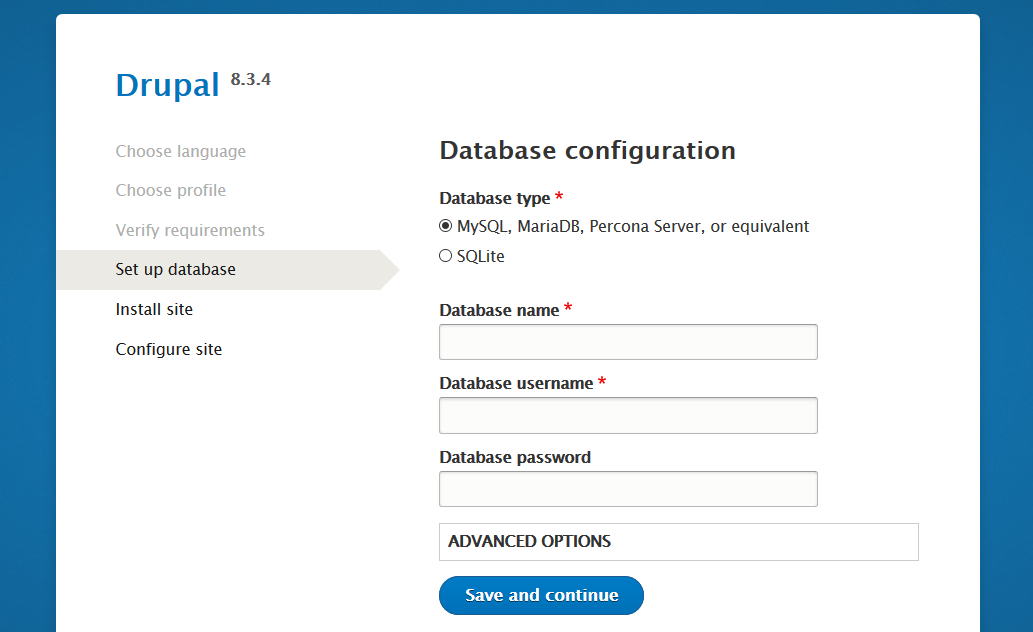
After adding the above value, click Save and continue.
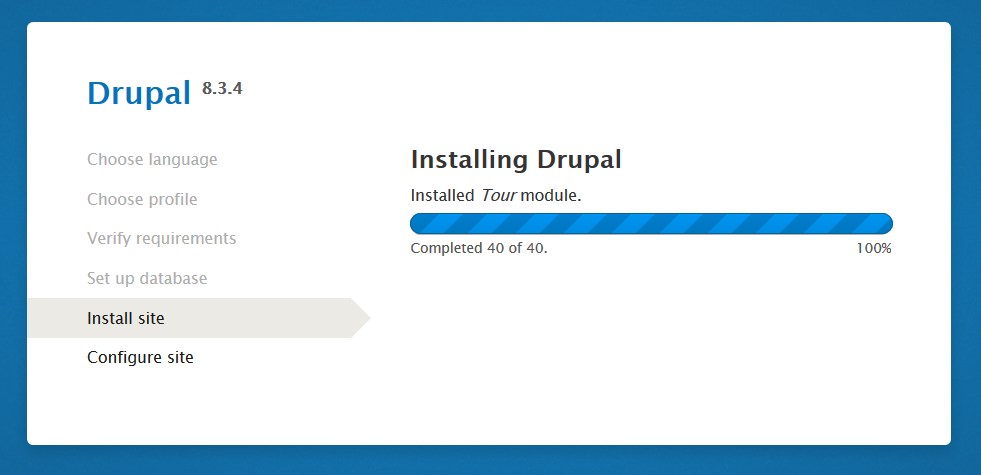
Step 14: Installation continues as you can see below,
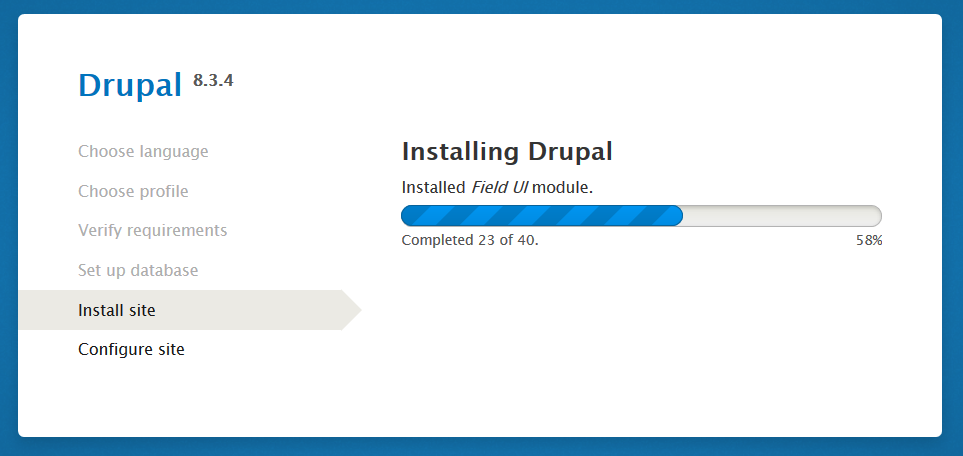
Now, Drupal installation is successful,
Step 15: Now, you will reach the step to configure site. Here add basic details such as site name, site email address, default country, time zone, etc.
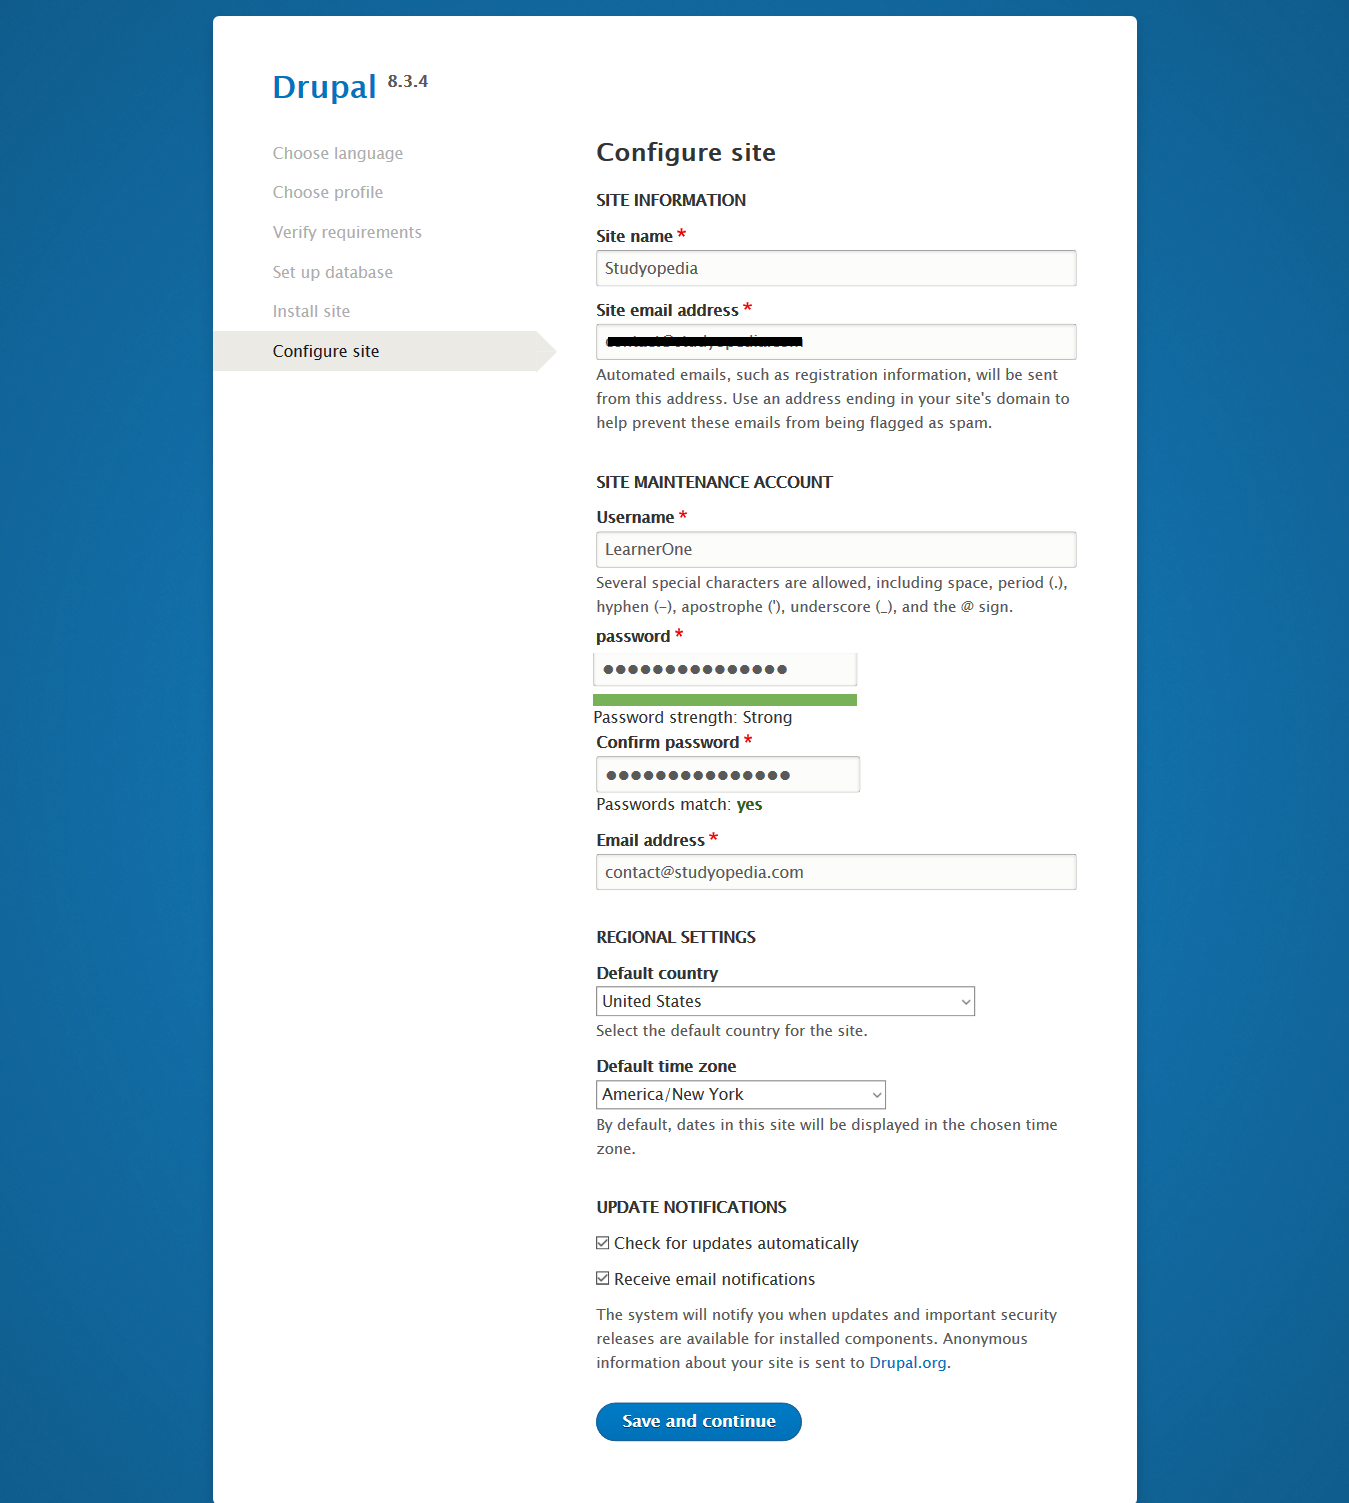
The following are the details added,
| Field | Value | Description |
|---|---|---|
| Site name | Studyopedia | Add the site name |
| Site email address | contact@studyopedia.com | Add email address |
| Username | LearnerOne | Add username to login |
| Password | Add password login | |
| Confirm Password | Confirm the password added above | |
| Email address | contact@studyopedia.com | Admin email address |
| Default Country | United States | Add your country here |
| Default Timezone | America/New York | Add the time zone here |
| Update Notifications | Set as per your choice | Set as per your choice |
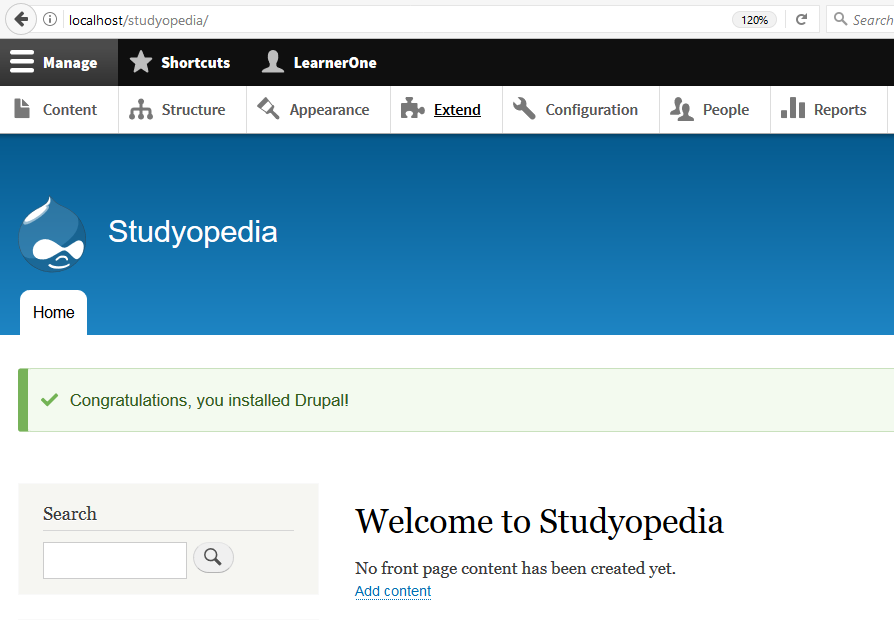
Now, you can see Drupal has been installed successfully.
harshit singla
Posted at 12:32h, 01 Julymy pc is showing error while completing drupal-9.2.0
its showing
PHP EXTENSIONS
Disabled
Drupal requires you to enable the PHP extensions in the following list (see the system requirements page for more information):
gd
Studyopedia Editorial Staff
Posted at 19:57h, 01 JulyHi @Harshit, Here’s the fix: https://studyopedia.com/errors-resolved/resolving-drupal-installation-php-opcode-caching-not-enabled-warning/