09 Oct How to install Java 13 on Windows 10
Java 13 released on September 17th, 2019. With that, the need of its usage is scaling high these days. In this article, we will see how to install Java JDK 13 on Windows 10 OS. With that, to avoid any hassles in future, we will also let you know how to verify the installation.

Download Java JDK 13
To download Java 13, go to Oracle’s official website and type “JAVA JDK 13” in the search box as in the below screenshot:
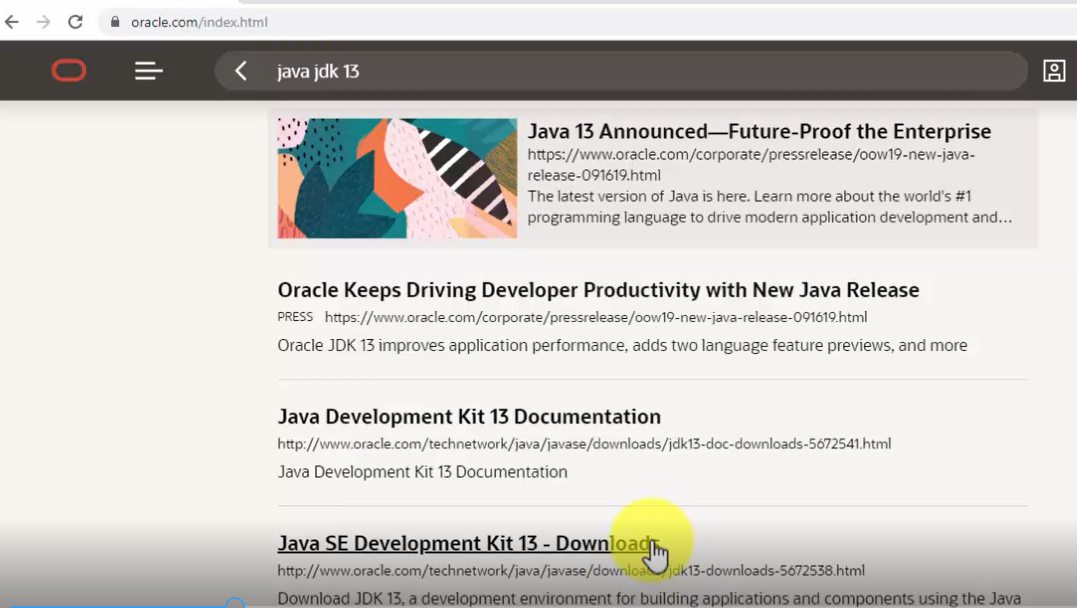
Now, click “Java SE Development Kit 13 – Downloads” and you will reach the Downloads section:
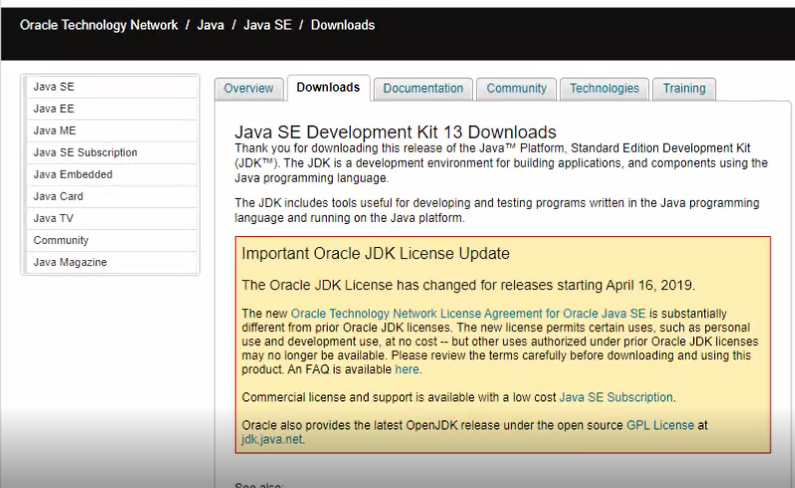
Go to bottom of the same page, click “Accept” there itself:
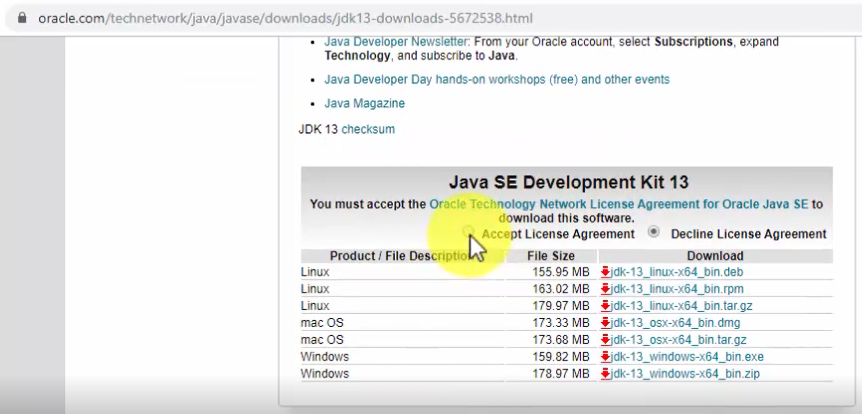
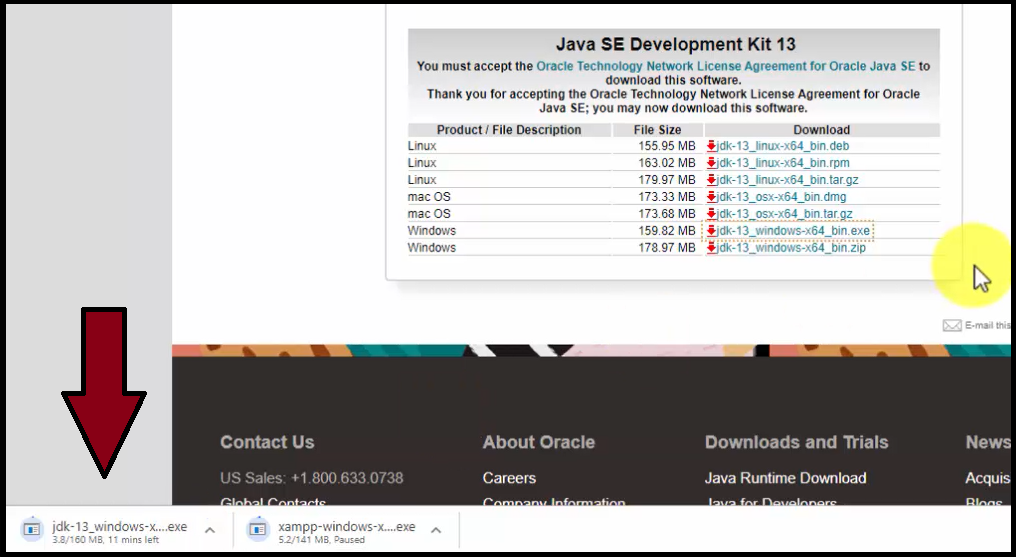
Since, we are on a Windows 10 system, therefore, we now have two options. From that, we will go with the installer exe 64-bit file i.e. jdk-13_windows-x64_bin.exe:
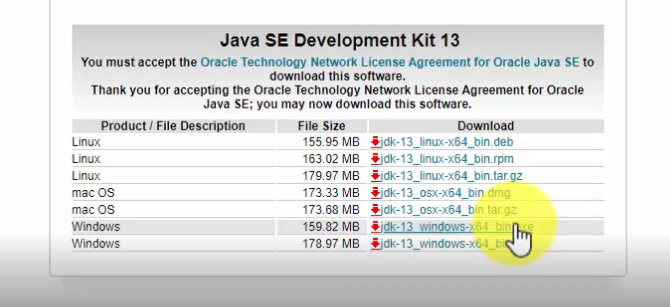
Note: Java JDK 13 will get installed only on a 64-bit Windows 10 system
As you can see on the bottom-left of the web browser, the download begins. Just wait for few minutes till the download finishes:
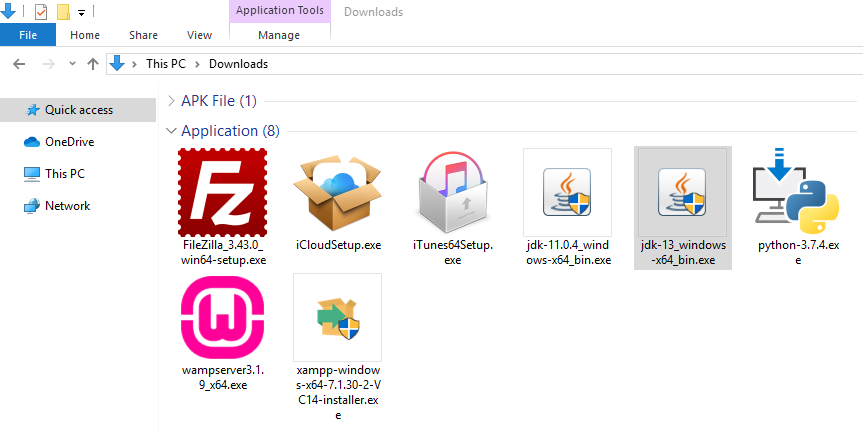
The downloaded jdk exe file will get saved in the “Downloads” folder:
Install Java JDK 13
Now, go to “Downloads” folder on your Windows 10 system and double click on the “jdk-13_windows-x64_bin.exe” file:
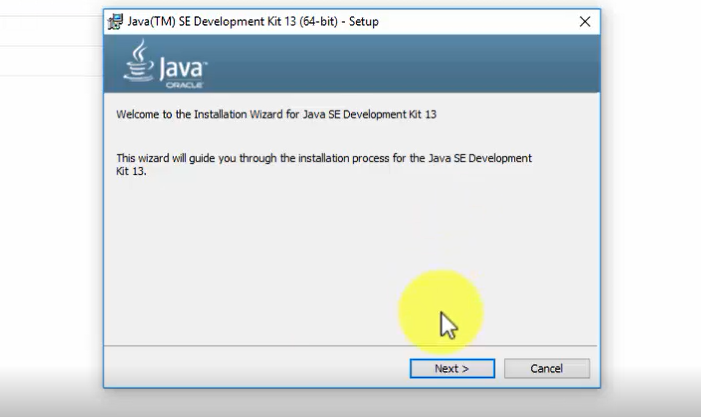
Double click on the exe file and the installation begins:
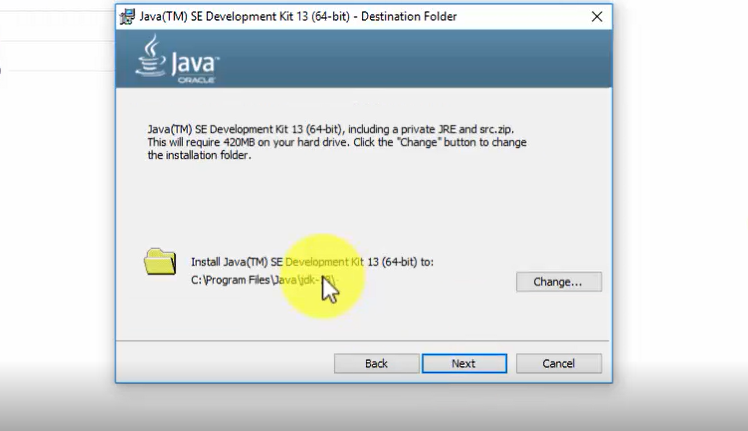
Click on “Next” above and set the path wherein the Java 13 will get installed. You can also keep it the default:
Click on “Next” above and the installation continues for some minutes.
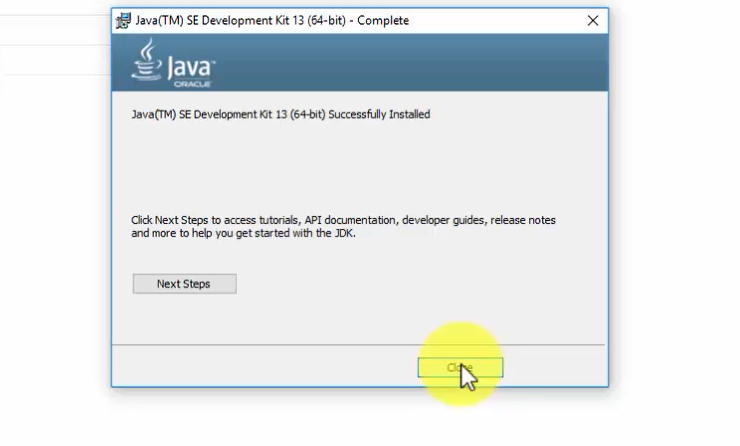
The installation finishes as in the following screenshot. Click on “Close”:
Now, let us set the JDK path.
Set Java JDK Path (Environment Variable)
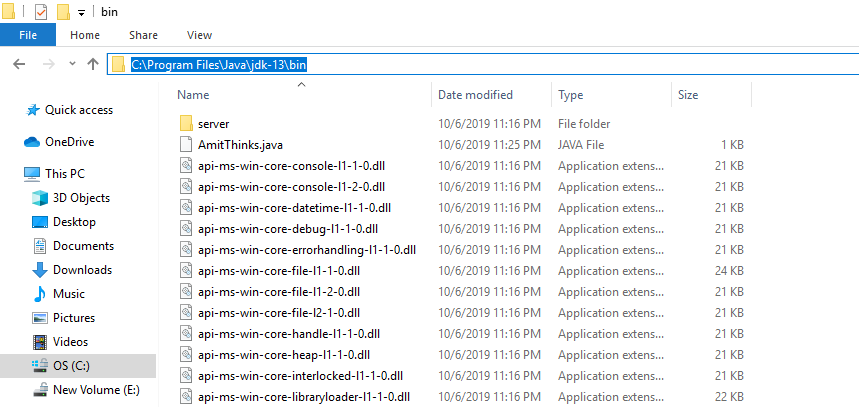
At first, copy the path wherein you installed the Java JDK. Let us copy it first. Remember, we need to copy the bin path i.e. the following on our system:
|
1 2 3 |
C:\Program Files\Java\jdk-13\bin |
Here’s the screenshot of the “bin” path, wherein we installed Java 13:
To set JDK Path, the easiest way is to type “Environment Variables” on Start. On typing, the following would be visible:
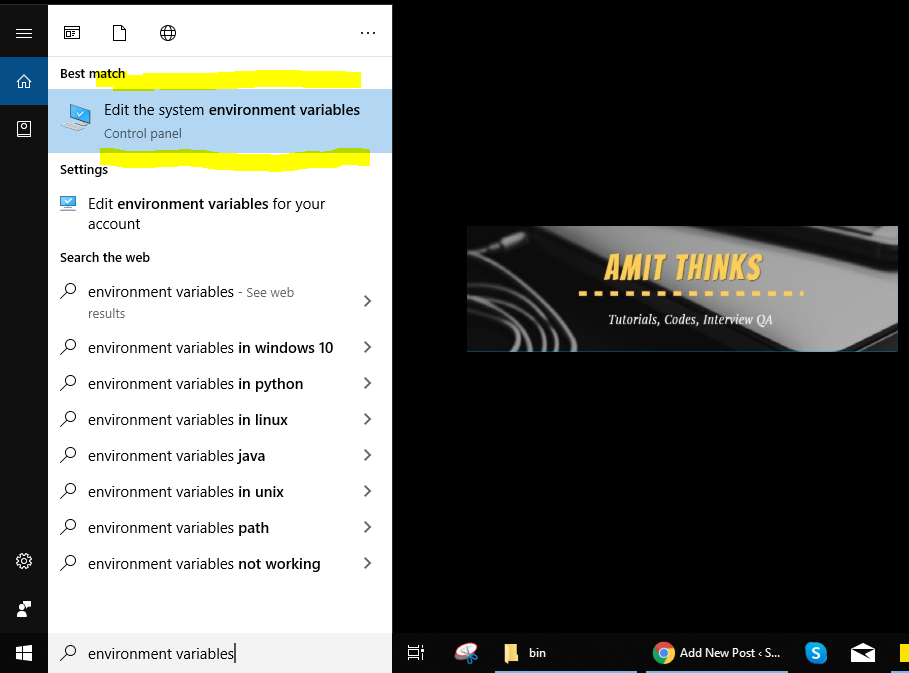
Now, click on “Edit Environment Variables” and a new dialog box would be visible:
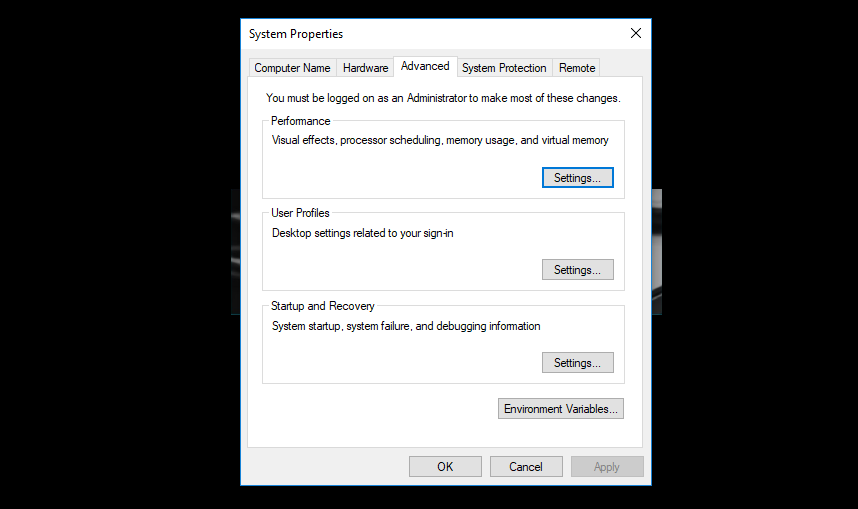
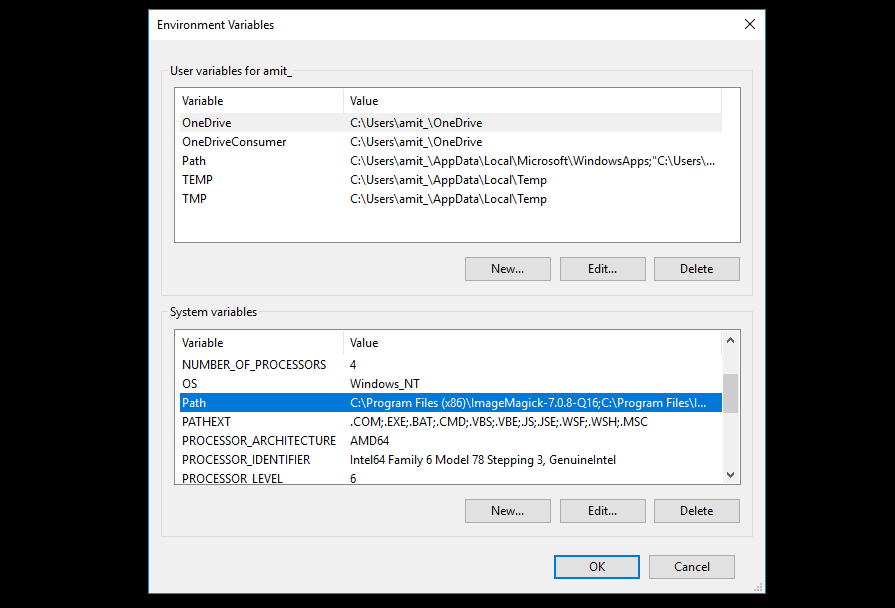
Now, click “Environment Variable” and a new dialog box will open. Go to “System Variables” section and double click “Path” as in the below screenshot:
On clicking “Path”, a new dialog box will open. From there, click “New” and add the Java JDK path “C:\Program Files\Java\jdk-13\bin” as displayed in the below screenshot:
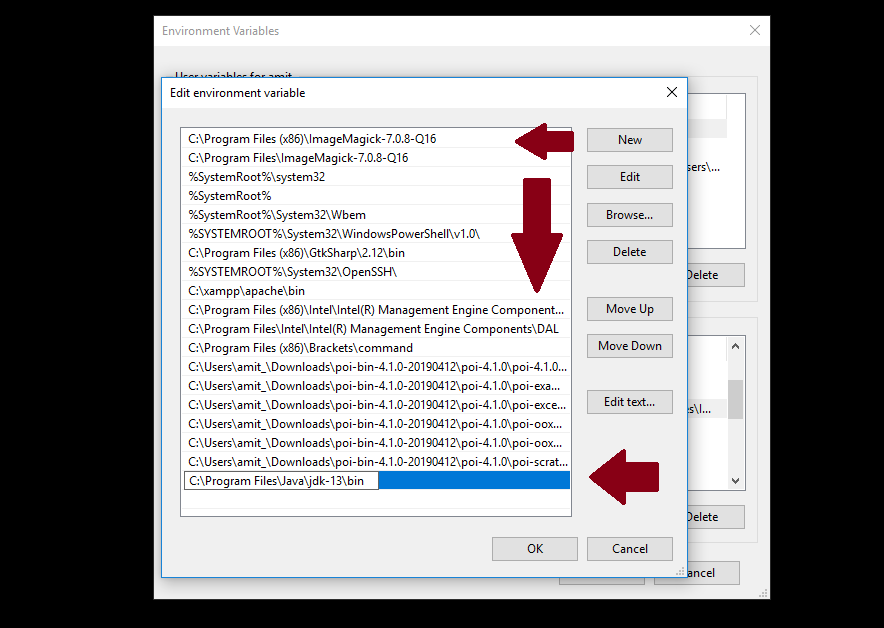
Above, press Ok for all the dialog boxes i.e. 3 times. This ends the installation and the procedure to set path for JDK. Now, we will verify the JDK installation.
Verify Java JDK 13 Installation
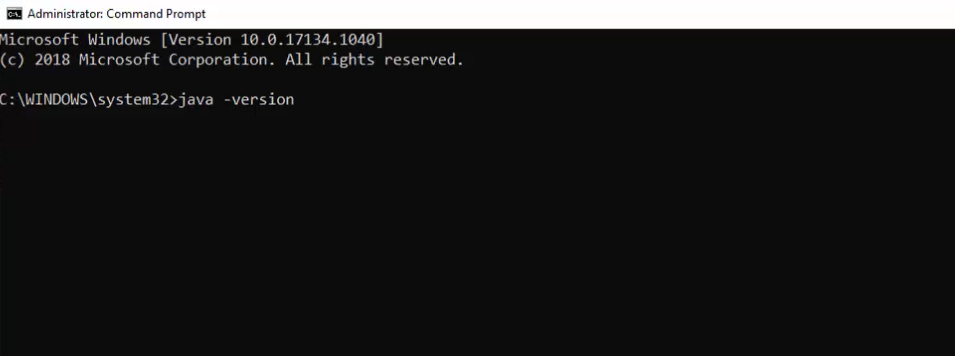
We saw how to install Java JDK 13 above. We installed on Windows 10 OS. Now, we can easily verify whether the installation was successfully or not using the following command:
|
1 2 3 |
java -version |
Let us implement the above command on command prompt (cmd) and verify Java installation:
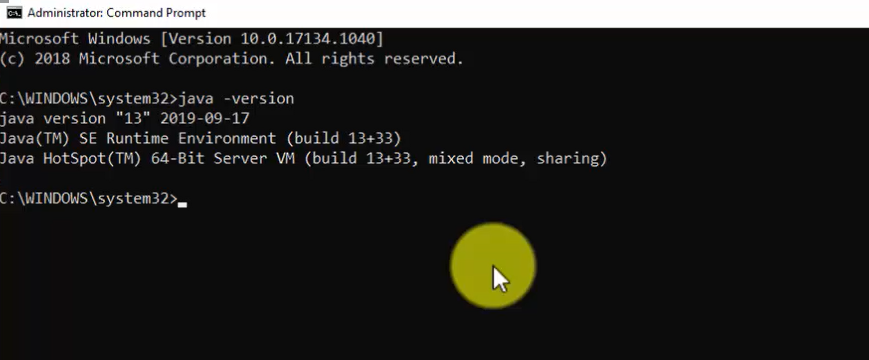
Therefore, the installation verification is now complete and successful since now we can see the version in the command prompt:
In the above tutorial, we saw how to install Java 13 on Windows 10. After installation, we also set the JDK path, without which the system won’t run Java programs. At the end, we verified the installation of Java JDK 13 successfully.
Here’s the YouTuve video for the steps we saw above to install Java 13 on Windows 10:
If you liked the tutorial, spread the word and share the link and our website Studyopedia with others.
Support us: DONATE
Read More:
- Install WordPress on localhost in Windows 10
- Install Drupal on localhost in Windows 10
- Install Joomla on localhost in Windows 10
- Install Python on Windows 10
- Install jQuery on localhost in Windows 10
- Install Eclipse in Windows 10


Emily Robertson
Posted at 23:22h, 31 OctoberThank you for providing all the steps to install the newly introduced Java 13 on Windows 10! It took me an hour and none of the other tutorials were detailed enough to elaborate all the steps. Kudos!
Pradeep
Posted at 23:27h, 31 OctoberThank you