12 Jul Add a WordPress Post
Content is added in a WordPress website in the form of posts and pages. Let’s say you have a website and you need to add some content, then easily add it by creating a new WordPress Post. Posts get added with date and time. Categorize posts in the form categories. Write frequent posts on you website to get more engaging content. Let’s learn what posts are with example,
For example, you are creating a website of your company that deals in plastics. So, add a post i.e. How to Polish PASTEL: Translucent Acrylic Sheet. Another example we can take is let’s say for a programming website you can add a post, How to start with programming.
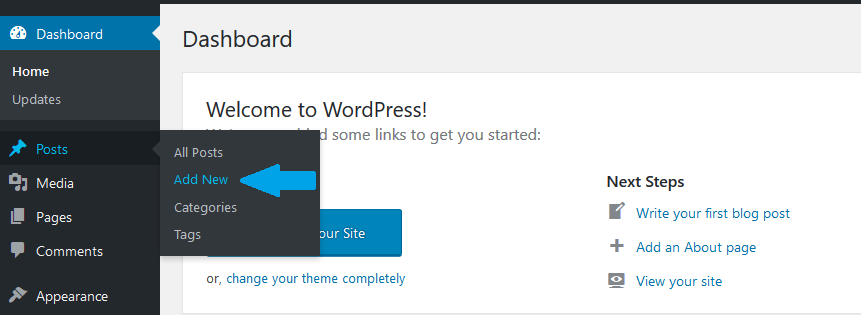
A post can be easily added in a WordPress website. For that, login to the website and reach Dashboard. Now, add a new post, as shown below.
To add a new WordPress post, some steps are to be followed. While adding a post, you need to work around post editor, and settings such as post format, featured image, categories, tags, etc. Let’s work around them one by one and add a new post.
Go to Posts > Add New. The same is shown in the following screenshot,

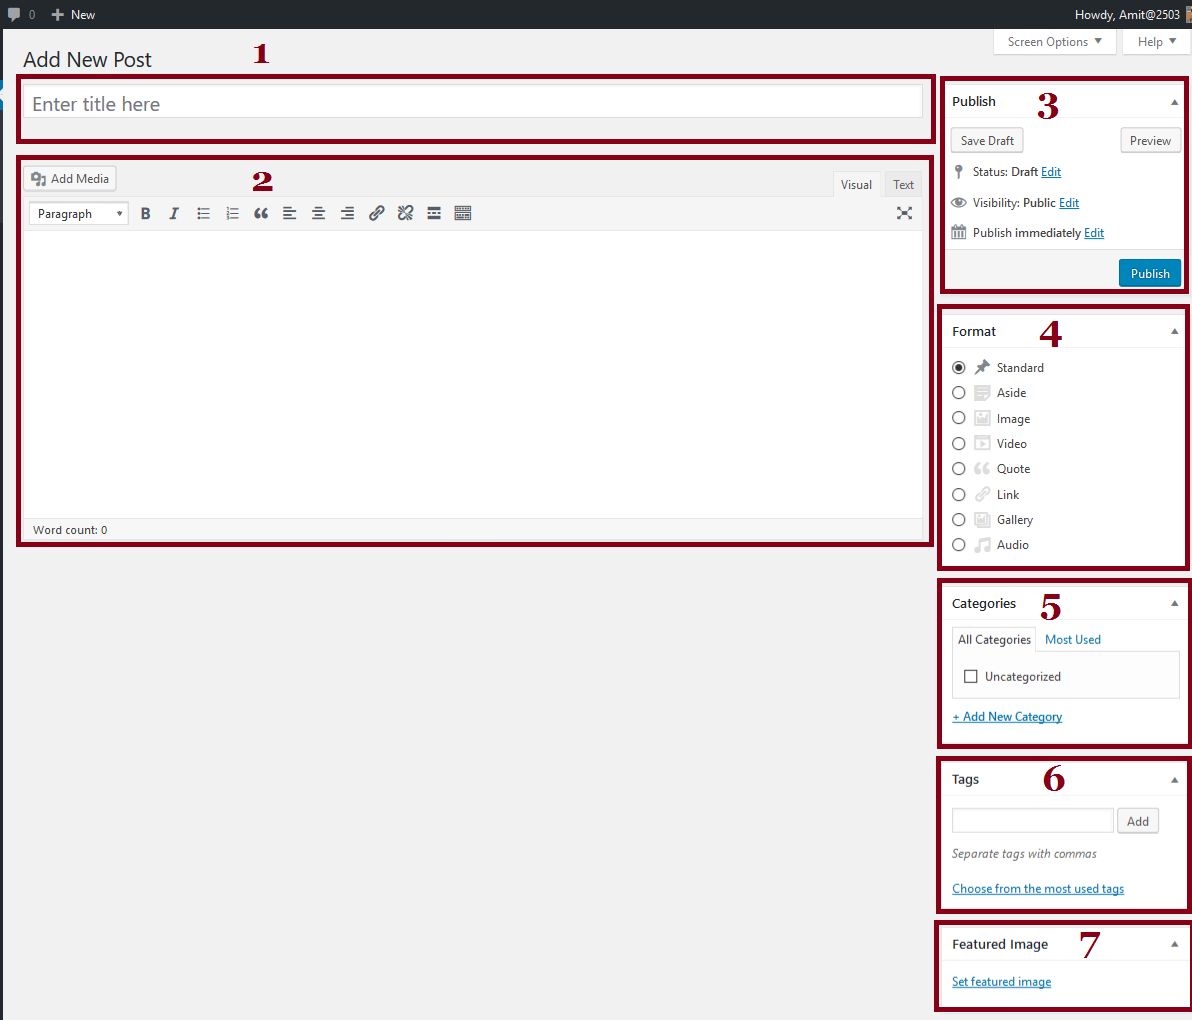
Now, you can see the WordPress posts editor from below,
Understanding WordPress Post Editor
Below, we have divided the WordPress post editor section into 7 sections, to explain it easily. Let’s see them one by one,
 Section 1- Title
Here, you need to add the post title.
Section 2- Body
Add the body of your content here. Also, you can upload media from the “Add Media”. Format the content from the section where you can see post editor is visible.
Section 3- Publish Options
These are the publishing option, with the following options,
- Save Draft- Save the post as draft.
- Preview- Check the preview of post before publishing.
- Status- Post is published, or pending approval or in draft.
- Visibility- The post is to be shown publicly or not.
- Publish Immediately- Schedule publishing of posts from here.
Section 4- Post Format
Select the format of post, while adding a new post. If you want a post with video, select Video. If you want a post that focuses on images, select Image. In the same way you can go through the following post formats,
- Standard
- Aside
- Image
- Video
- Quote
- Link
- Gallery
- Audio
Section 5- Categories
From here, add category for posts or you can also add a new add a new category. Categories can be arranged in hierarchy.
For example, categories can be Web, Programming, Design, CMS, etc for a programming based website.
Section 6- Tags
From here, add tag for posts or you can also add a new add a new tag. Tags describe a post in more details.
For example, tags can be learn, tutorials, etc for a programming based website.
Section 7- Featured Image
Add featured image here for your post. This image will also be visible as thumbnail image.
All Posts
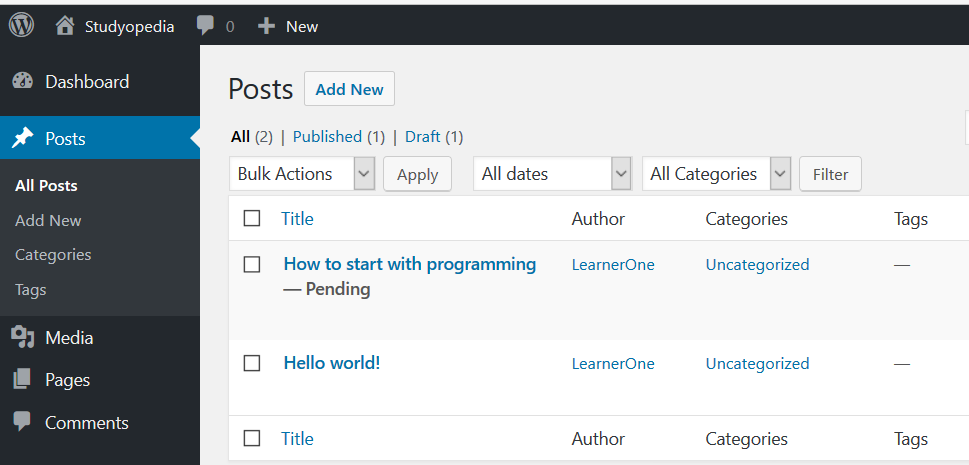
Check all the posts at once using the All Posts option. Some options are also visible; so that you can easily delete a post, quick edit a post, search a post, etc from the Posts section itself.

Now, the following options can be seen,

- All– It shows the number of all the posts.
- Published– It shows the number of all the posts published.
- Draft– It shows the posts saved as drafts, so that it can be accessed later.
- Bulk Actions– Select multiple posts from here and move them to trash or edit them in a go.
- Filter– Filter the posts according to categories and dates.
Hover over a post to see the following options,

- Edit– Click on Edit button and you will reach the post editor section to edit posts.
- Quick Edit– Quick edits option is to quickly edit a post. It won’t have all the edit option, but quite important options such as changing title, date, category, etc can be seen here.
Here’s the screenshot showing Quick Edit option,

- Trash– For deleting the post.
- View– For viewing the post on the website.


No Comments