08 Aug Run Java First Program on Windows 10
In the previous lesson, we learned how to set environment for Java. We successfully verified the installation of Java on command prompt (cmd). In this lesson, we will learn how to write and run Java first program on Windows.
Open a notepad and enter the following code:
|
1 2 3 4 5 6 7 8 |
class Example1 { public static void main(String []args) { System.out.println("Studyopedia Java Tutorial"); System.out.println("Our First Java Program"); } } |
Now, save the above notepad as Example1.java. Here, you can see the extension is java to run a java program.
The class above is a main class, since it is having the main() function in it. Also, a program having main should have the program name similar to class name. In this case, its Example1.
Now, we will reach the Command Prompt as we did in the previous lesson to verify JDK installation. Here, we will add a new project folder in D: drive i.e.
|
1 2 3 |
D:\Studyopedia |
We will save all our Java examples in the above folder. You can add any folder.
But to tell the compiler that here you have saved our Java Programs, you need to set the path in Environment Variables i.e.
Go to Control Panel > System > Advanced System Settings > Advanced tab > Environment Variables.
Under System Variable, click Path, then New and add the following path and save it,
|
1 2 3 |
D:\Studyopedia |
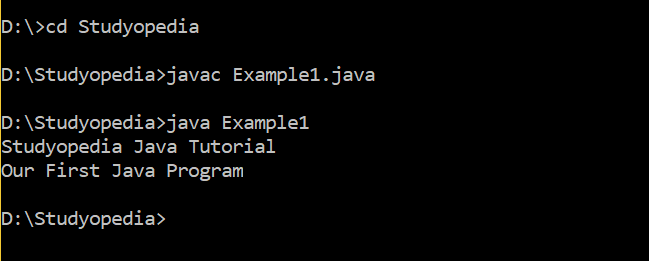
After adding the path above, now again go to Command Prompt and reach the above path as shown below,

Now, type the following command to compile the java program and press enter:
>javac Example1.java
Now, type the following command to run the java program, which we compiled successfully and press enter:
>java Example1
Now, if the program is correct, without any bug, then it will be successful, and the following will be printed,

After successfully running the program, output will be visible as shown above.
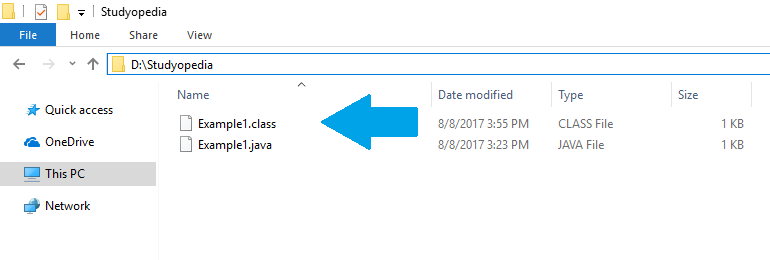
Now, go to the same path and now you can see a class file generated for the same program.

In this lesson, we learned how to run our first Java program on Windows 10.


No Comments