10 Oct Set Shipping in PrestaShop Store
Shipping options are provided on every Online Store, and is visible when a user purchase a product or bulk of products and reach Checkout. PrestaStore Store Shipments provide Free Shipping as well as other shipment options, and a facility for administrator to set and manage these settings. To set shipping in PrestaShop Store, you need to visit the store’s shipping preferences section. Also, you can set the carrier and a carrier option,
Set Free Shipping
Allow free shipping for customers buying more number of products. You can also set free shipping for a higher total amount of products. For example,
- Free shipping for Products bought with total amount above 200$
- Free shipping for Products bought with total weight above 10lb
To set free shipping for the PrestaShop Store, you need to reach the preferences settings for the store.
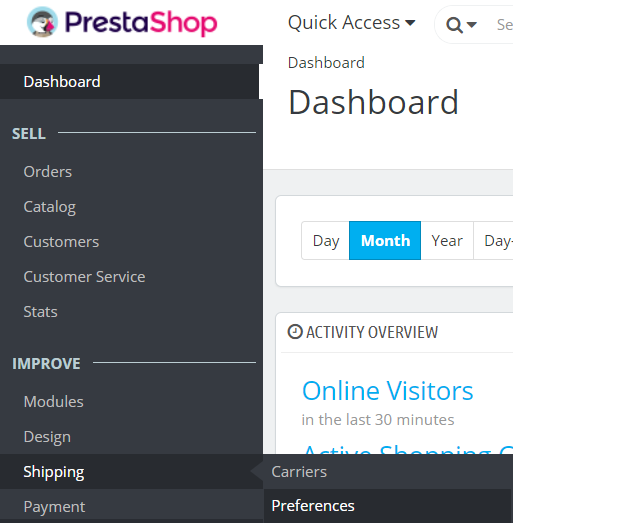
Login to the PrestaShop Store as an admin and reach the Dashboard.
Go to IMPROVE > Shipping > Preferences
Now, you will reach the PrestaShop Shipping section, wherein options are available to set Handling charges and Carrier options such as Default Carrier, Sort by options, etc.
The following settings are available for Shipping,
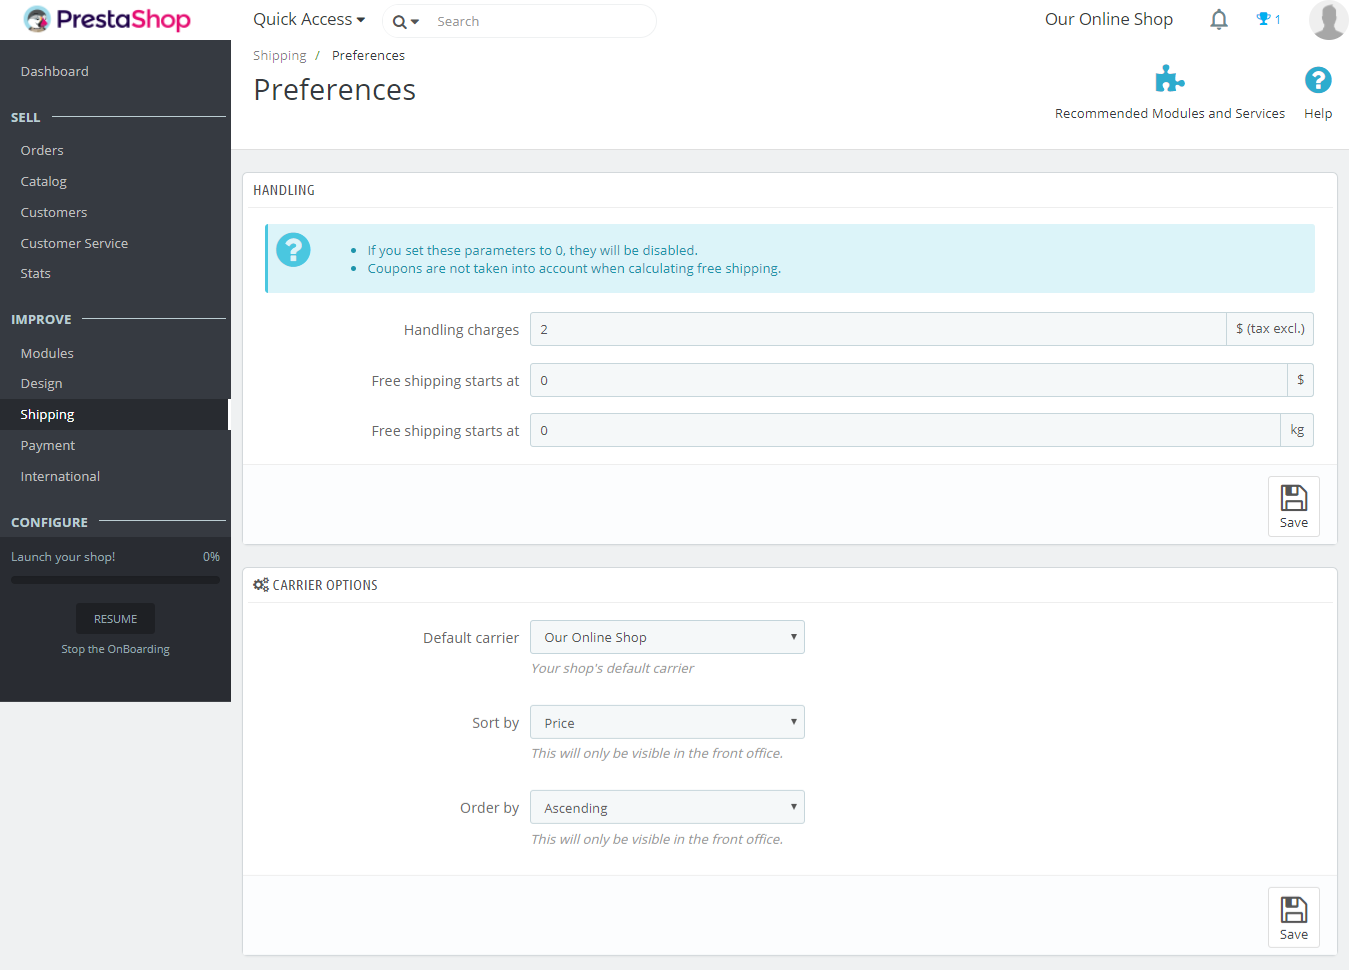
Here are the Shipping Preferences Settings,
Handling Charges
The per-order handling charges, which gets added to total amount at the time of checkout.
Free Shipping starts at (currency)
Set the value for free shipping, for example, free shipping for total amount above 100$.
Free Shipping starts at (lb)
Set the value for free shipping, for example, free shipping for total weight above 5lb.
Default Carrier
Let’s say you have more than one carrier, then you may want to promote one of them to your users. You can set the default carrier here.
Sort by
Here, choose to sort the carrier list by shipping price or by position in the Carriers page.
Order by
This is to set the order in which carriers are to be sorted.
In this way, set Shipping in PrestaShop Store. Now let’s see how to add new carrier to PrestaShop Store.
Add new Carrier
The PrestaShop Store should have a carrier registered, as you as the shipping of the product begins. You can send the product parcels using local postal or with a private carrier.
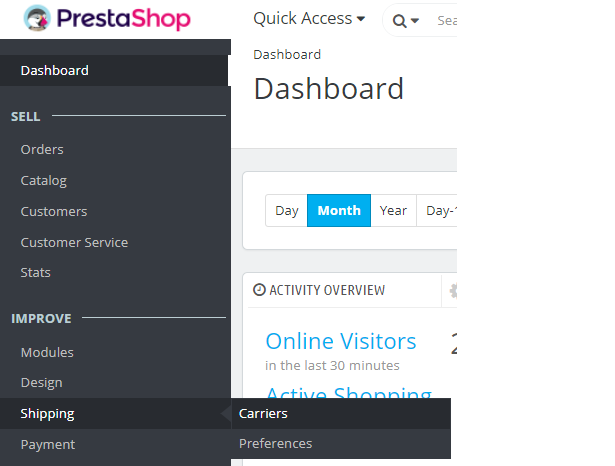
To reach the carrier settings, login to the PrestaShop Store as an admin and reach the Dashboard.
Go to IMPROVE > Shipping > Carriers
Now, you will reach the carrier section, wherein all the carrier options are visible.
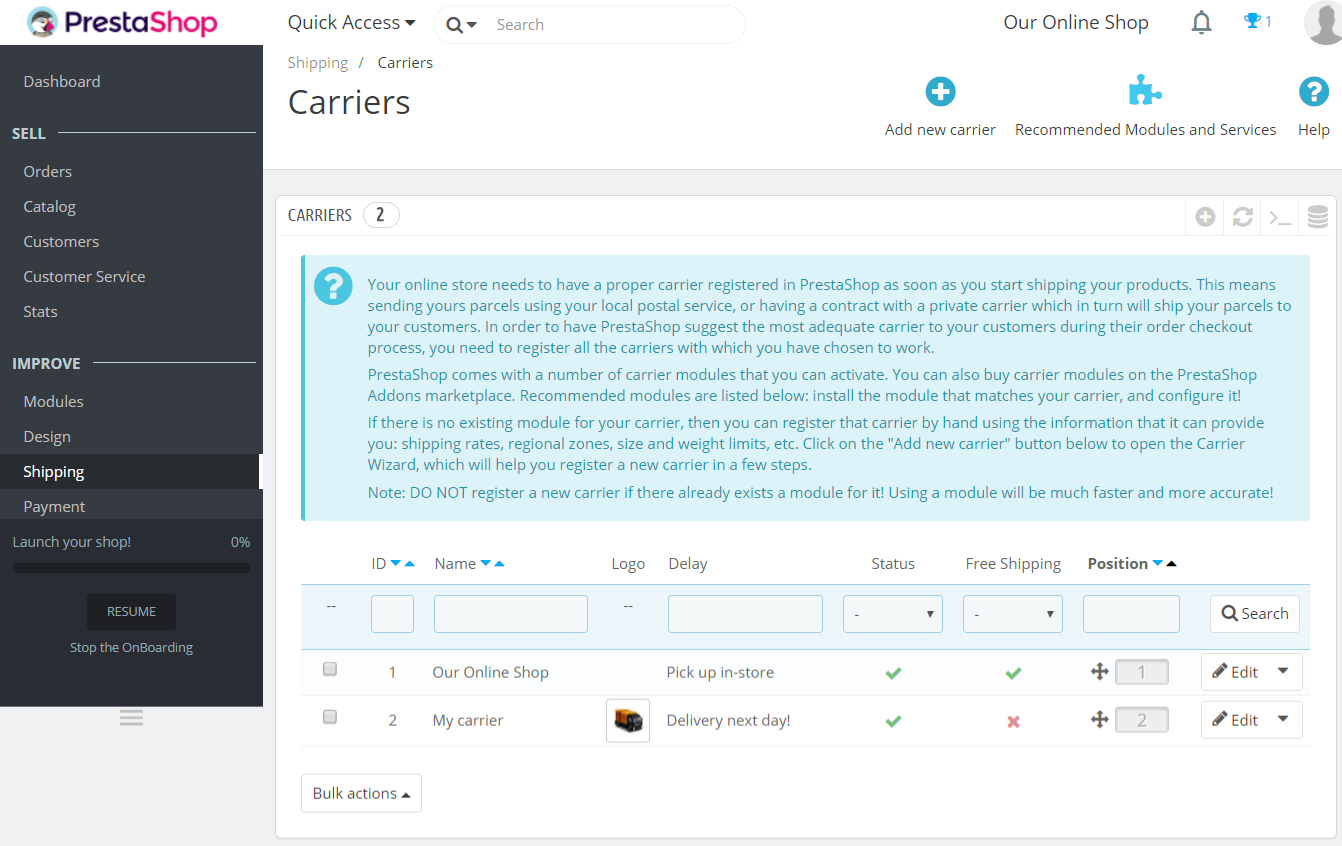
Click Add new carrier as in the above screenshot to add a new carrier to the PrestaShop store,
Now, you will reach the carrier options, wherein the following options are visible to add a new carrier:
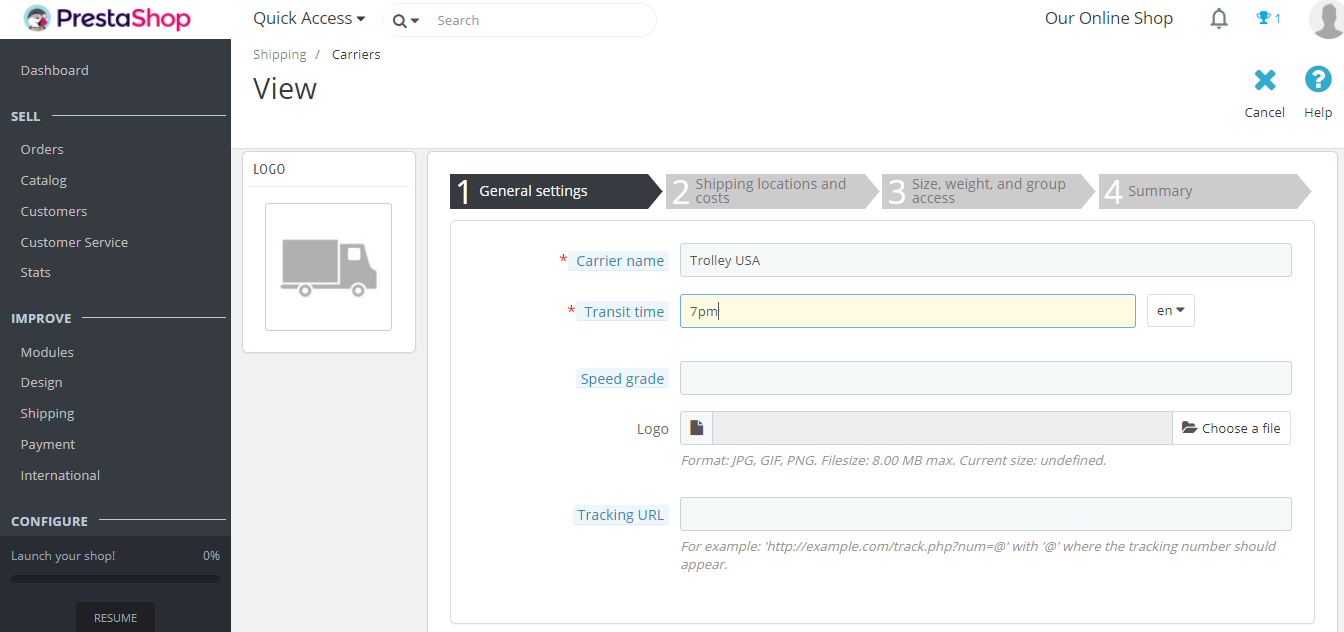
General Settings
Options to add carrier name, transit time, tracking URL, etc.
Add options and click Next to move to the next step,
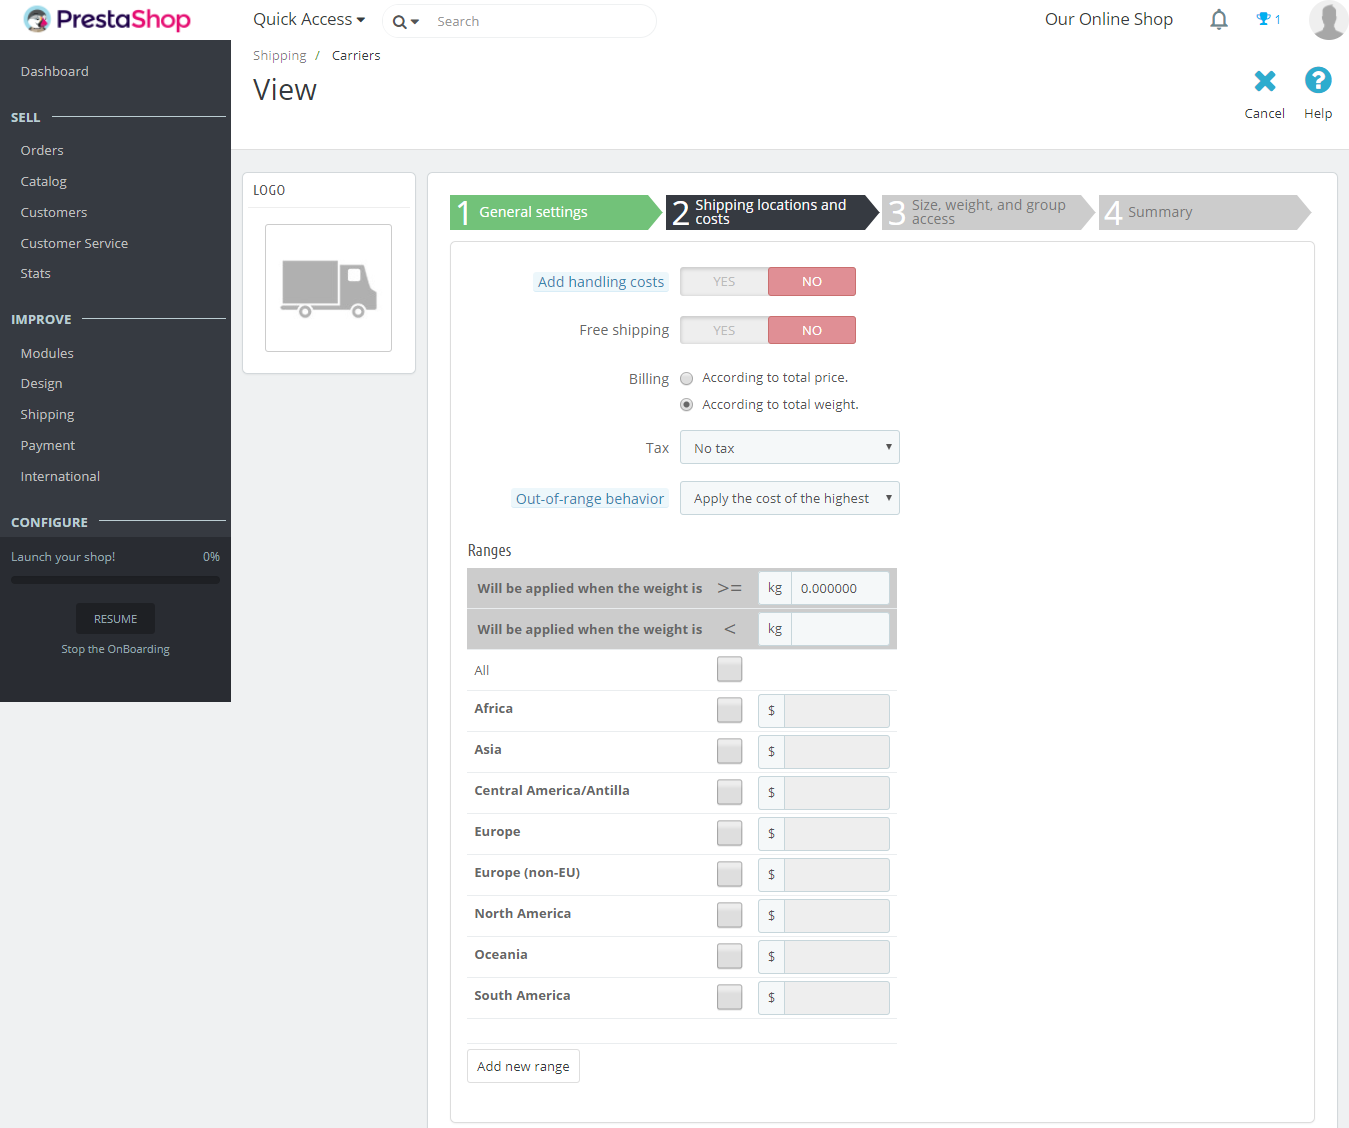
Shipping Locations & Costs
Here, enable handling costs, invoice settings, enable free shipping, add a range for shipping, etc. Add options and click Next to move to the next step,
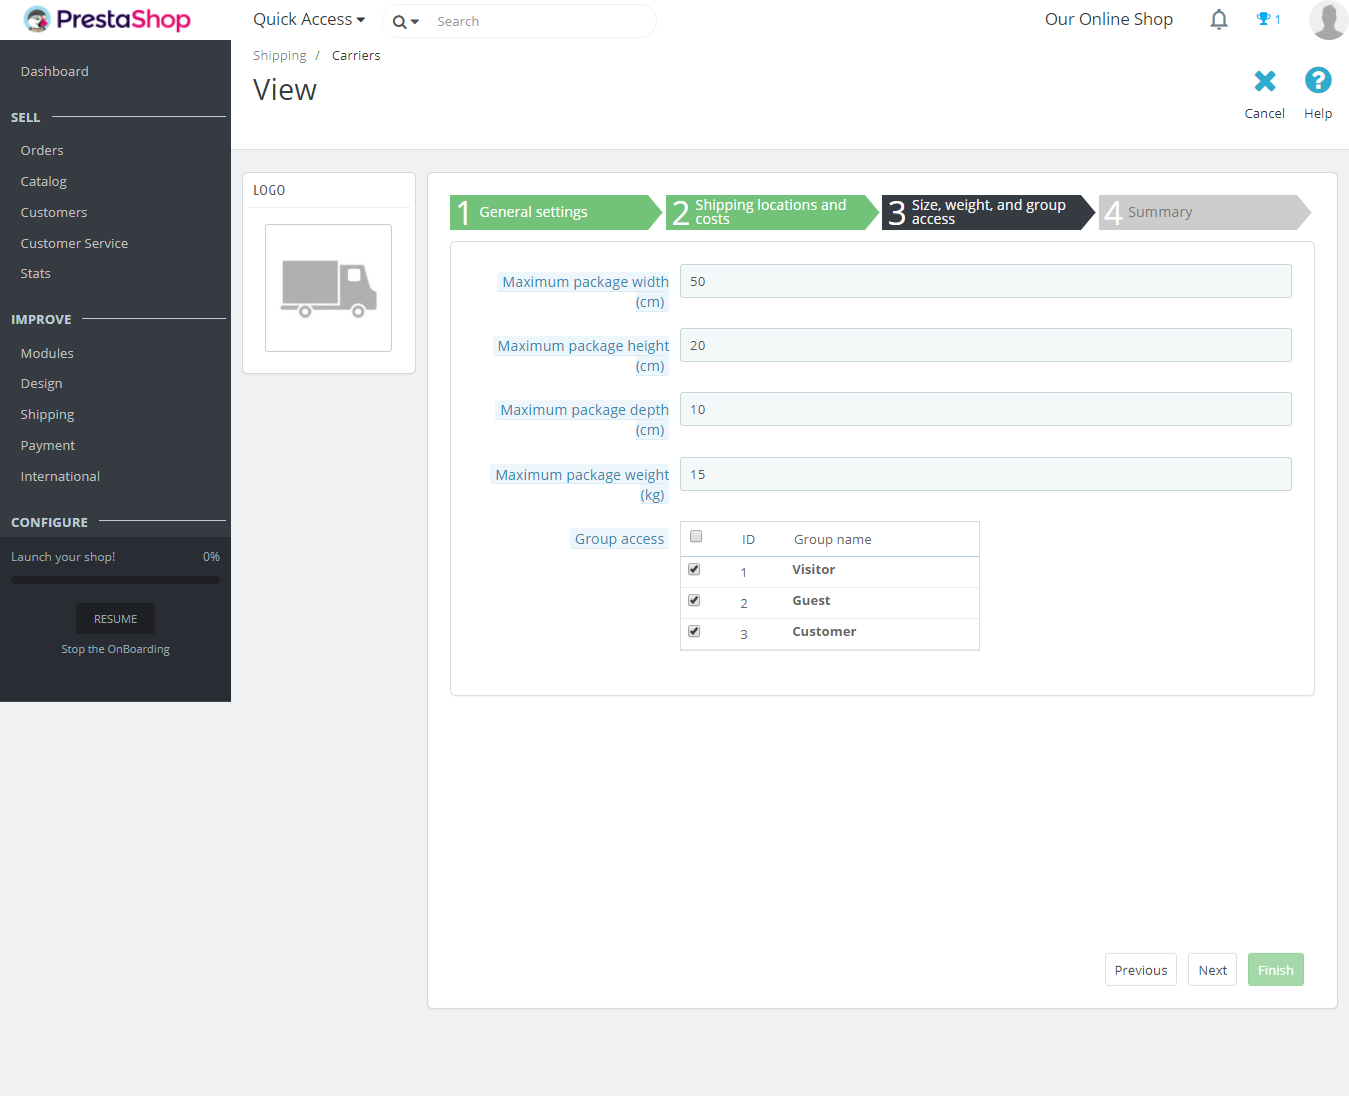
Size, weight, and group access
Set the maximum package width, height, depth and weight. Also set group access for Visitor, Guest and Customer.
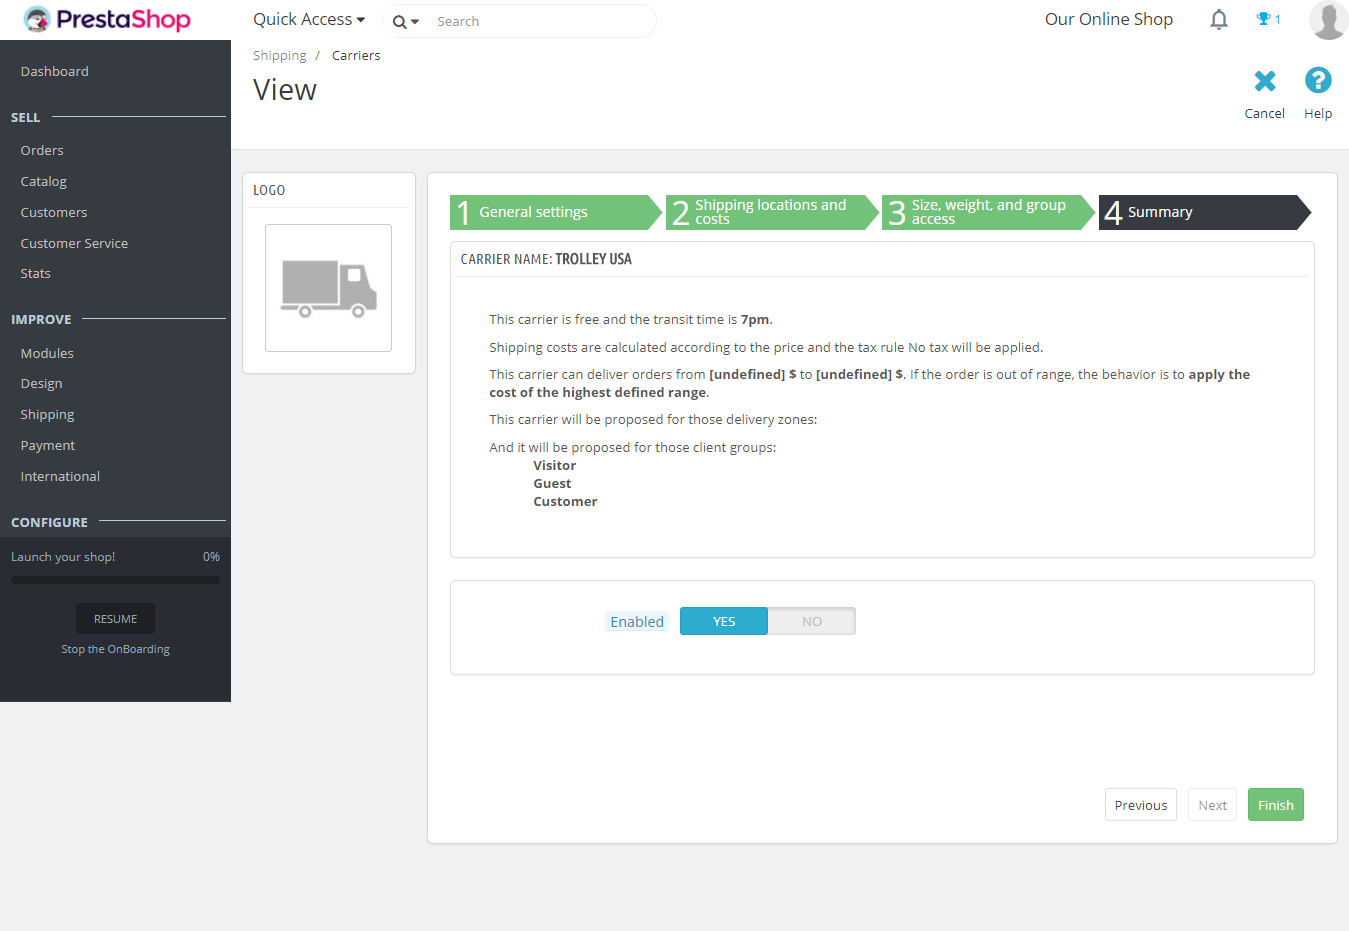
Summary
The summary of the details for the newly added Carrier is visible here.
Also enable and disable the carrier from here.
In the lesson, we learned how to set shipping in PrestaShop Store. We also saw how to add new carrier to PrestaShop.
No Comments