23 Sep Add new category to PrestaShop Store
Categories in an online store provide navigation and group products, making it easier for visitors to reach a specific product section to buy a product. For example, Footwear category will have sports shoes, casual shoes, formal shoes, boots, sneakers, etc. In this lesson, we will learn how to add new category to PrestaShop Store.
To reach the Category section, login to the PrestaShop store as an admin and reach the Dashboard.
Go to SELL > Catalog. After that you need to click Categories.
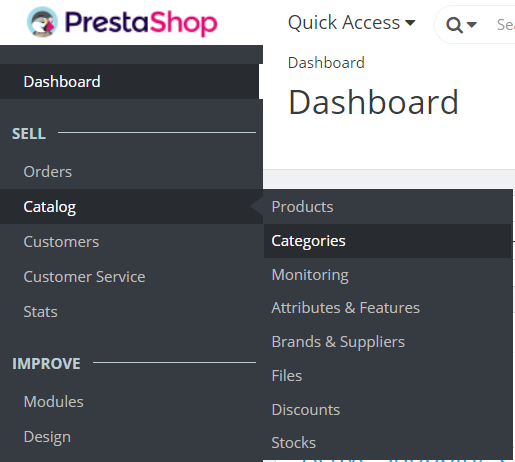
The Categories section is now visible,
As you can see above, our PrestaShop store is only having a single category right now i.e. Women. The same you can see on the first page of the PrestaShop store.
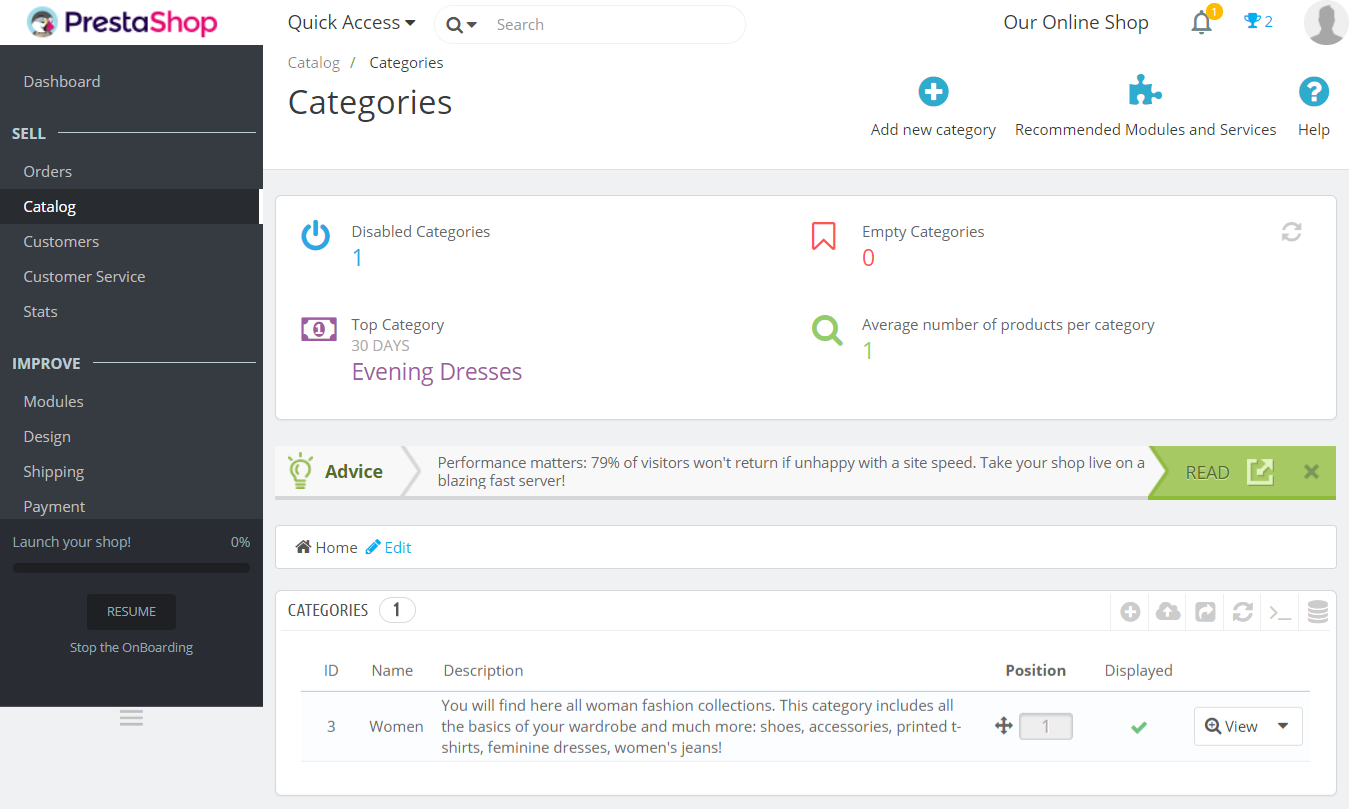
Click Add new category to add a new category to the PrestaShop store.
On clicking, a section will be visible to add new category.
The following fields can be seen while adding a new category,
Name
Add category name here.
Description
Add the description of the category.
Category Cover Image
The category cover image is to be added here.
Category Thumbnail
The category thumbnail is to be added here.
Menu Thumbnails
The menu thumbnail is to be added here.
Meta Title
Add the category title.
Meta Description
Add category description here.
Meta Keywords
Add tags here.
Friendly URL
The URL of the category.
Group Access
These are the default customer groups.
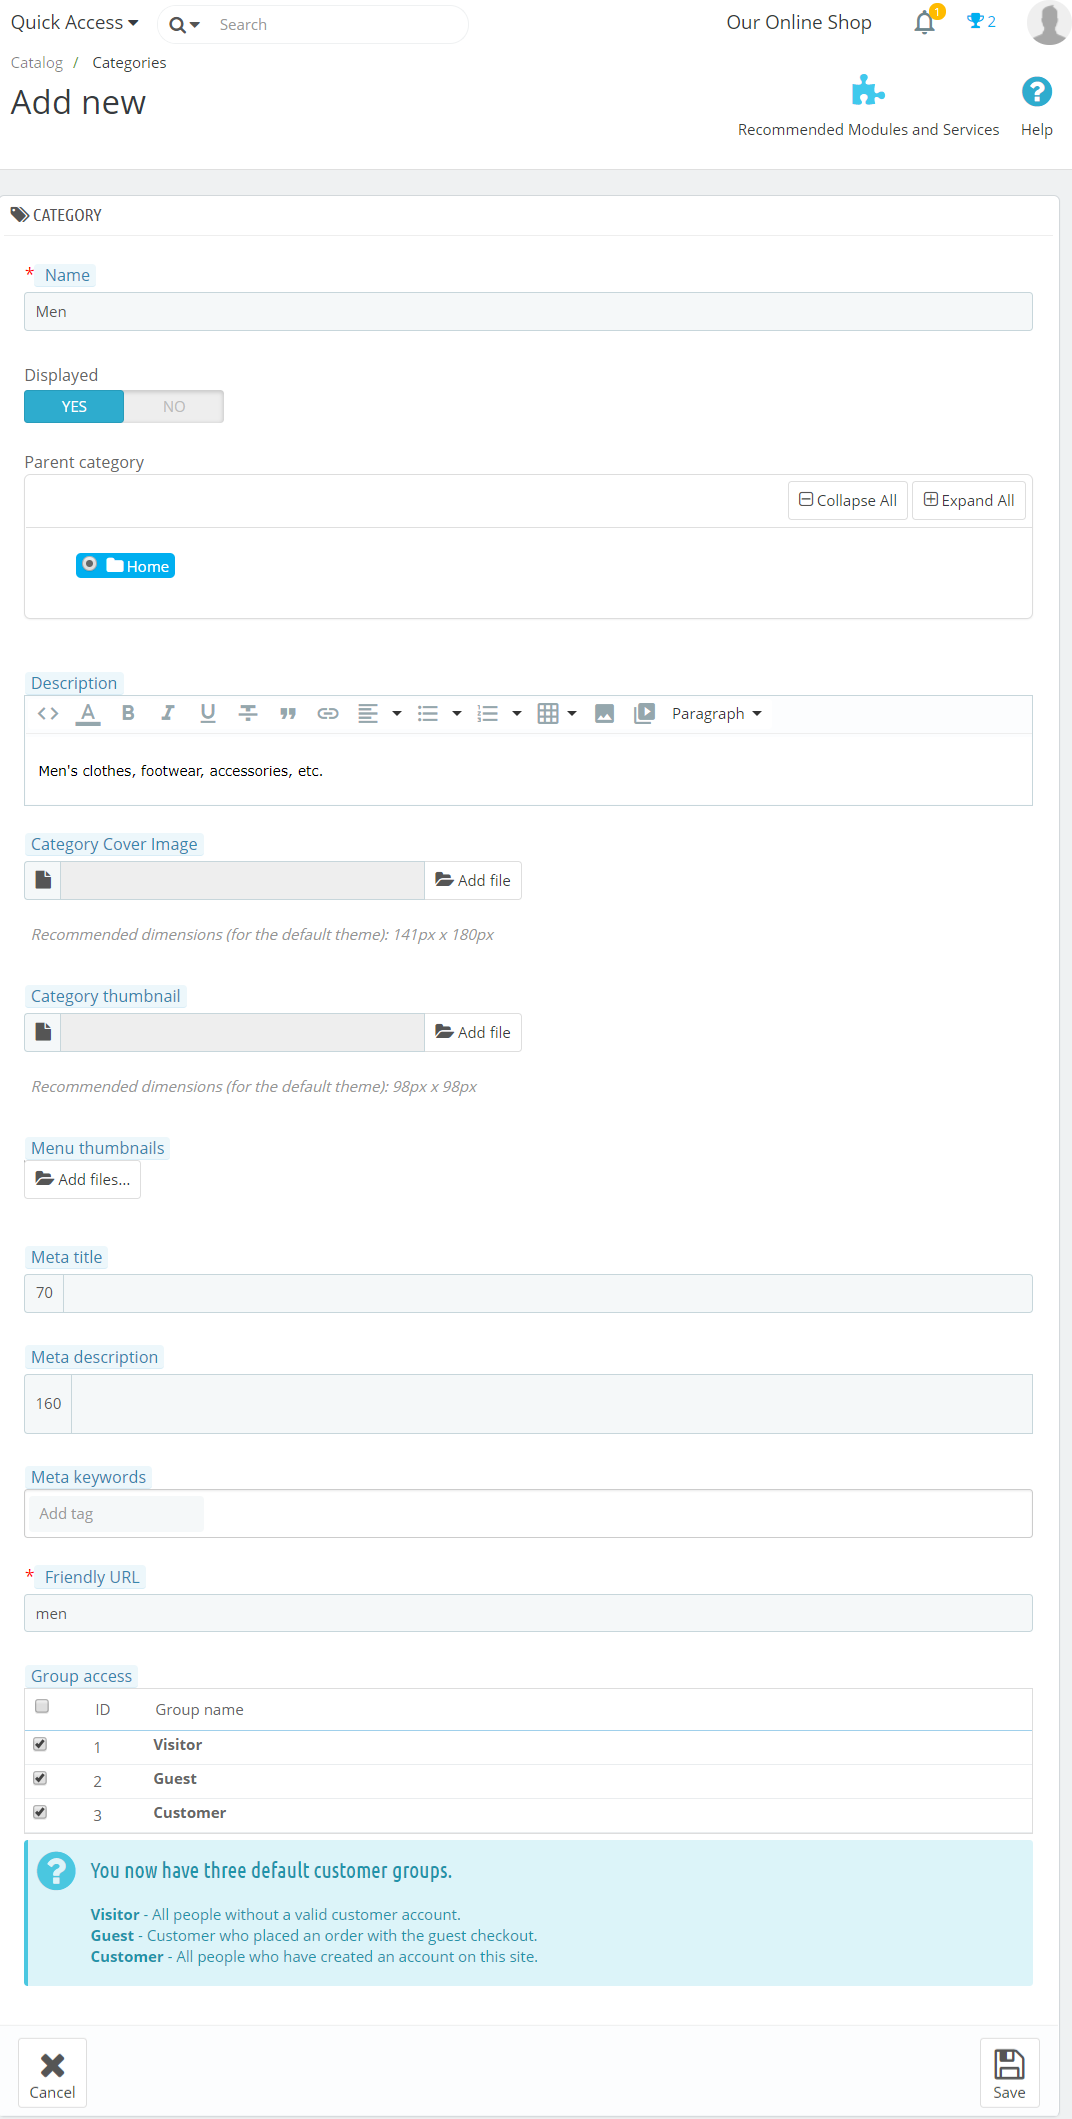
After adding the above fields, click Save to save our new category Men.
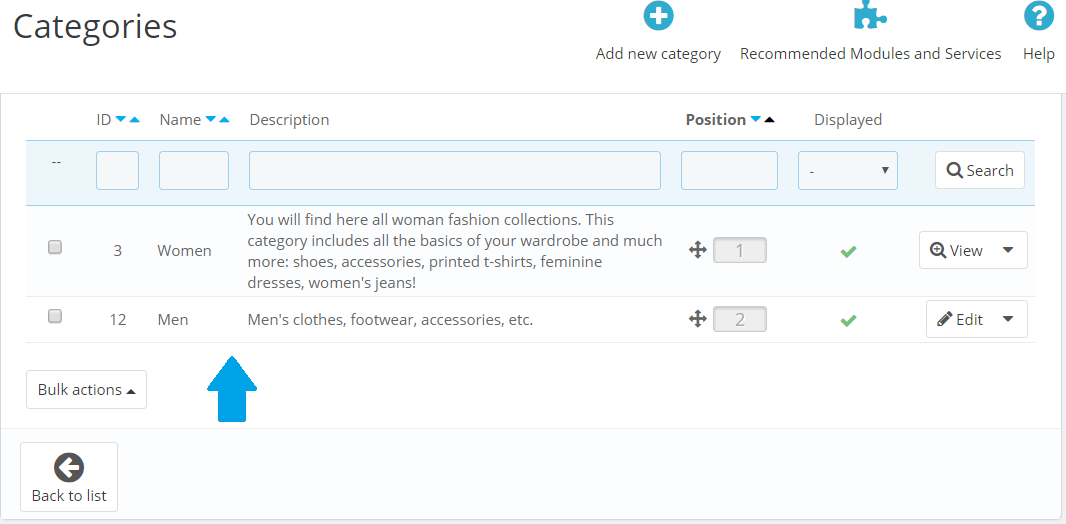
Now in the category section the Men category is visible.
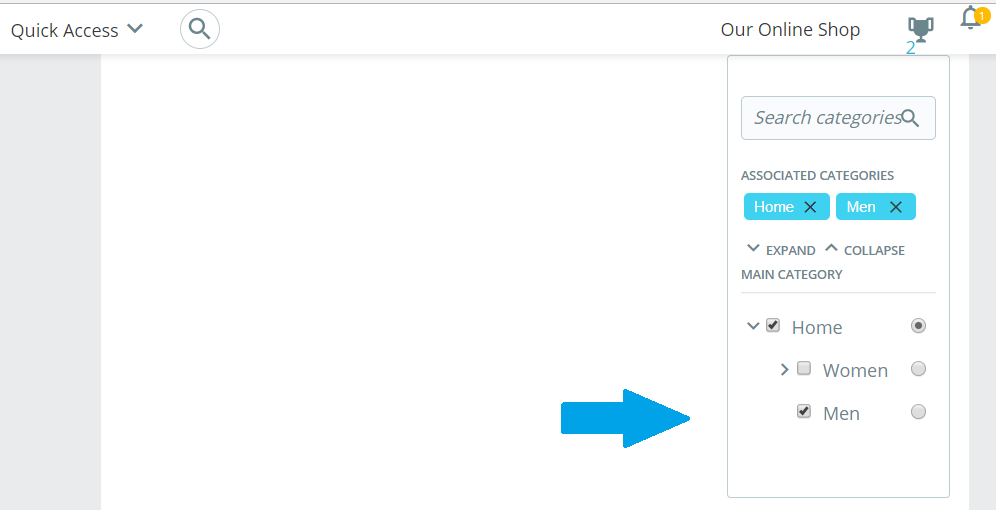
Now, under Products section, while adding a new product our new category is visible,
In this lesson we learned how to add new category to PrestaShop Store. We added Men category to the store. In the next lesson we will learn how to check orders on the PrestaShop Store.


No Comments