06 Aug osCommerce Installation on localhost using XAMPP
osCommerce installation is quite easy. It has some simple steps, which are shown below. First, we will learn about the software requirements to install osCommerce for online store development,
What you need for osCommerce Installation
For starting working on osCommerce, you need the following software/ tools on localhost:
- osCommerce: It is a free and open source content management system to develop dynamic websites.
- XAMPP: It is a cross platform open source web solution package, that fulfills your need of,
- Web Server
- MySQL
- PHP
Installing osCommerce on Localhost
We’re learning osCommerce installation from scratch, so first we need to install it on localhost. Here are the steps,
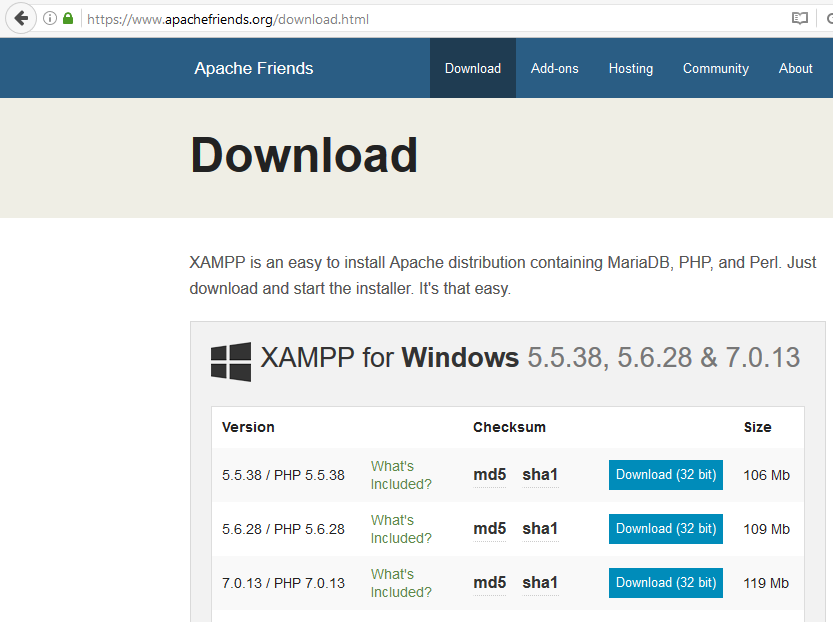
Step– Go to the XAMPP official website and download XAMPP,
Step– Install XAMPP at any location. We’re installing in C: Drive as shown below,
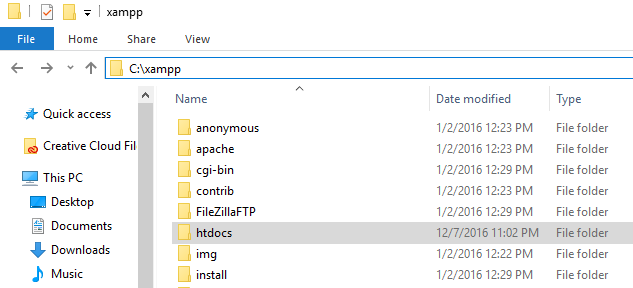
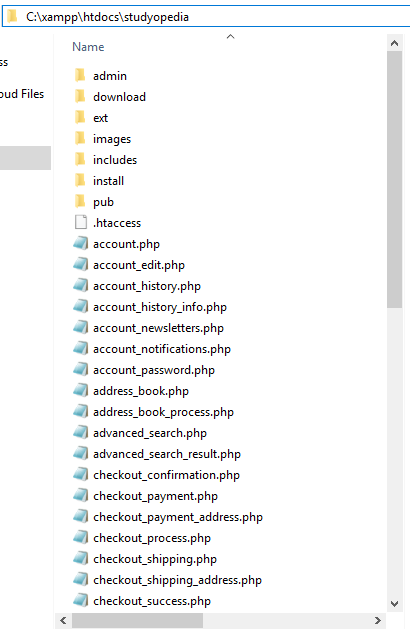
Step– Create project folder in the following htdocs directory, C:\xampp\htdocs\
We’re done with installation of XAMPP.
Now, we will learn how to install osCommere.
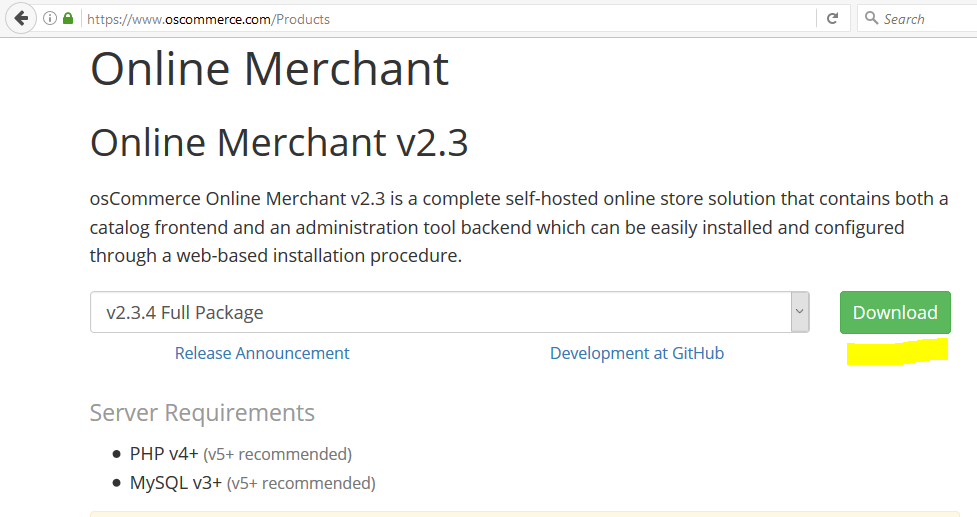
Step- Download osCommerce Online Merchant v2.3 Full Package zip file
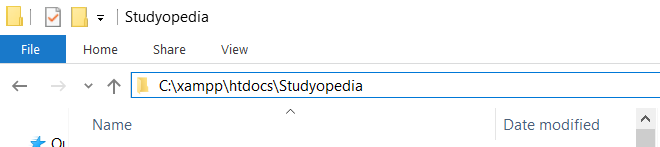
Step- We created the project folder studyopedia, which is our website folder,
C:\xampp\htdocs\studyopedia
Now, you can see we have reached the project folder directory. Move the osCommerce zip file to your project folder as shown below.
Unzip it in the same folder.
Here, what you can see after moving and unzipping the zip file,
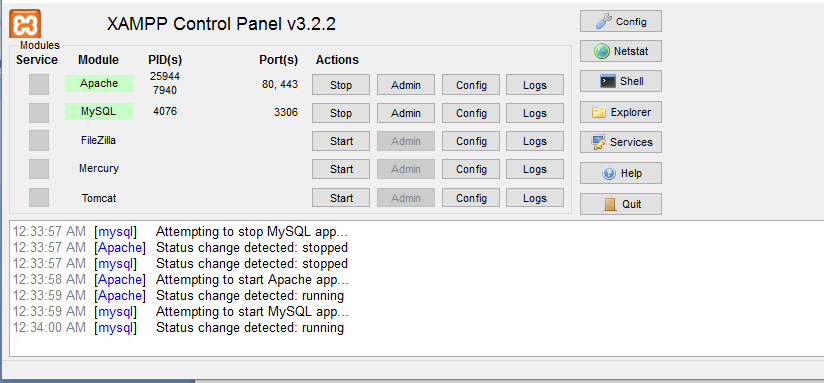
Step 6– Now, start XAMPP from “XAMPP Control Panel”

After opening XAMPP, click Start on Apache and MySQL.
Here, Apache is our server and MySQL is our database.
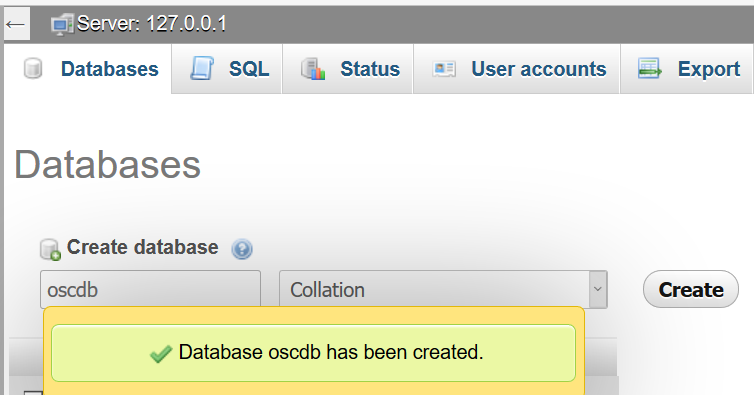
Step- Now, go to the browser and type the following to reach phpmyadmin, for creating a new database.
http://localhost/phpmyadmin/
Now, you will reach phpmyadmin. Here, click New to create a new database.
We’re keeping the database name, oscdb,
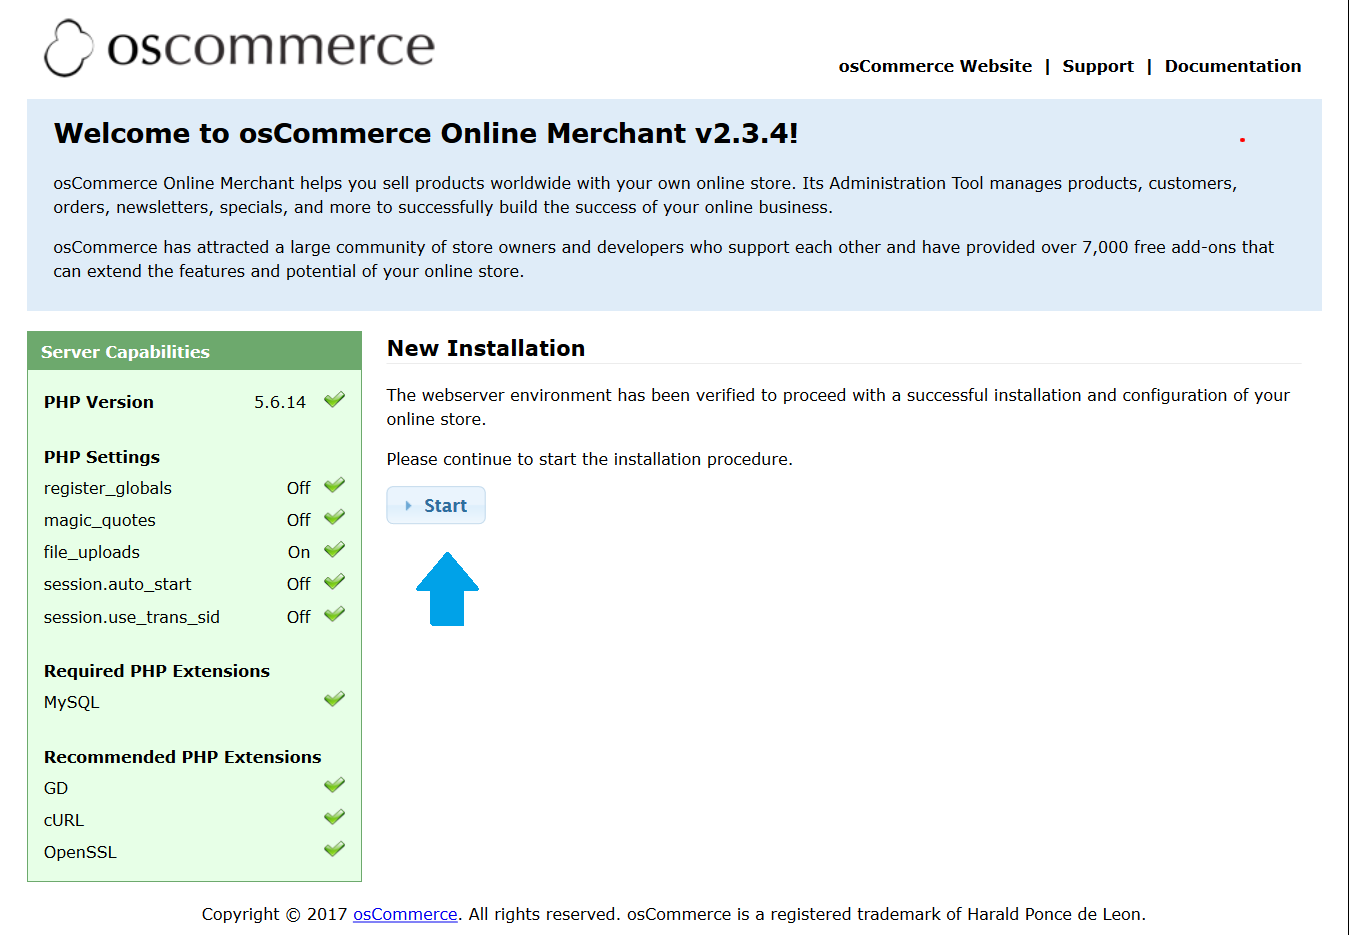
Step- Now, go to the browser and type the following to start the installation of osCommerce,
http://localhost/studyopedia/
Here, you need to click the Start button as shown below,
Step- Database Server
After clicking Start above, you can see the following section that starts setup and configuration of osCommerce Online Merchant.
Fill in the details for Database Server as shown below,
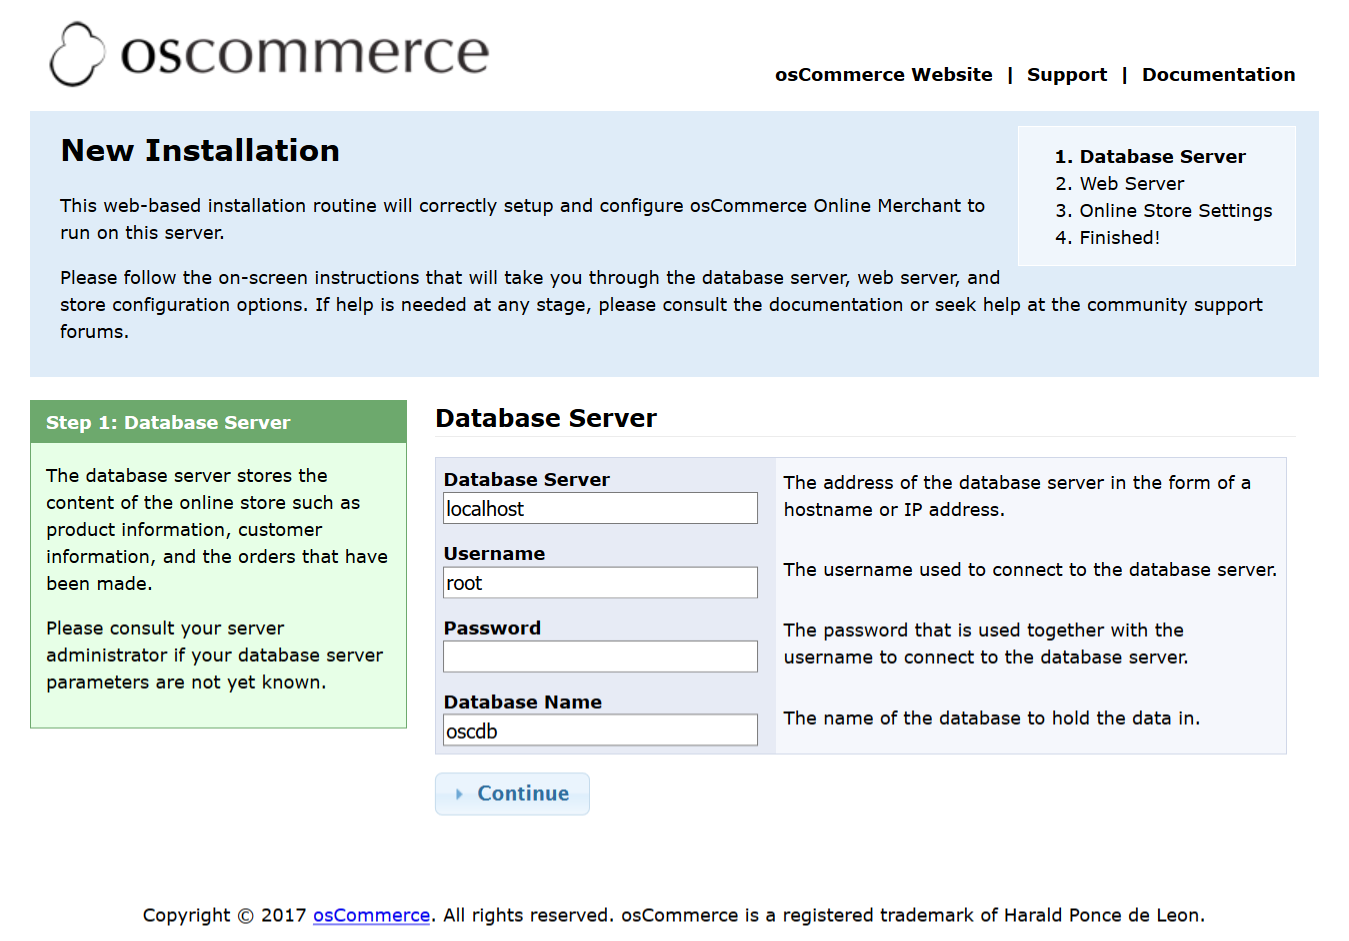
After filling the details, click Continue.
Step- Web Server
Now, we have reached the web server section. Add your website address, which is on localhost and also your web server root directory (where we created our project folder studyopedia).
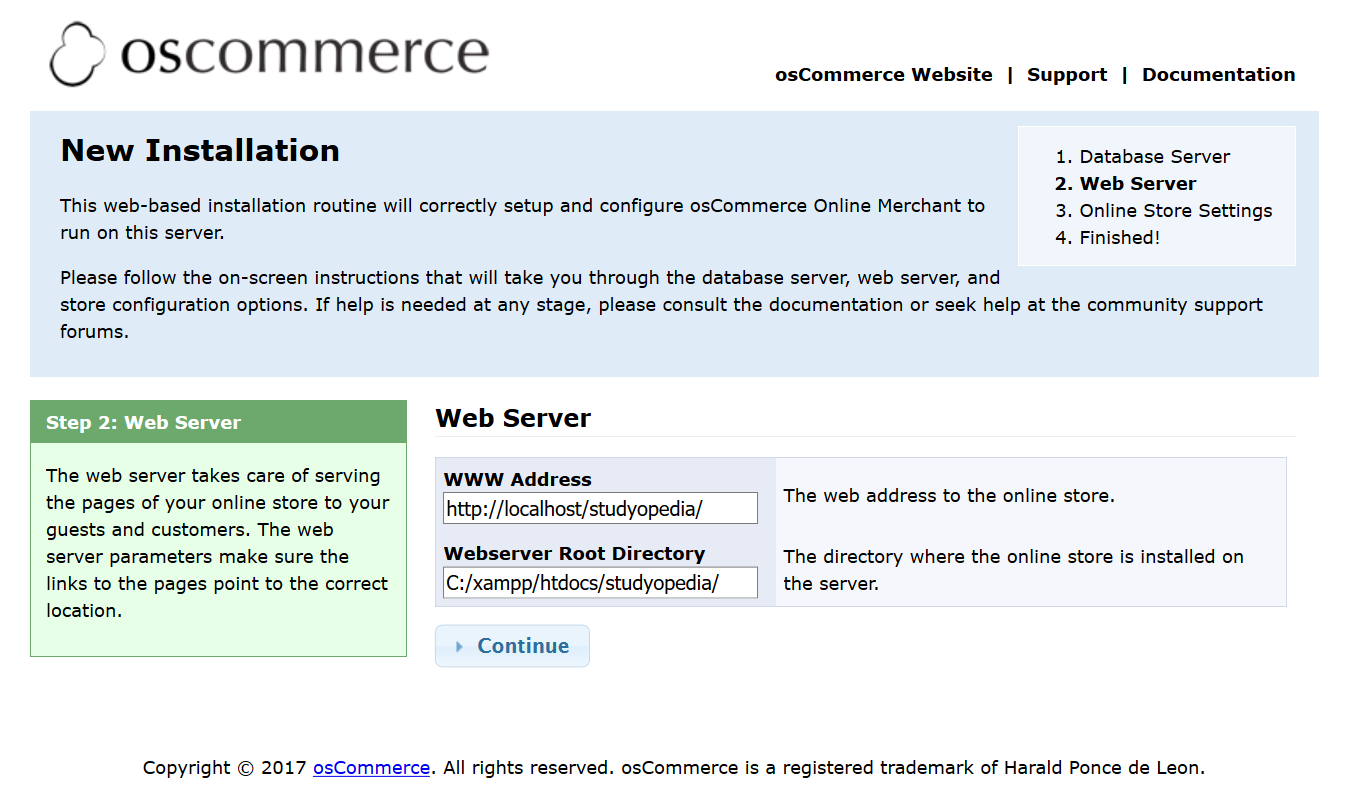
After that click, Continue.
Step- Online Store Settings
We reached the store settings. Here, add the details about your online store, such as store name, store owner name, Admin username, etc.

After that, you need to click Continue.
Now, you can see osCommerce installation completed successfully,
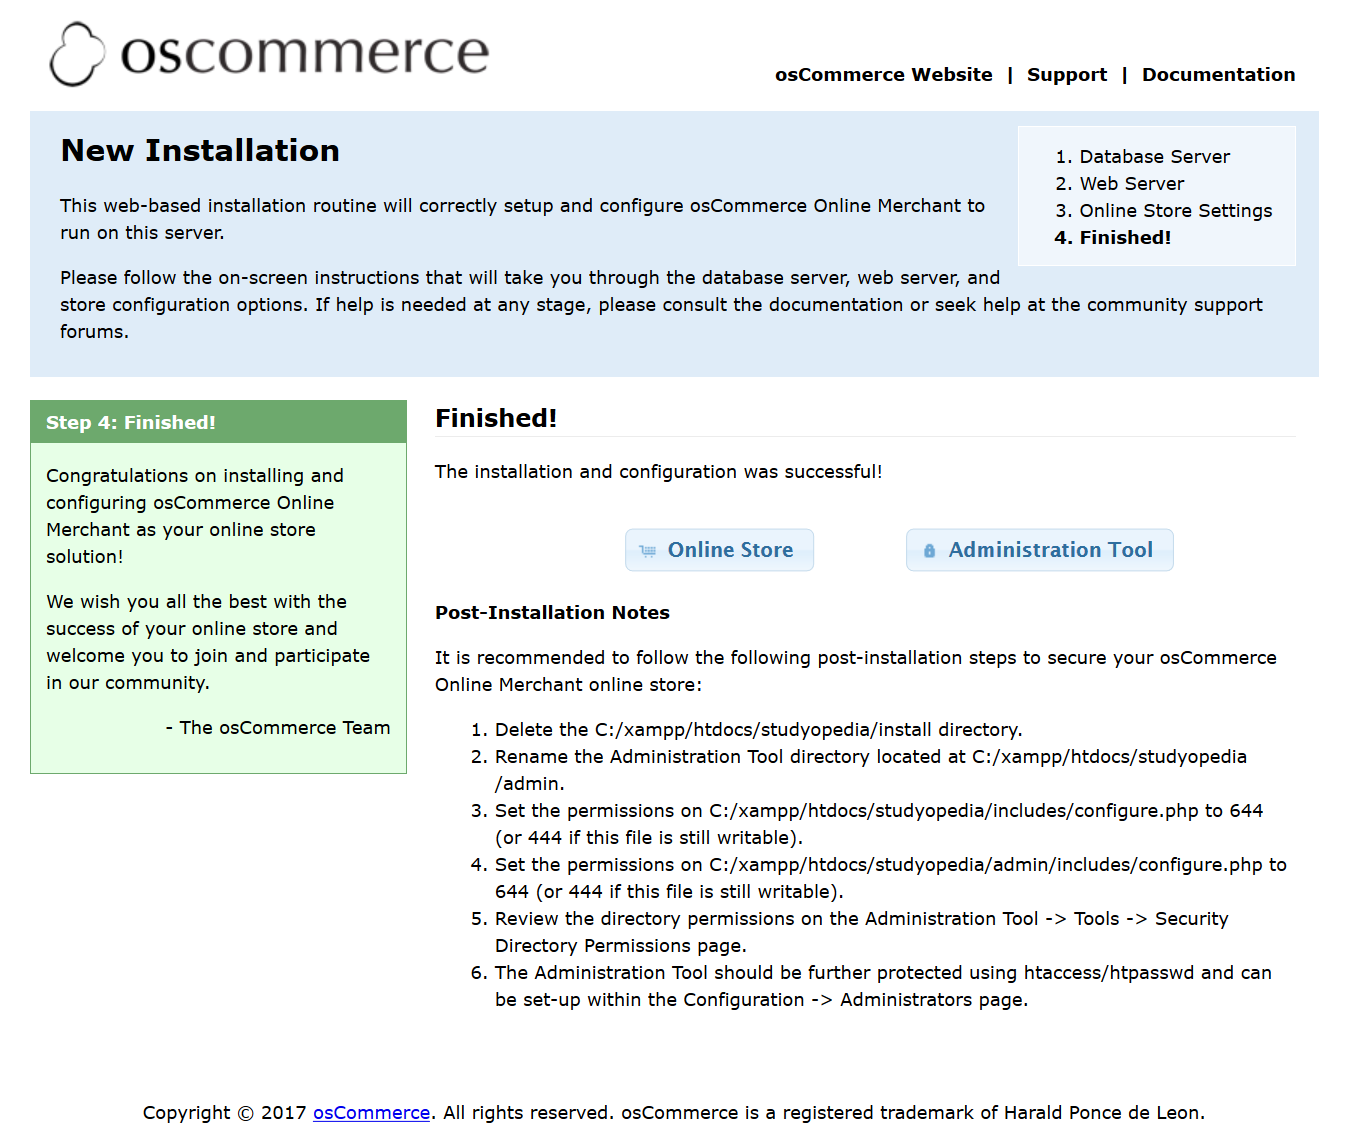
As shown above you can see the Post Installation Notes.
Follow it to secure your osCommerce online store. In the next lesson we will learn how to visit our Ecommerce store home page for the first time.
No Comments