08 Oct How to Install Python on Windows 10/ 11
In this article, we will see how to install Python 3 on Windows. With that, to avoid any hassles in the future, we will also let you know how to verify the installation.
Before moving further, we’ve prepared a video tutorial to install Python:
If you want a text tutorial to install Python, then here are the steps:
Download Python
To download Python, go to Python’s official website.
Now, keep the mouse cursor on the Downloads menu. The current version of Python can now be seen,
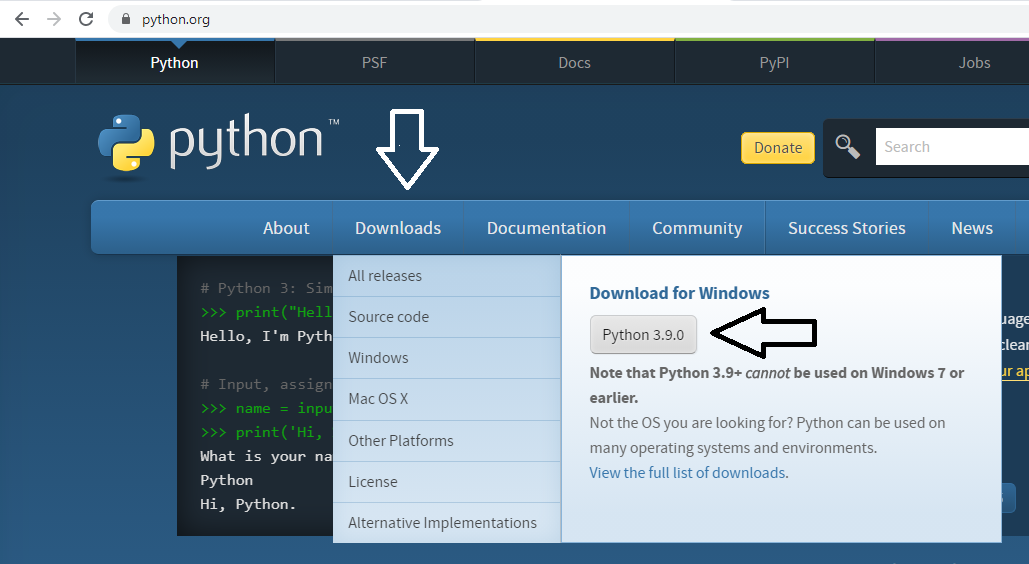
On clicking, the download begins,
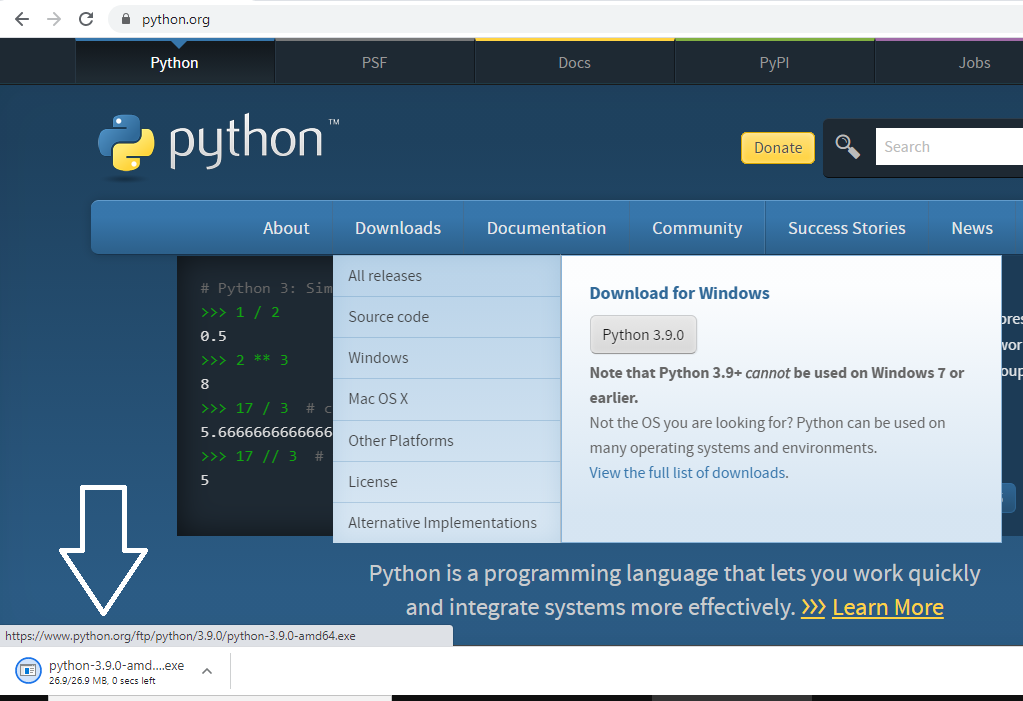
After the download completes, click on the arrow, and select Open to begin installing,
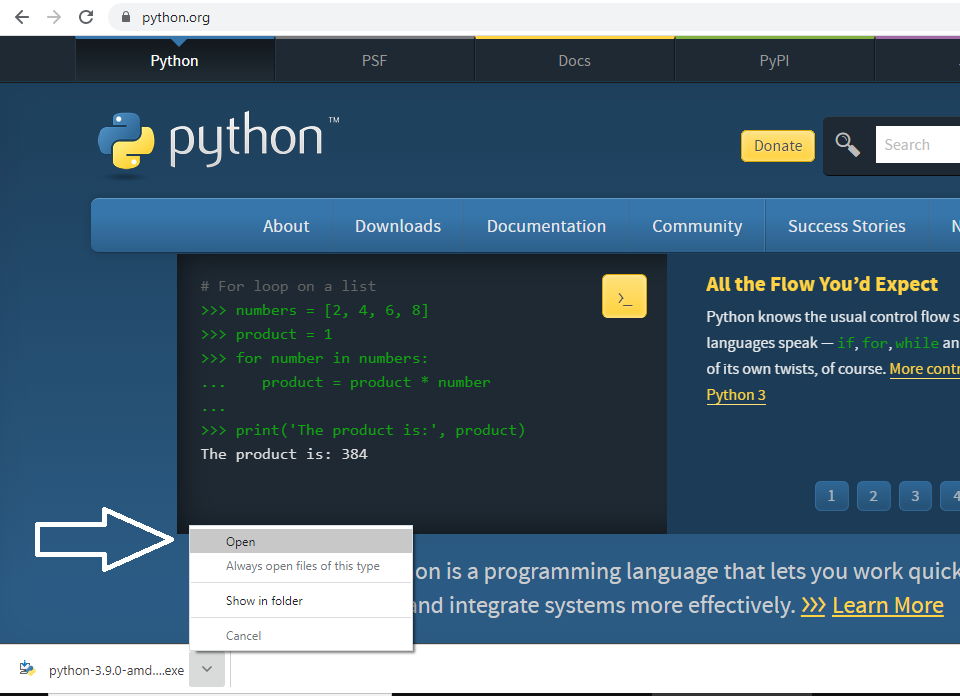
Installing Python
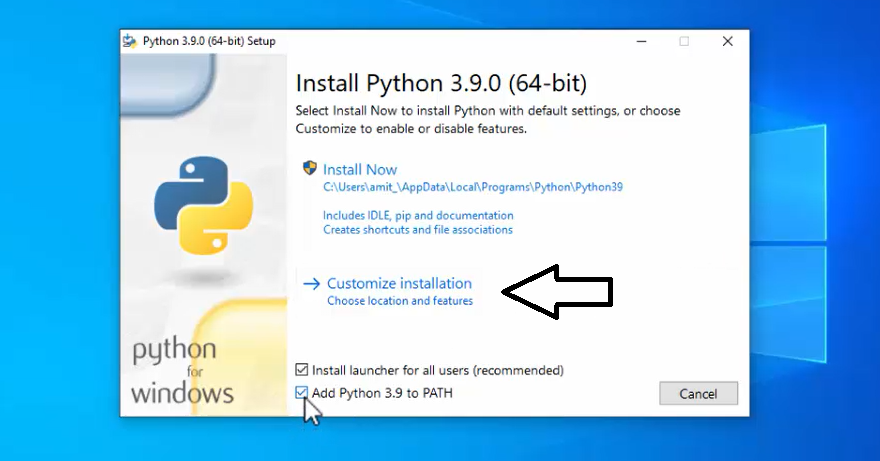
Installation steps initiated. Select the checkbox “Add Python 3.9 to PATH“. After that, click Customize Installation as shown below:
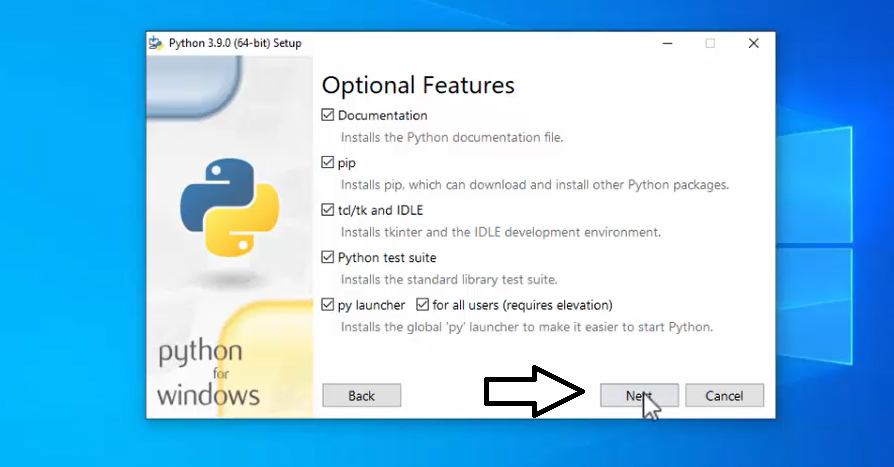
Now, you will reach the section Optional Features. This by default checks the “pip” package installer, test suite, py launcher, etc. Pip is used to install and manage Python packages.
Keep the default and click “Next“:
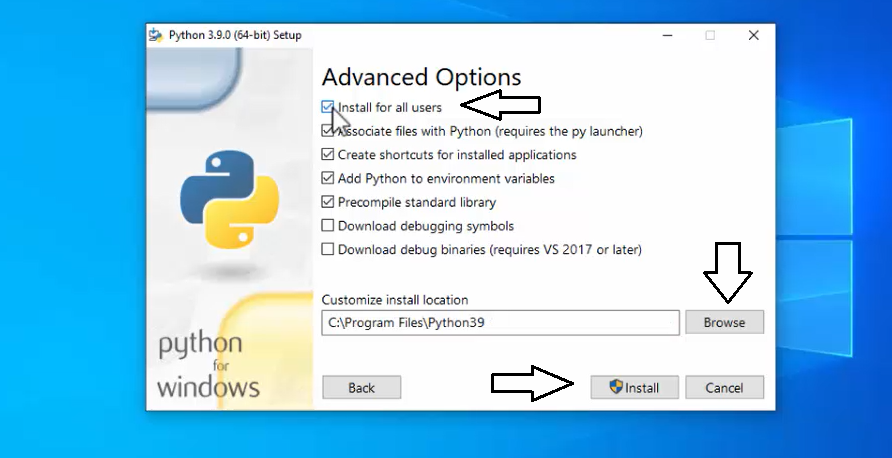
The Advanced Options section would be visible now. Select Install for all users. On selecting it will set the following installation path on its own. You can change the installation path by clicking Browse. If you want to keep the default path, click Install,
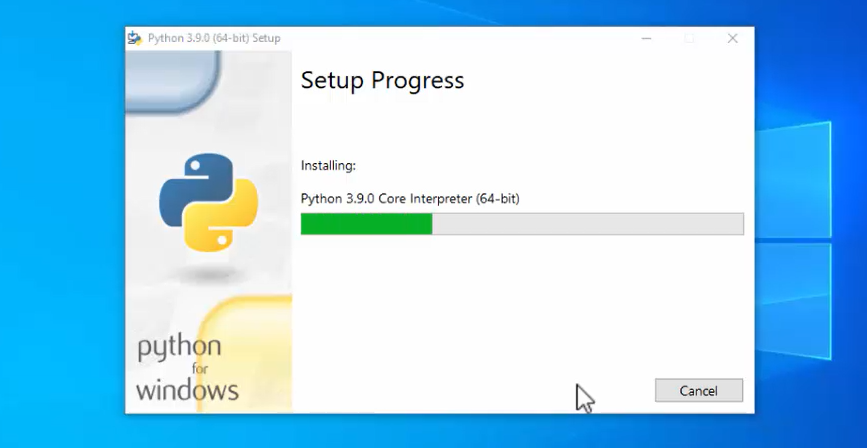
Installation of all the components begins,
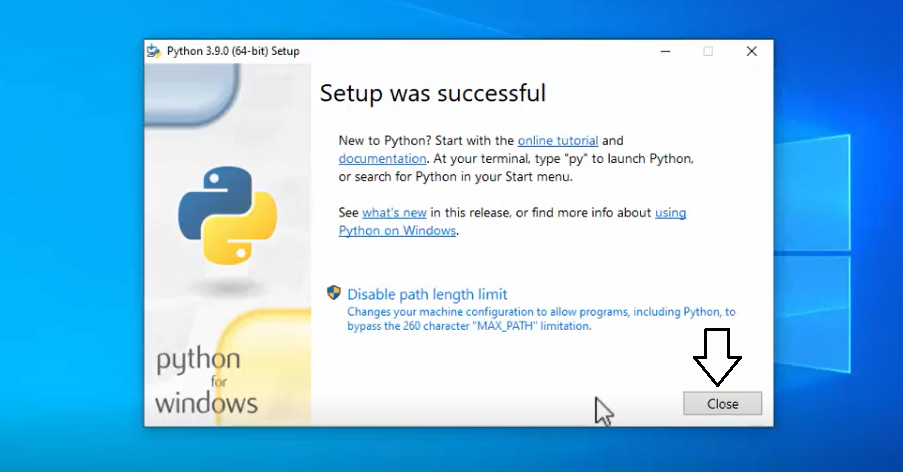
After a few seconds, the installation completes as shown below.
Click Close,
Verify Python Installation
Now, verify whether we have successfully installed Python or not.
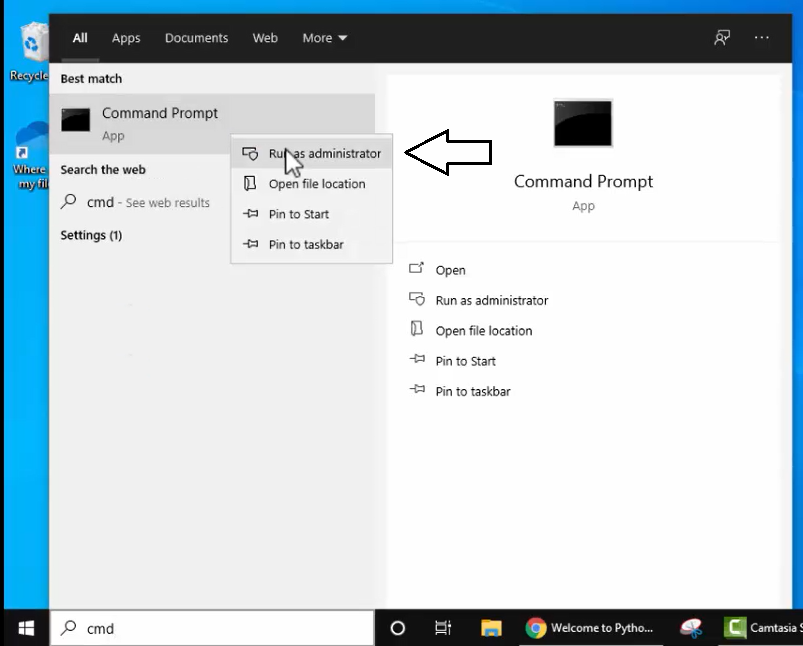
Go to START -> type CMD, right-click Open as Administrator.
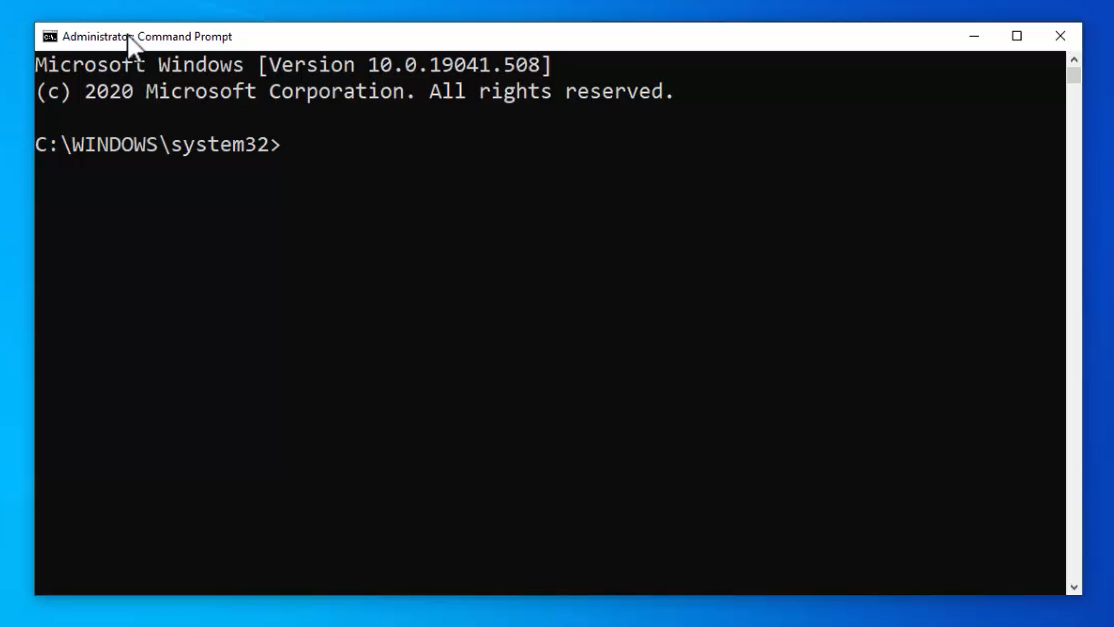
The Command Prompt opens as shown below,
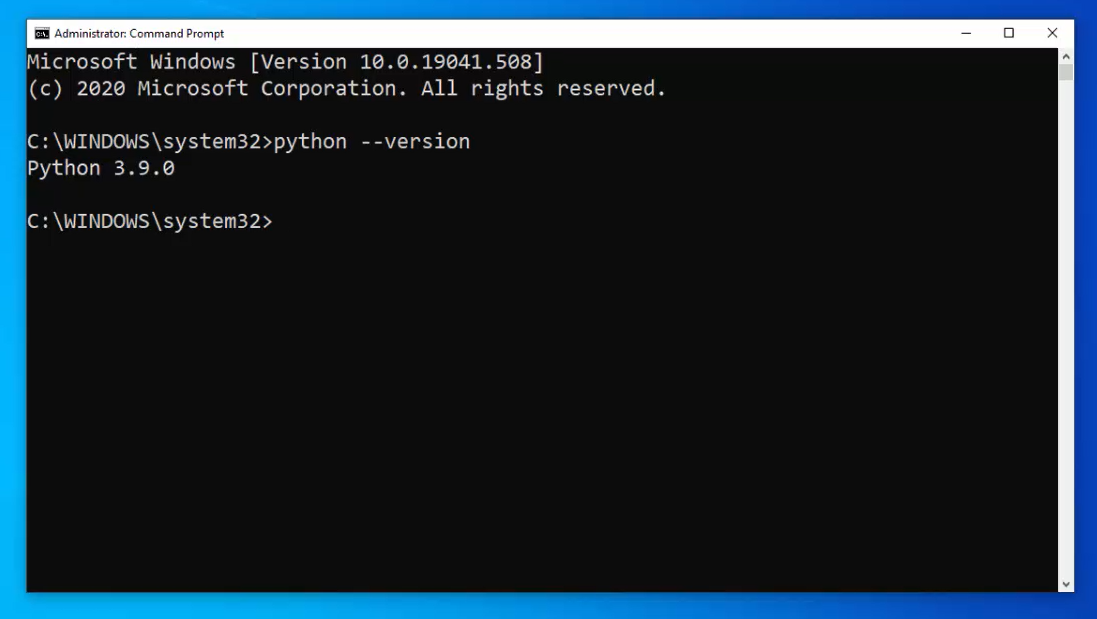
Now, on typing the following command python –version on CMD, the following is visible, that means Python successfully installed on our Windows 10 OS:
If you liked the tutorial, spread the word and share the link and our website Studyopedia with others.
For Videos, Join Our YouTube Channel: Join Now
Read More:


No Comments