07 May How to install NetBeans IDE on Windows 10
NetBeans is a free and open source Integrated Development Environment (IDE) and is governed by the Apache Software Foundation. Develop desktop, mobile, and web applications with Java, JavaScript, HTML5, PHP, C/C++, etc easily with NetBeans. Here, we will be installing NetBeans IDE.
In this tutorial, we will learn how to install NetBeans IDE on Windows 10. Java installation is also necessary since NetBeans is a Java-based IDE, therefore we will also see JAVA JDK installation while installing NetBeans IDE with text as well as a video tutorial below:
Before moving further, we’ve prepared a video tutorial to install NetBeans:
Following steps we will follow to install NetBeans IDE on Windows 10:
- Download and Install Java
- Download NetBeans
- Installing NetBeans IDE
- Set NetBeans and Java path
- Launch NetBeans after installation
- Check the Video Tutorial also
Let’s begin with the installation:
Step 1: Download and Install Java
We will see how to install Java JDK on Windows 10 OS. With that, to avoid any hassles in the future, we will also let you know how to verify the installation.
Let us now Download Java JDK
To download Java, go to Oracle’s official website and type “JAVA JDK ” in the search box as in the below screenshot:
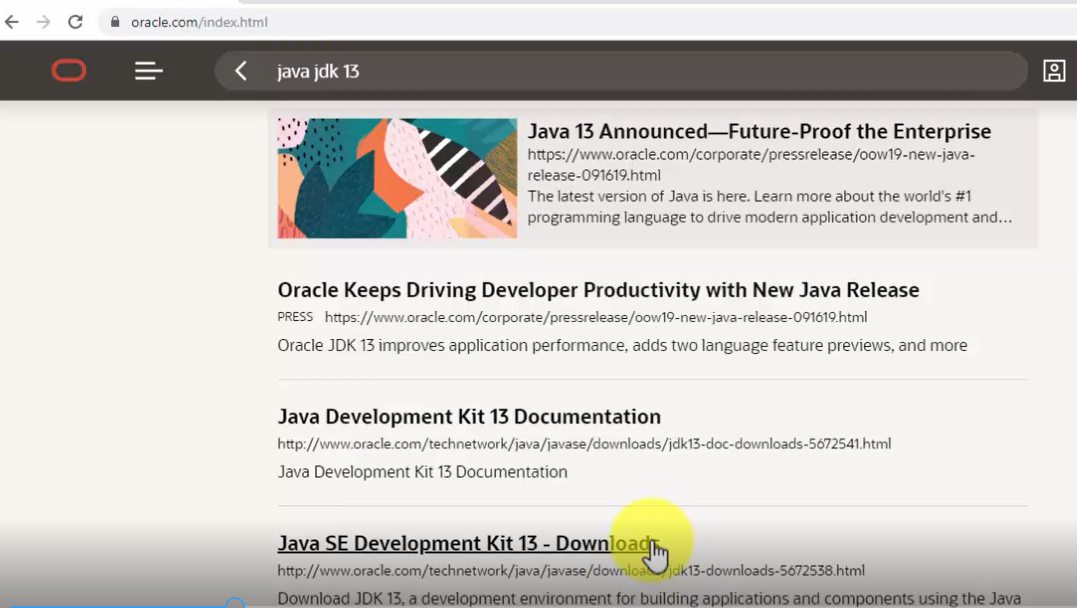
Now, click “Java SE Development Kit 13 – Downloads” and you will reach the Downloads section:

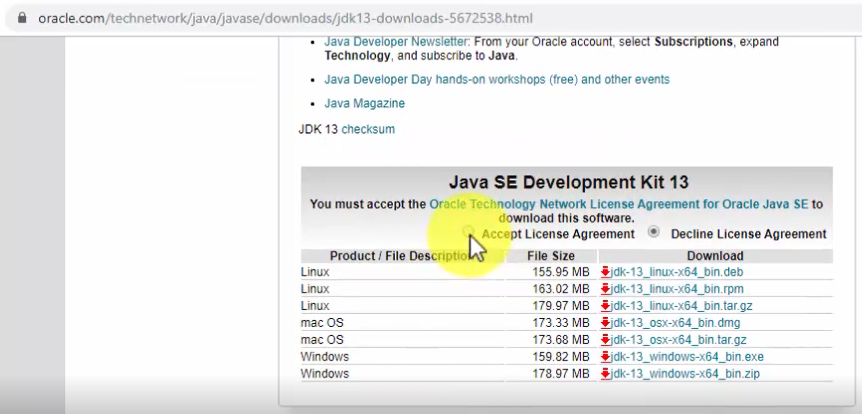
Go to bottom of the same page, click “Accept” there itself:
Since, we are on a Windows 10 system, therefore, we now have two options. From that, we will go with the installer exe 64-bit file i.e. jdk-13_windows-x64_bin.exe:
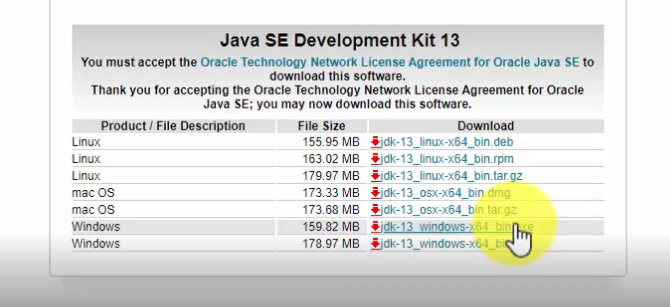
Note: Java JDK 13 will get installed only on a 64-bit Windows 10 system
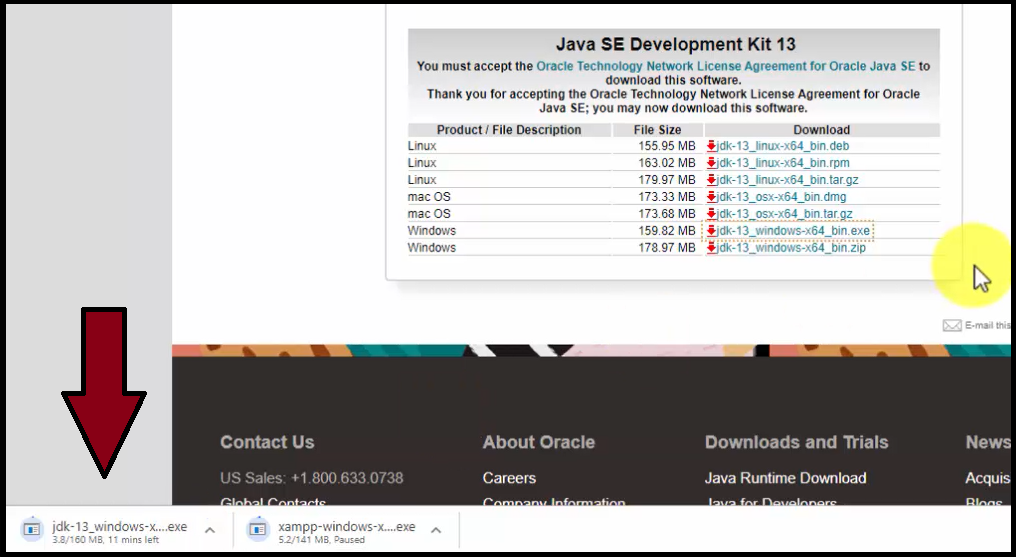
As you can see on the bottom-left of the web browser, the download begins. Just wait for few minutes till the download finishes:
The downloaded jdk exe file will get saved in the “Downloads” folder:
Now, go to “Downloads” folder on your Windows 10 system and double click on the “jdk-13_windows-x64_bin.exe” file:
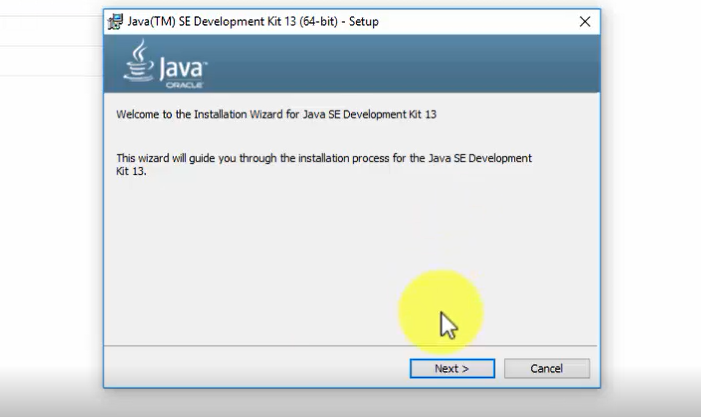
Double click on the exe file and the installation begins:
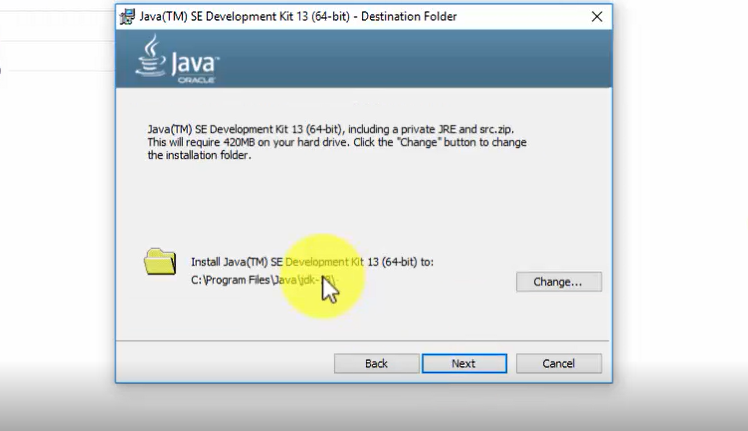
Click on “Next” above and set the path wherein the Java 13 will get installed. You can also keep it the default:
Click on “Next” above and the installation continues for some minutes.
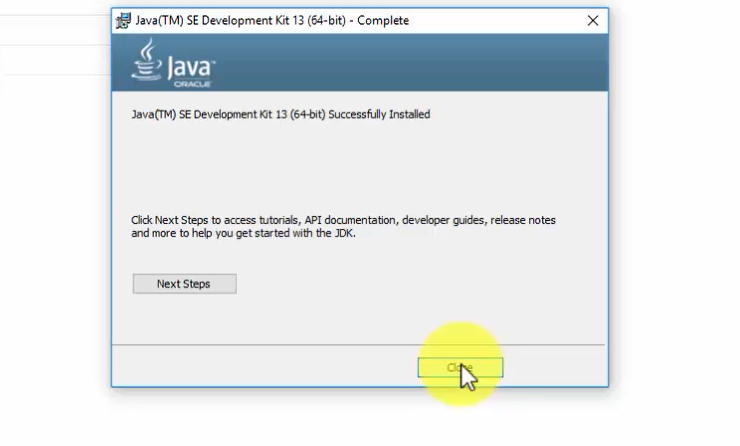
The installation finishes as in the following screenshot. Click on “Close“:
Now, let us set the JDK path.
Now, we will see how to set Java JDK Path (Environment Variable).
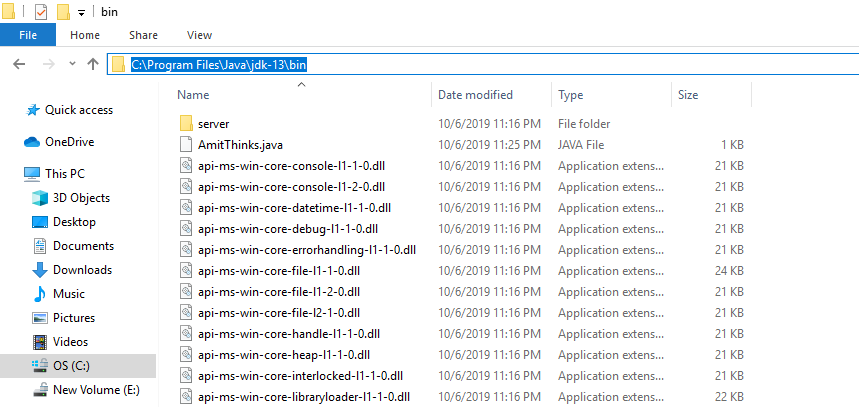
At first, copy the path wherein you installed the Java JDK. Let us copy it first. Remember, we need to copy the bin path i.e. the following on our system:
C:\Program Files\Java\jdk-13\bin
Here’s the screenshot of the “bin” path, wherein we installed Java 13:
To set JDK Path, the easiest way is to type “Environment Variables” on Start. On typing, the following would be visible:
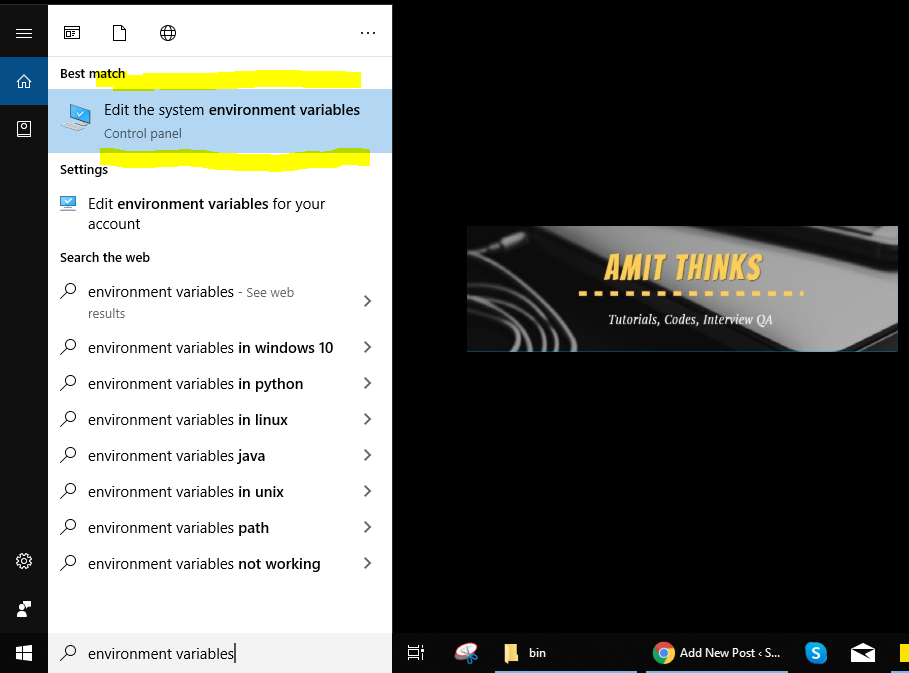
Now, click on “Edit Environment Variables” and a new dialog box would be visible:
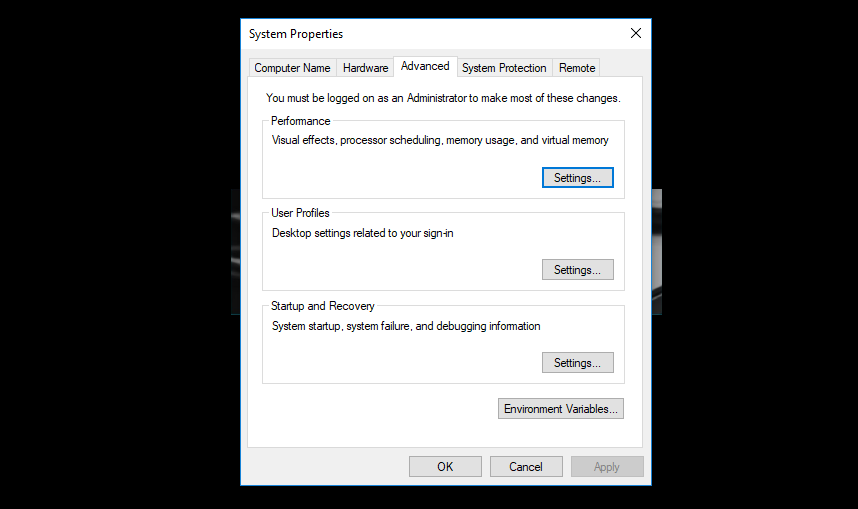
Now, click “Environment Variable” and a new dialog box will open. Go to “System Variables” section and double click “Path” as in the below screenshot:
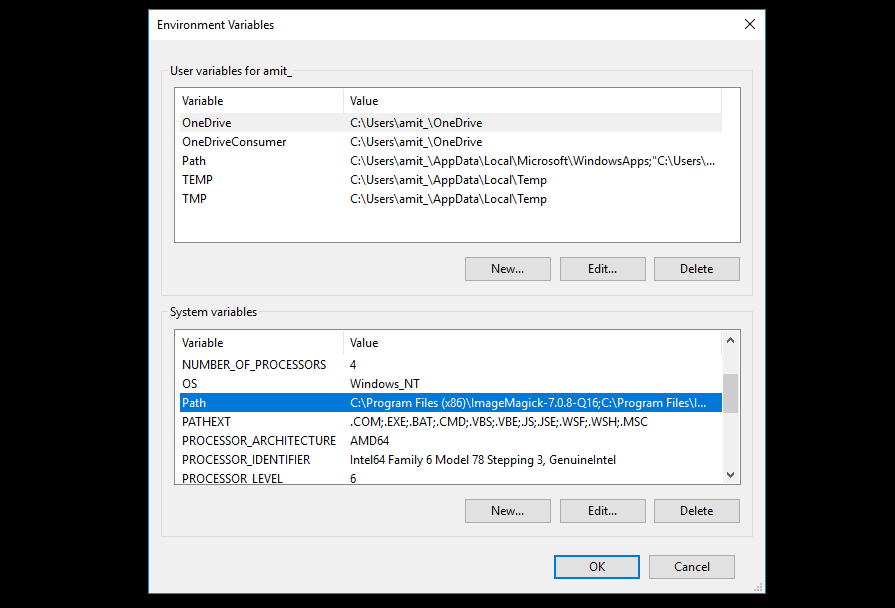
On clicking “Path“, a new dialog box will open. From there, click “New” and add the Java JDK path “C:\Program Files\Java\jdk-13\bin” as displayed in the below screenshot:
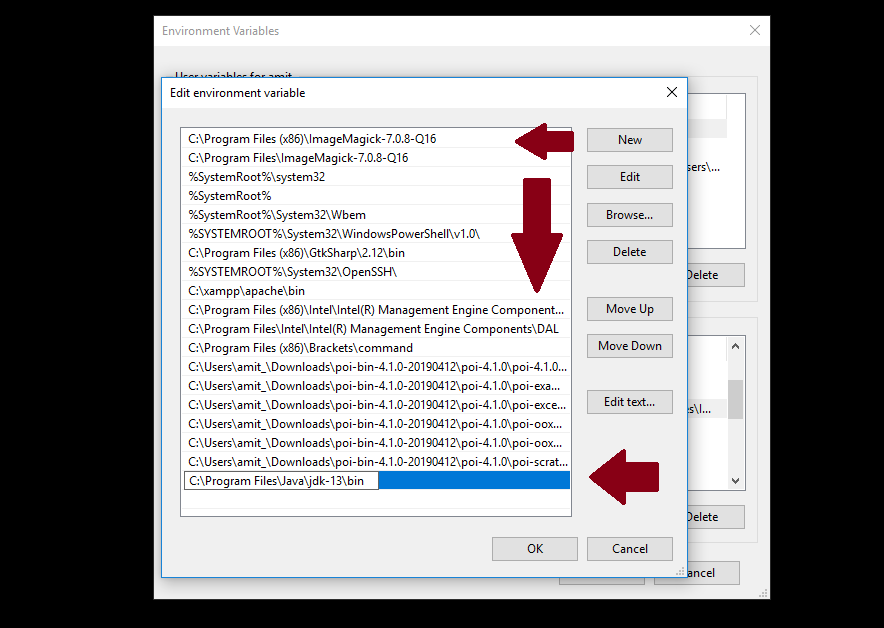
Above, press Ok for all the dialog boxes i.e. 3 times. This ends the installation and the procedure to set path for JDK. Now, we will verify the JDK installation.
Now, we will verify Java JDK 13 Installation.
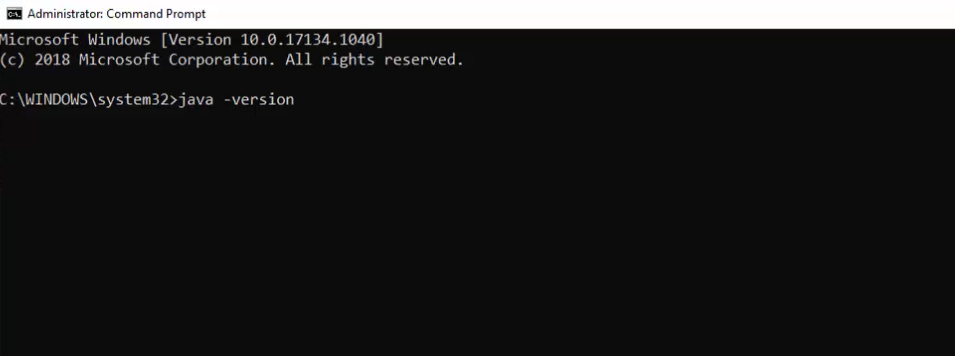
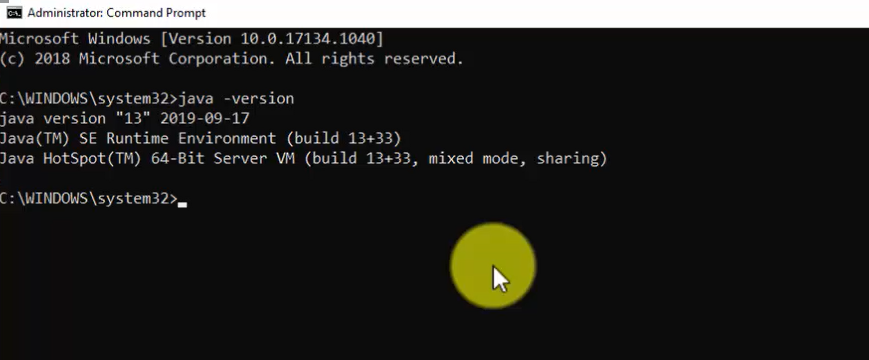
We saw how to install Java JDK 13 above. We installed on Windows 10 OS. Now, we can easily verify whether the installation was successfully or not using the following command:
java -version
Let us implement the above command on command prompt (cmd) and verify Java installation:
Therefore, the installation verification is now complete and successful since now we can see the version in the command prompt:
Step 2: Download NetBeans IDE
We installed Java above for NetBeans. Now, to install NetBeans IDE on Windows 10, at first we will download NetBeans IDE.
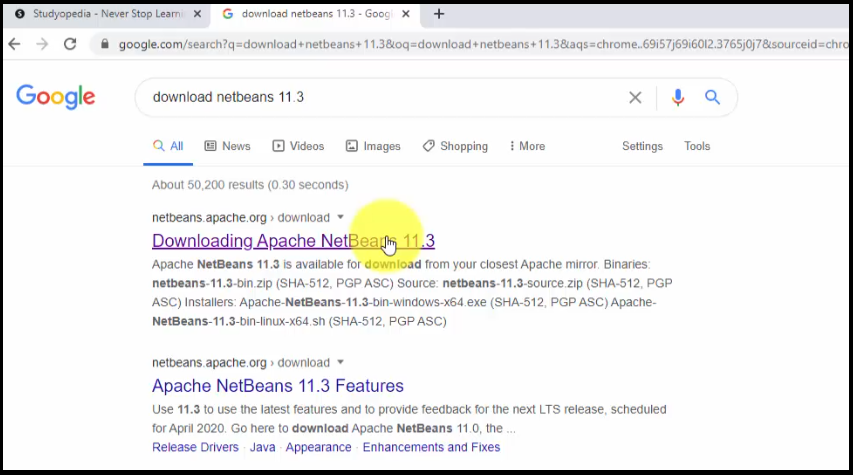
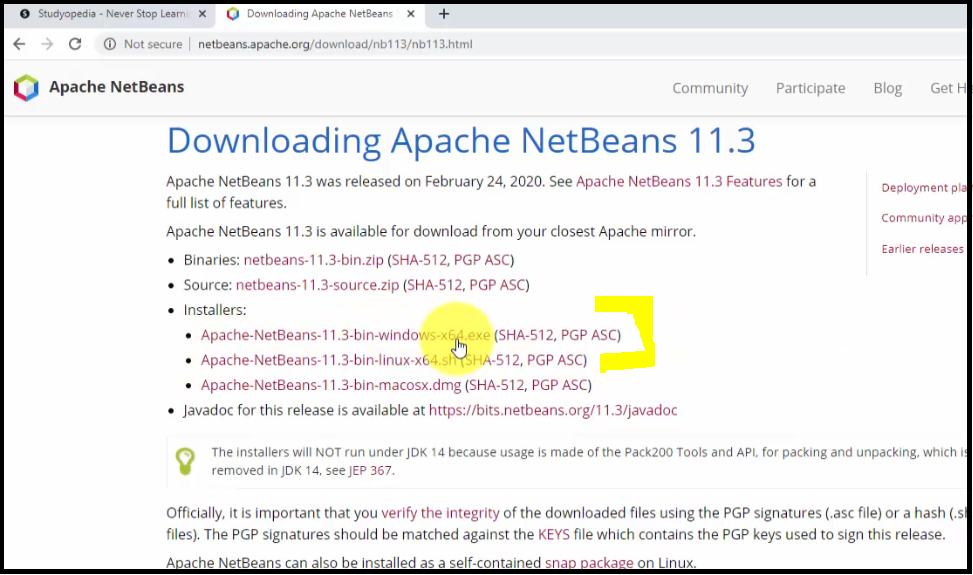
Go to Google and type Download NetBeans IDE 11.3. On typing, the official website of NetBeans i.e. “netbeans.apache.org” would be visible on the top of search results. Click on the website to download NetBeans as in the below screenshot:
Now, the official website will open. Click on the Windows exe file i.e. “Apache-NetBeans-11.3-bin-windows-x64” file since we have to install NetBeans IDE on Windows 10:
Now, you will be redirected to mirror sites. Click on any of them to download NetBeans IDE. We click the first one and the Download started as in the below screenshot. The Download status would be visible on the bottom left of Chrome web browser. When the download ends, right click to reach the folder where it installed. We have set the default for Google Chrome downloads to the “Downloads” folder:

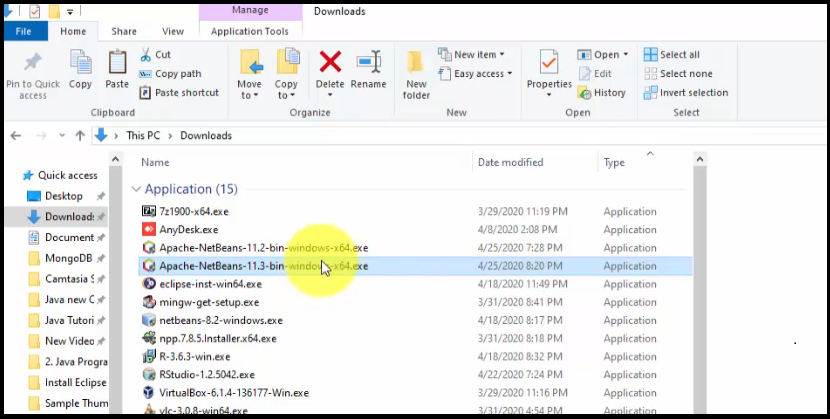
NetBeans installed successfully under “Downloads” folder through Google Chrome as in the below screenshot. Locate the exe file of NetBeans: “Apache-NetBeans-11.3-bin-windows-x64” file:
Now, let us move to Step 3 and begin installing NetBeans.
Step 3: Installing NetBeans IDE
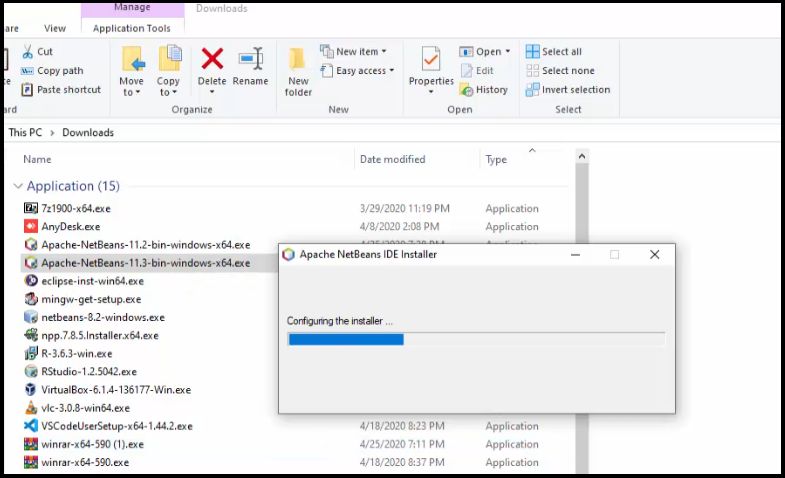
Now, we will be installing NetBeans IDE. Double click the exe file we downloaded in Step2 and the installation begins as in the below screenshot:
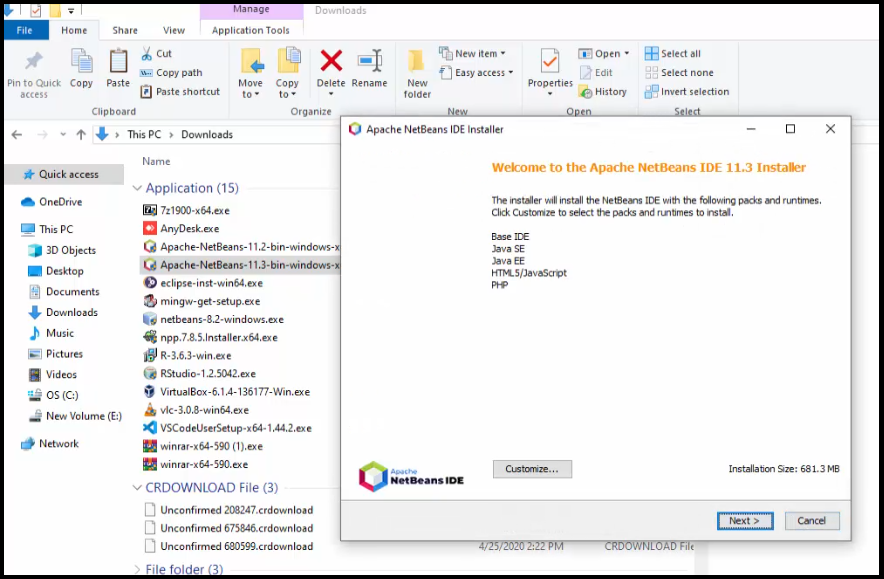
Now, you will reach the following installation dialog box (NetBeans Installer) showing what all will get installed with the installer size.
Note: You may get NetBeans installation error here. Do not worry, check our tutorial to fix NetBeans installation error.
Click “Next” to proceed:
Now, let us move to Step 4 and set the path.
Step 4: Set NetBeans and Java path
Now, set the path for NetBeans i.e. where you want to install it. We will keep the default i.e. under Program Files we will set the NetBeans path. Following is the path:
C:\Program Files\NetBeans-11.3
Here, you can also see we need to set the path for JAVA JDK installation. This is the reason why we need to install Java before installing NetBeans IDE. Set the same path we saw under step 1 above while Installing Java i.e. he following Java path:
C:\Program Files\Java\jdk-13
Screenshot shows the same paths:

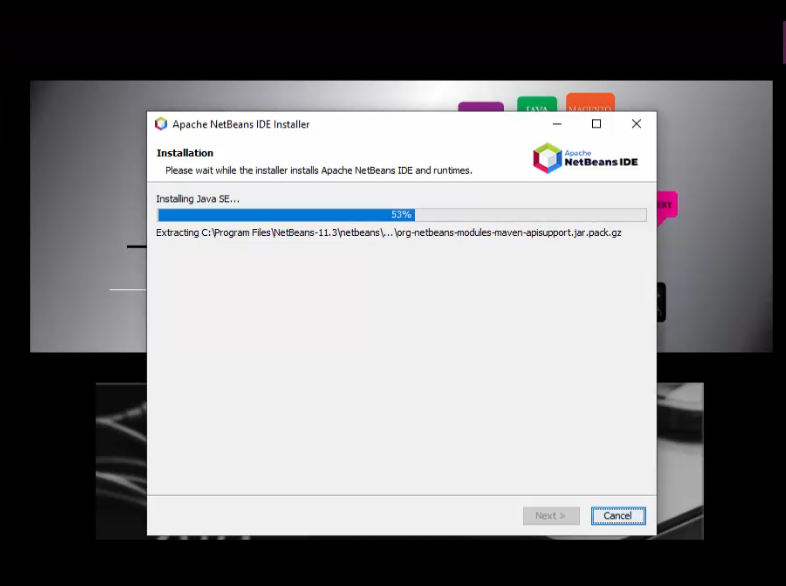
After, that click “Next” and the installation continues. Now, the summary of installer is visible. Click on “Install” as in the below screenshot:

Now, installation continues. This is the final step:
Installation completed successfully and Desktop Shortcut created as in the below screenshot:
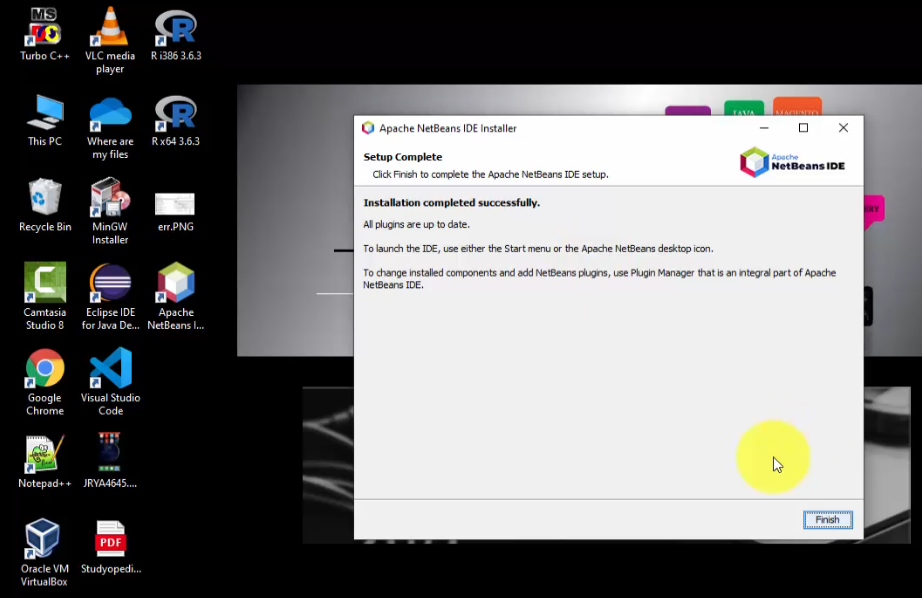
Click “Finish” above to close the dialog box.
Step 5: Launch NetBeans after installation
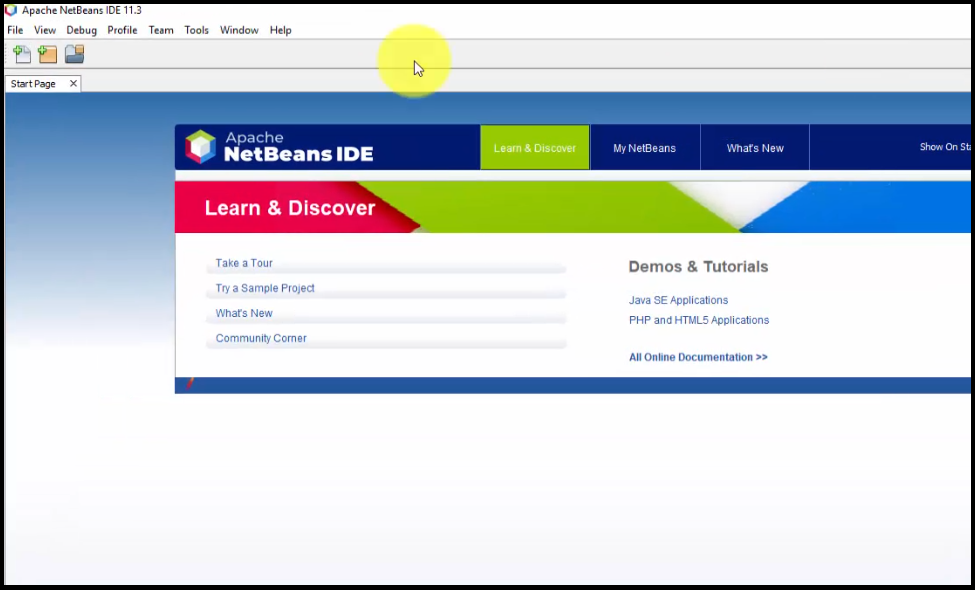
After that, click the “Desktop Shortcut” to launch NetBeans as in the below screenshot:

NetBeans opened successfully for the first time after installation as in the below screenshot:
In this article, we saw how to install NetBeans on Windows 10 after installing Java. While installing, we also set the Java path.
If you liked the NetBeans tutorial, spread the word and share the link and our website Studyopedia with others.
Support us: DONATE
Read More:
Akash
Posted at 19:01h, 28 MayThanks a lot. It helps me a lot!
kygs
Posted at 19:41h, 18 OctoberThis was really useful to help me install Java and also NetBeans. I installed different versions to the ones mentioned in the instructions (Java 17 and NetBeans 15) but the instructions were essentially the same and really useful i.e. making sure to install Java first and set up the Java Path. Thanks for this tutorial.