21 Jul Padding in Android Layout
In the previous lesson, we learned how to work with Margin in Android Layouts. In this lesson, we will learn how to work with Padding in Android Layout. Padding is within the view and expressed in Android in pixels for the left, top, right and bottom parts of the view.
Here, we will learn what is padding and how it can be worked easily on Android layout. Demo app will be shown to make it easy for a Beginner to understand.
Let’s start with the following illustration, explaining the concept of Padding in Linear Layout. Here the text Studyopedia, is our TextView text. Whereas, the Gray rectangular Box is the space for our View TextView.
A widget in Android occupies a rectangular space. Black line shows padding,
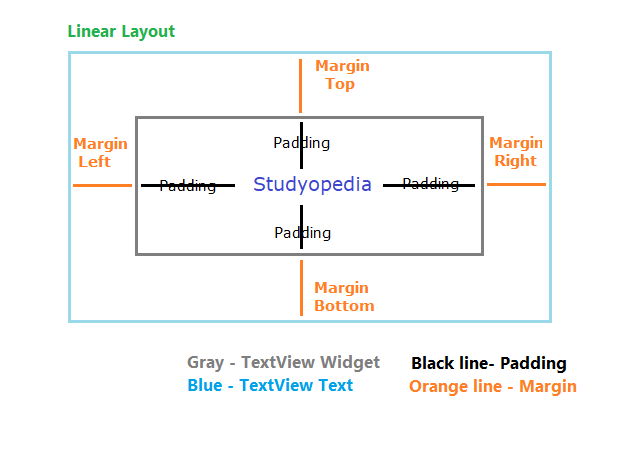
For example, a right padding of 2 will push the view’s content by 2 pixels to the left of the right edge.
The following methods are used to set padding,
setPadding(int, int, int, int): Sets Padding
setPaddingRelative(int, int, int, int): Sets relative padding
Let’s learn about the above two methods,
Android setPadding(int, int, int, int) method
It sets the padding. Here’s the syntax for setPadding() method,
void setPadding (int left, int top, int right, int bottom)
Here,
left: left padding in pixels
top: top padding in pixels
right: right padding in pixels
bottom: bottom padding in pixels
Android setPaddingRelative(int, int, int, int) method
It sets the relative padding. Here’s the syntax for setPaddingRelative() method,
void setPaddingRelative (int start, int top, int end, int bottom)
Here,
start: start padding in pixels
top: end padding in pixels
end: end padding in pixels
bottom: bottom padding in pixels
Padding can be queried by calling the following methods. The methods return the padding value of this view,
| Method | Description |
|---|---|
| getPaddingLeft() | It returns the left padding. |
| getPaddingTop() | It returns the top padding. |
| getPaddingRight() | It returns the right padding. |
| getPaddingBottom() | It returns the bottom padding. |
| getPaddingStart() | It returns the start padding depending on its resolved layout direction. |
| getPaddingEnd() | It returns the end padding depending on its resolved layout direction. |
Example
Time for some examples of the usage of padding in Android, with the emulator output.
Note:
If the minSdkVersion is 17 or higher, then
Use paddingStart instead of paddingLeft attribute, &
Use paddingEnd instead of paddingRight attribute.
If the minSdkVersion is 16 or less, then
Use both older paddingLeft and paddingStart attribute, &
paddingRight and paddingEnd attribute.
Let’s say, you have the following code for TextView, without padding,
<TextView
    android:layout_width="wrap_content"
    android:layout_height="wrap_content"
    android:text="Learn"
    android:textSize="30sp"
    android:textStyle="bold"
    android:id="@+id/textView"
    android:textAlignment="center"
    android:layout_alignParentEnd="true"
    android:layout_alignParentRight="true"
    android:layout_alignParentStart="true"
    android:layout_alignParentLeft="true" />
Here’s the output,
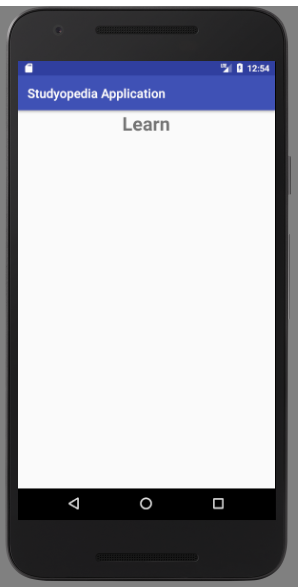
Let’s now work with the following code for TextView with padding. We are adding the following to our code: android:padding=”100dp”
<TextView
    android:layout_width="wrap_content"
    android:layout_height="wrap_content"
    android:text="Learn"
    android:textSize="30sp"
    android:textStyle="bold"
         android:padding=”100dp”
    android:id="@+id/textView"
    android:textAlignment="center"
    android:layout_alignParentEnd="true"
    android:layout_alignParentRight="true"
    android:layout_alignParentStart="true"
    android:layout_alignParentLeft="true" />
Here’s the output,
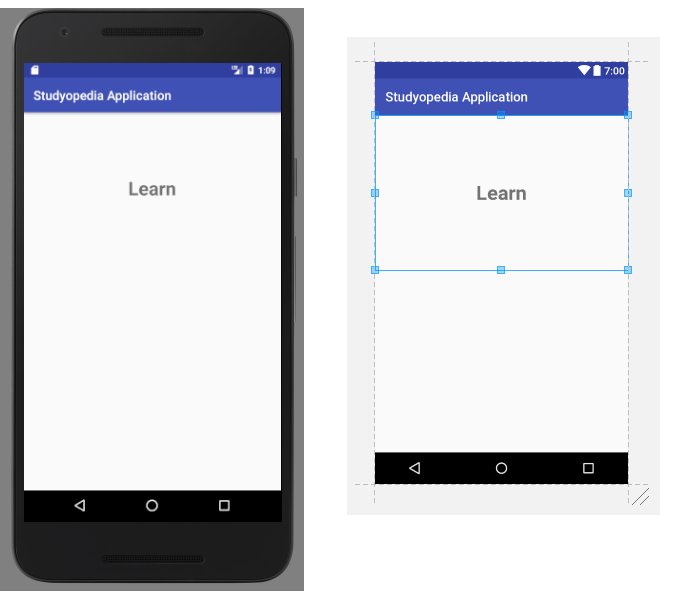
Let’s move further and now add right padding. On adding, the TextView will shift to the left within the view.
We are adding, android:paddingRight=”100dp” and different is easily visible below,
<TextView
    android:layout_width="wrap_content"
    android:layout_height="wrap_content"
    android:text="Learn"
    android:textSize="30sp"
    android:textStyle="bold"
    android:id="@+id/textView"
    android:paddingRight=”100dp”
    android:textAlignment="center"
    android:layout_alignParentEnd="true"
    android:layout_alignParentRight="true"
    android:layout_alignParentStart="true"
    android:layout_alignParentLeft="true" />
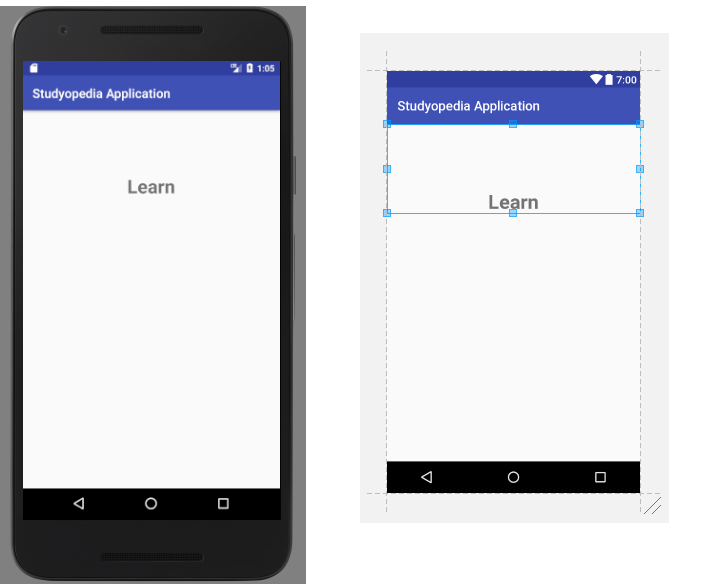
Here’s the output,

Let’s move further and now add left padding. On adding, the TextView will shift to the right within the view.
We are adding, android:paddingLeft=”100dp” and different is easily visible below,
<TextView
    android:layout_width="wrap_content"
    android:layout_height="wrap_content"
    android:text="Learn"
    android:textSize="30sp"
    android:textStyle="bold"
    android:id="@+id/textView"
    android:paddingLeft=”100dp”
    android:textAlignment="center"
    android:layout_alignParentEnd="true"
    android:layout_alignParentRight="true"
    android:layout_alignParentStart="true"
    android:layout_alignParentLeft="true" />
Here’s the output,

Let’s move further and now add top padding. On adding, the TextView will shift to the bottom within the view.
We are adding, android:paddingTop=”100dp” and difference is easily visible below,
<TextView
    android:layout_width="wrap_content"
    android:layout_height="wrap_content"
    android:text="Learn"
    android:textSize="30sp"
    android:textStyle="bold"
    android:id="@+id/textView"
    android:paddingTop=”100dp”
    android:textAlignment="center"
    android:layout_alignParentEnd="true"
    android:layout_alignParentRight="true"
    android:layout_alignParentStart="true"
    android:layout_alignParentLeft="true" />
Here’s the output,
In this article, we saw how to work with Padding in Android with a live running Android Application as an example.
If you liked the tutorial, spread the word and share the link and our website Studyopedia with others.
For Videos, Join Our YouTube Channel: Join Now
Recommended Posts:
- Margin in Android Layout
- What is Gradle?
- Android Architecture
- Android Gravity Concepts
- Android Quiz
- Android Interview Questions for Freshers
No Comments