24 Sep Train/ Test in a Machine Learning Model
When you build a model, as discussed in the previous lessons, the model is trained. The initial data is split into two i.e. training and test. We train the model, then test the model, and in the end, the model is deployed.
The accuracy of the model is measured using the Train/ Test method or you can say the performance is evaluated.
Why Train/ Test
Let’s say a model performed exceptionally well on the training data, but unfortunately, the performance was poor on new and unseen data. This is called overfitting.
The train/ test process prevents overfitting. Using a separate testing set, we can get a better estimate of the model’s performance in real-world scenarios.
The Training Set and Test Set is what you need to understand while learning Machine Learning. Let’s understand:
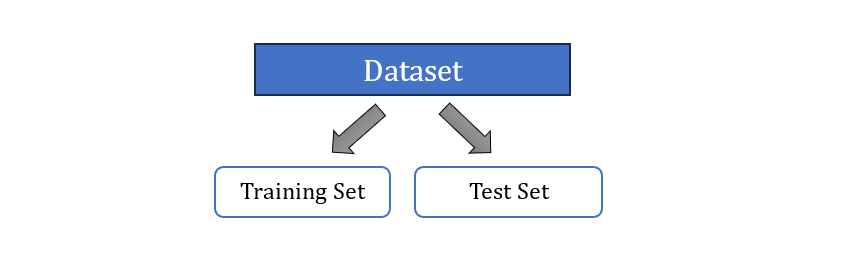
Training Set
As the name suggests, the training dataset is for training. This is labeled data fed to the model and the model is trained (fit) using this training dataset. Out of the complete data, around 75% is considered for training.
Test Set
As the name suggests, the test dataset is to test the model. Here, the ML model is tested using the new data i.e. the model accuracy is tested using the test data. The remaining 25% is the test set i.e. the testing dataset.
Example: Predicting Student Pass/Fail
Let us see an example to predict whether a student will pass or fail based on the number of hours they study. We have divided the example into steps:
- Generate the data
- Split the data
- Train the model
- Test the model
Generate the Data
In our data, the 0 is for fail and 1 for pass. We have placed our data in a Pandas Dataframe:
import numpy as np
import pandas as pd

# Our sample data
data = {
    'Hrs_Studied': [1, 2, 3, 4, 5, 6, 7, 8, 9, 10],
    'Passed': [0, 0, 0, 0, 0, 0, 1, 1, 1, 1]
}

# Pandas Dataframe
df = pd.DataFrame(data)
The dataframe looks like this:
   Hrs_Studied	Passed
0	1	0
1	2	0
2	3	0
3	4	0
4	5	0
5	6	0
6	7	1
7	8	1
8	9	1
9	10	1
Above, each row represents a student.
- The Hrs_Studied column shows the number of hours each student studied.
- The Passed column shows whether the student passed (1) or failed (0).
Split the Data
To split the data, we have used the sklearn.model.selection module’s splitter function train_test_split(). It splits arrays or matrices into random train and test subsets. Let us first see the syntax:
train_test_split(arrays, test_size, train_size, random_state, shuffle, stratify)
Above,
- arrays: This is a sequence of indexables with the same length. Allowed inputs are lists, numpy arrays, scipy-sparse matrices, or pandas dataframes.
- test_size: It can be a float or int.
If float, the range is between 0.0 and 1.0. It is the proportion of the dataset to include in the test split.
If int, represents the absolute number of test samples.
If None, the value is set to the complement of the train size.
If train_size is also None, it will be set to 0.25. - train_size: It can be a float or int.
If float, the range is between 0.0 and 1.0. It is the proportion of the dataset to include in the train split.
If int, represents the absolute number of train samples.
If None, the value is automatically set to the complement of the test size. - random_state: Controls the shuffling of the data before the split.
- shuffle: A bool value. Whether or not to shuffle the data before splitting.
If shuffle=False then stratify must be None. - stratify
If not None, data is split in a stratified fashion, using this as the class label.
Here is the code to split:
from sklearn.model_selection import train_test_split

X = df[['Hrs_Studied']]
y = df['Passed']

train_X, test_X, train_y, test_y = train_test_split(X, y, test_size=0.2, random_state=42)
Above, we have X and y as input values i.e. Pandas Dataframe. Also,
- test_size=0.2: This means 20% of the data will be used for testing, and 80% for training.
- random_state=42: This ensures the reproducibility of the split. The same random state will always produce the same split.
Train the Model
First, we have imported the Logistic Regression Model. This line imports the LogisticRegression class from the sklearn.linear_model module. Logistic Regression is a statistical method for predicting binary outcomes (e.g., pass/fail, yes/no).
from sklearn.linear_model import LogisticRegression
Here, we create an instance of the LogisticRegression class and store it in the variable model. This instance will be used to train the model on our data:
model = LogisticRegression()
Now, the fit method is used to train the model:
model.fit(train_X, train_y)
As shown above, it takes two arguments:
-
- train_X: The training data features (in this case, the number of hours studied).
- train_y: The training data labels (in this case, whether the student passed or failed).
Here is the complete code to train the model:
from sklearn.linear_model import LogisticRegression

model = LogisticRegression()
model.fit(train_X, train_y)
Test the Model
Now, let us make predictions based on the test data.
The below line uses a trained machine learning model (model) to make predictions on the test data (test_X). The predict() method generates the predicted labels for the input data.
predictions = model.predict(test_X)
Import the accuracy metrics. This line imports the accuracy_score function from the sklearn.metrics module. This function is used to calculate the accuracy of the model’s predictions.
from sklearn.metrics import accuracy_score
Now, let us calculate the accuracy. The accuracy_score() function compares the true labels (test_y) with the predicted labels (predictions). It calculates the proportion of correctly predicted labels out of the total number of labels:
accuracy = accuracy_score(test_y, predictions)
The below line prints the accuracy as a percentage. The accuracy value is multiplied by 100 to convert it to a percentage, and :.2f formats the output to two decimal places.
print(f'Accuracy: {accuracy * 100:.2f}%')
Here is the complete code to test the model:
predictions = model.predict(test_X)

from sklearn.metrics import accuracy_score
accuracy = accuracy_score(test_y, predictions)
print(f'Accuracy: {accuracy * 100:.2f}%')
Explanation
- Training Set: The model learns from 80% of the data points.
- Testing Set: The model’s predictions are compared against the remaining 20% of the data points to evaluate its performance.
The model uses the number of hours a student studies to predict whether they will pass or fail. By comparing the predicted outcomes with the actual outcomes in the testing set, we can assess how well the model performs.
If you liked the tutorial, spread the word and share the link and our website Studyopedia with others.
For Videos, Join Our YouTube Channel: Join Now
Read More:
No Comments