15 Sep Create New Java Class in Eclipse
In the previous lessons, we learned how to create new Java project and Java package in Eclipse. Here, we will learn how to create new Java class. A class in Java is a blueprint to held data in the form of variables and member functions. For creating a new Java class, you need to first create a Java project.
Launce Eclipse and go to the File Menu, then
File > New > Class

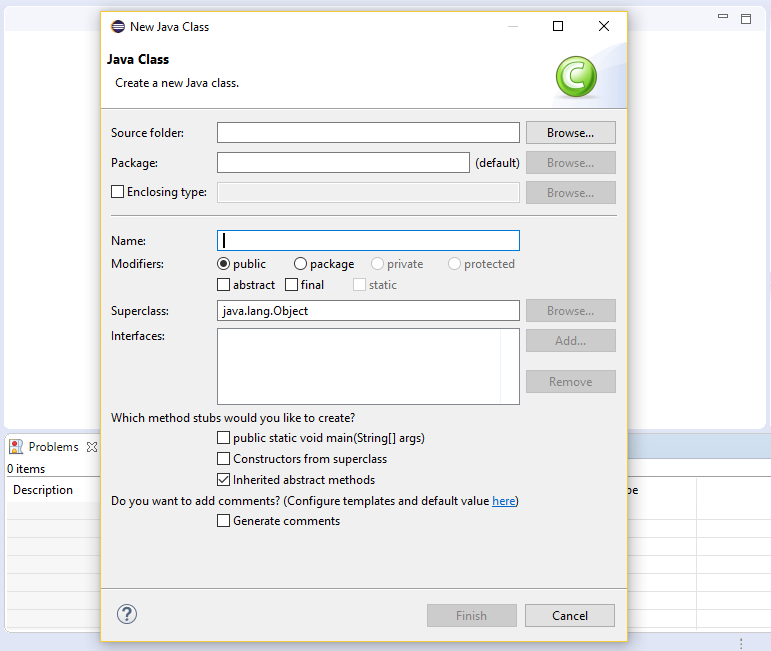
After clicking class above, a new dialog box opens up. It is the wizard to create new Java class in Eclipse.

Here are the options provided by the new Java class wizard,
Source Folder
Enter source folder for the new Java class or click Browse to select from a dialog box.
Package
Mention the package to contain the new class. Add the package name or select one by clicking Browser.
Enclosing type
Choose a type to enclose the new class. Select this or the above Package option.
Name
Here, type the name of the Java class.
Modifiers
Access modifiers such as public, private, protected, abstract, etc. Here, select one of more access modifiers for the new Java class you’re adding.
Superclass
Add a superclass for this class.
Interfaces
Add interfaces by clicking Add. These interfaces are the one, which the new class implements.
Which method stubs would you like to create?
Select the method stubs to create in this new class:
- public static void main(String [] args): A main method stub to the new class.
- Constructors from superclass: On selecting this, it copies the constructors from the new class’s superclass. Adds these stubs to the new class.
- Inherited abstract methods: It adds to the new class stubs of any abstract methods
from superclass. - Do you want to add comments? The wizard adds comments to the new class, if this option is selected.
Demo Java Class in Eclipse
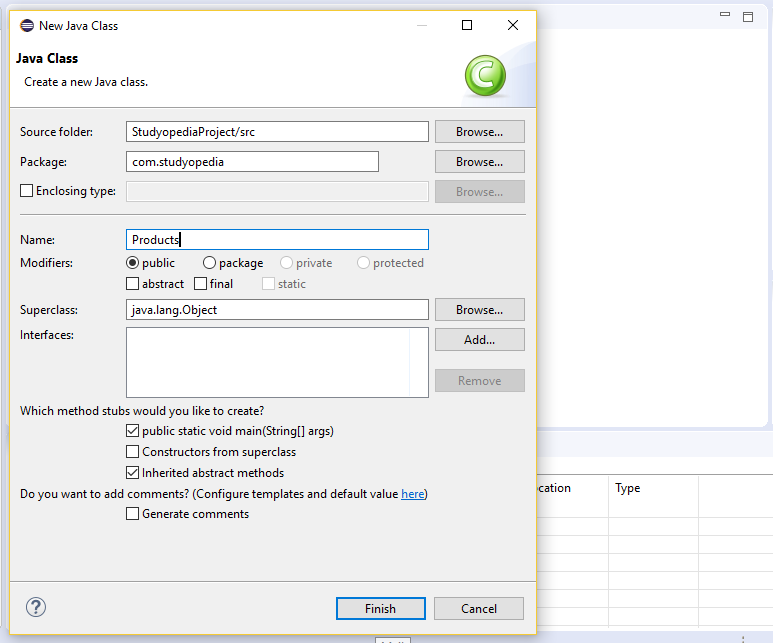
For demo, we will be creating a Java class inside the same project and package we created before. Go to File > New > Java Class and fill the details for the new Java class,

The name of our project is StudyopediaProject, which we created before. We added a new package in it i.e. com.studyopedia.
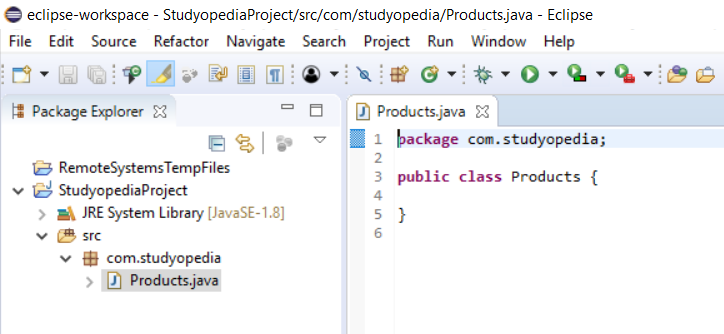
Now, we’re adding a new Java class, with name Products. You can give any name to it. After clicking Finish above, the Java class gets created successfully as shown below,

We have till now created project, package and class in Eclipse. The project name is StudyopediaApplication and the package is com.studyopedia. The class we added in this lesson is Products.
Let us now see a video describing how to create a Java class in Eclipse with step-by-step implementation,
Support Studyopedia: DONATE
In the next lesson, we will learn how to create new Java Interface in Eclipse.


No Comments