15 Jul How to add SSL to WordPress Website (http to https)
SSL is Secure Sockets Layer, a protocol to secure a website and provides a reliable channel for Internet Communications. The S in HTTPS stands for secure i.e. Hyper Text Transfer Protocol Secure. Protocol is also called HTTP over SSL or HTTP over TLS, since Transport Layer Security’s (TLS) predecessor was Secure Sockets Layer (SSL), Here, we will learn about the following about SSL and a solution to simply add SSL to WordPress website,
- What is SSL?
- Why do we need SSL?
- Where SSL is used?
- Install SSL on website
- Steps to add SSL to WordPress website
Let’s start!

What is SSL (Secure Socket Layer)
Online environment i.e. the web world needs to be secure. For security, an encryption protocol was needed between the web server and web browser for customers making payments, securing emails, etc. Initially, it lead to the introduction of secure connections and now it is more useful for securing accounts, purchasing online from E-commerce websites, building authenticity, etc.
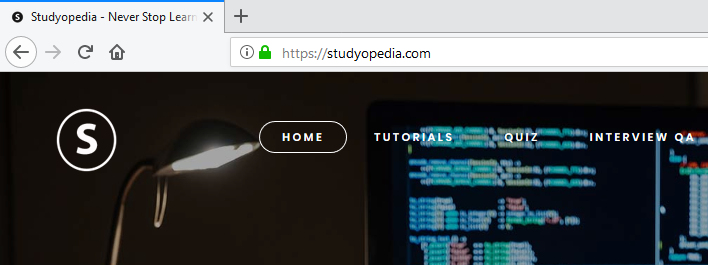
A lot of websites these days are https, instead http. These HTTPS websites are websites with Secure Sockets Layer (SSL) certificate. If you see the following (lock sign) in the address bar, it states that the website is secured with SSL,
Let’s now see why we need SSL on our website.
Why do we need SSL
SSL is a must these days, since it helps in the following ways,
- It makes the data transmission between browser to server and server to server more secure.
- Makes sure the server connection is safe, secure and avoid unauthorized access.
Where SSL is used
SSL makes security a priority and useful in the following applications/ areas,
- Online Transactions such as Net Banking, credit card, debit card, etc more secure with SSL.
- Email communications such as using Microsoft Outlook on the web, Microsoft Exchange Server, Office 365, etc.
- Making payments while purchasing online on E-Commerce websites.
- Connecting database between internal networks.
- Sending and receiving files to/ from the website using FTP.
- Login to webmail and cPanel for login to your website cPanel.
- Remote file sharing
- Transferring files such as images, video, PDF, documents, etc on a website.
Let’s now see how to get an SSL certificate.
Install SSL on Website
For SSL, you need to contact your Certificate Authorities. These authorities such as Comodo, GoDaddy, Let’s Encrypt, etc are trusted to provide valid certificates. Hosting providers such as GoDaddy, SiteGround, etc also provide SSL certificates. Buy SSL certificate from there itself and inform the hosting provider. Here are some SSL certificates provided by GoDaddy,
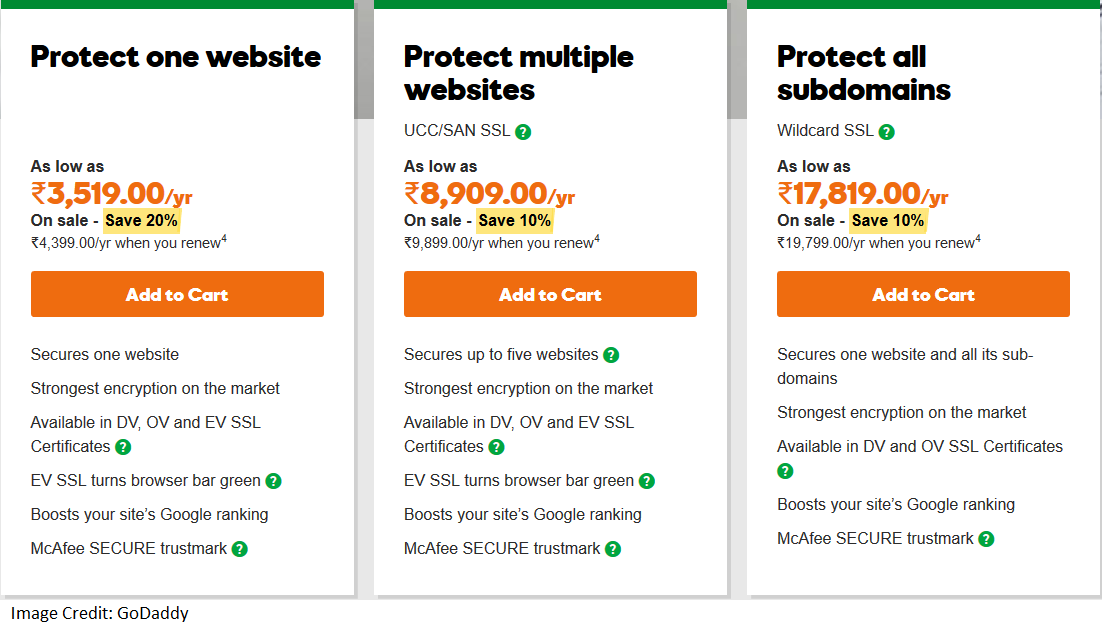
Select any of the certificate according to your need and contact the customer support of the hosting provider. They will install the SSL certificate on your website after receiving the payment.
Note: In the same way, you can get SSL Certificate from your hosting provider such as SiteGround, Hostgator, etc.
After installation, follow the below given steps to convert your http website to https,
Edit .htaccess
Edit the .htaccess file and redirect URL from http to https.
Go to the root of your website and update the .htaccess file to,
|
1 2 3 4 5 6 7 |
<IfModule mod_rewrite.c> RewriteEngine On RewriteCond %{SERVER_PORT} 80 RewriteRule ^(.*)$ https://www.example.com/$1 [R,L] </IfModule> |
Now, we will learn how to update URLs on the WordPress website i.e. http to https.
Update URLs
The URLs on the website are still pointing to http. You need to update it to https. For that, follow the below given steps,
Firstly, login to the WordPress website as an admin and reach the WordPress Dashboard.
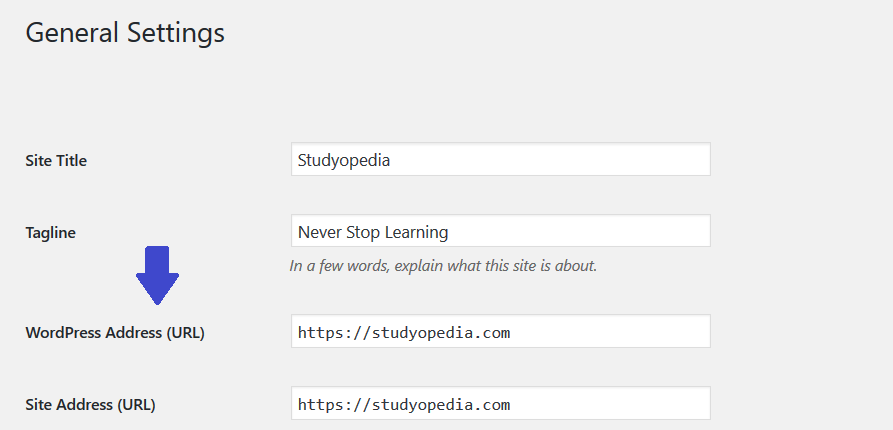
Go to Settings > General, then
1. Update WordPress Address: http to https
2. Update Site Address: http to https
To update all the URLs, you can try the Velvet Blues Update Urls WordPress Plugin. Install the plugin, go to Tools and click Update Urls,

Now, you will reach the section to update URL,
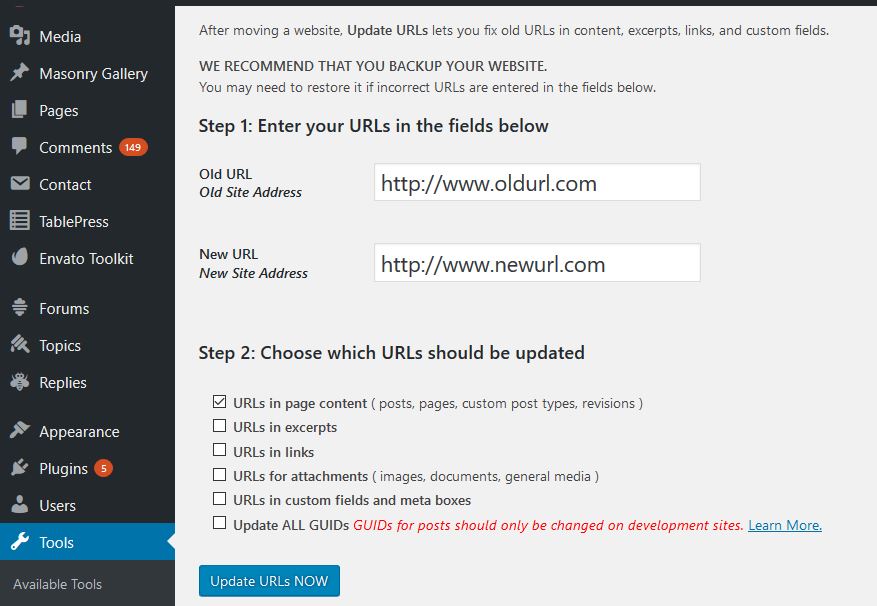
Add the old and new URL, choose which all URL you want to update, for example, attachments, posts, pages, links, etc.
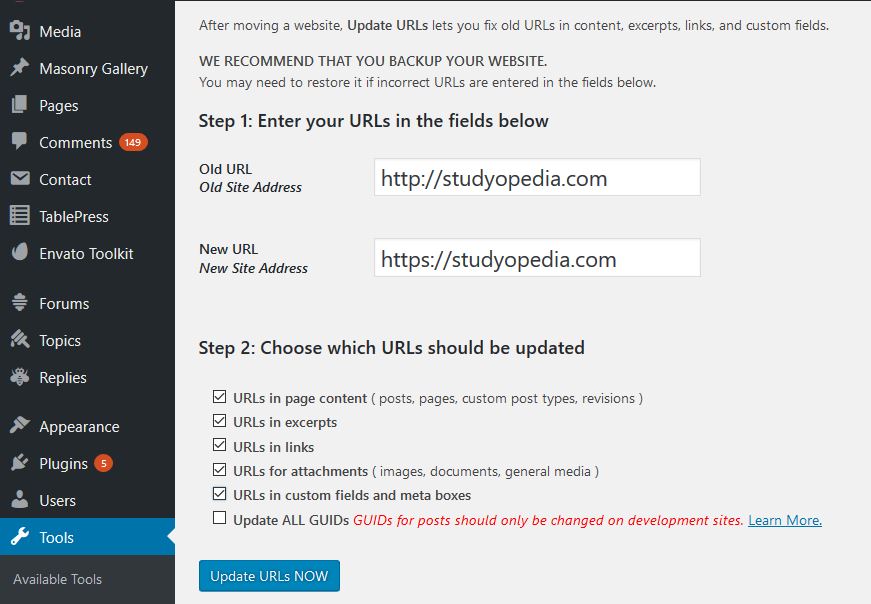
Connection Secured
After installing and following the above steps, you may see the following while opening your website,

Connection is Not Secure Error
However, on navigating to other pages of the website, you may see the following error “Connection is Not Secure”. It states the mixed content issues i.e. some pages (like images) still do not have https,

You can also use Really Simple SSL Plugin on your WordPress website.
Really Simple SSL WordPress Plugin
Do not worry if you face issues while setting up SSL for mixed content. Install the Really Simple SSL plugin and configure it,
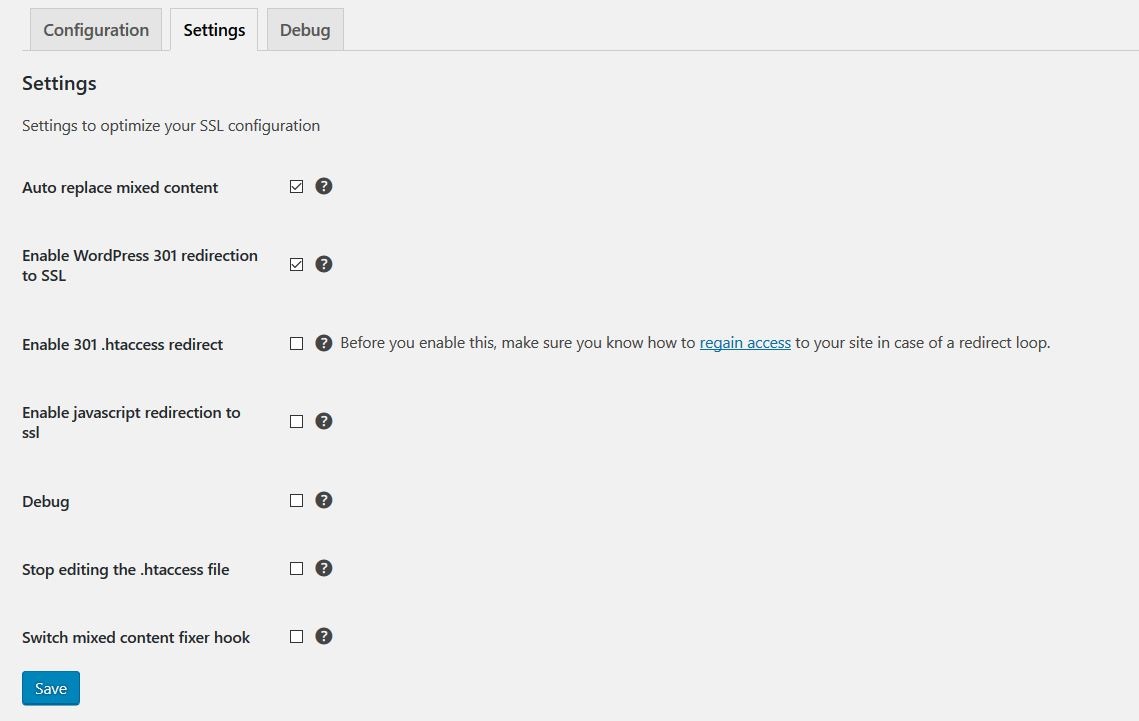
After correctly configuring the settings, click “Ready to migrate to switch to SSL” to begin the migration from http to https,
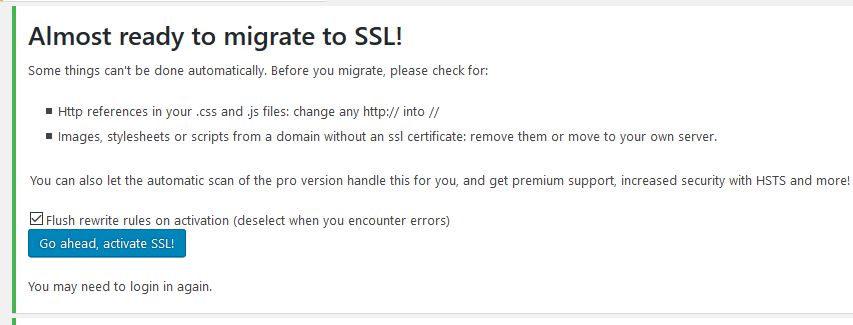
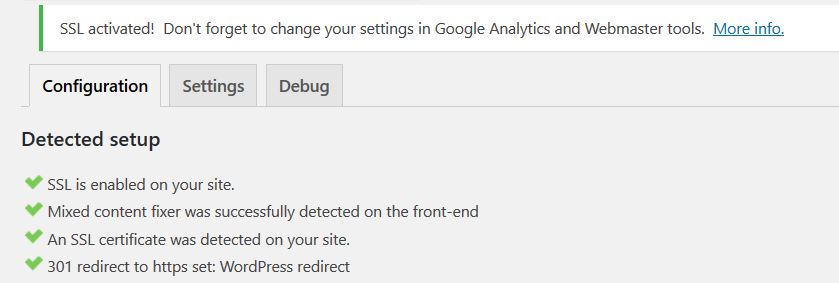
After clicking above, you will get the following success message, SSL activated successfully on the WordPress website,
We learned how to update http website to https i.e. how to add SSL to WordPress Website . If you’re facing trouble while adding SSL to your website, then please let us know here.


No Comments