03 Aug Android Button Control
Android Button control represents a push-button that can be pressed, or clicked to perform an action. Generally, while using an app, we see many buttons and being a user to initiate an action, we click one at a time.
Usage
Button can be an OK, Submit, or any other that initiates an action. For example, in the below figure 4 buttons are visible.
Create any number of buttons and initiate a listener, so that you can initiate an event on button click,

Example
Here’s a simple example showing the working on Android Button on Android Studio. Here, we will be showing a message on button click.
If you’re beginning with Android, then learn how to run your first Android app in Android Studio.
Let’s start with the usage of Android Button control.
MainActivity.java
The src\main\java\com\studyopedia\studyopediaapplication\MainActivity.java is a java class which sets the views. Here we will set the View to be displayed with the setContentView.
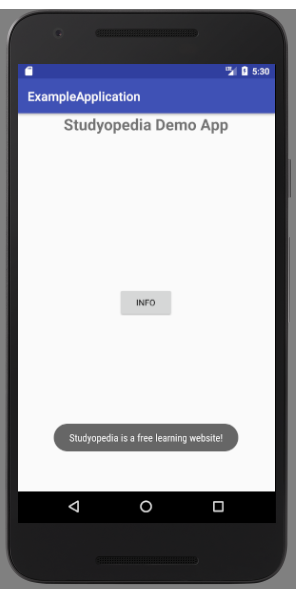
On button click, a toast will appear with a message “Studyopedia is a free learning website!”. Toast in Android is a notification message that is visible in the form of popup.
package com.studyopedia.exampleapplication;

import android.support.v7.app.AppCompatActivity;
import android.os.Bundle;
import android.view.View;
import android.widget.Button;
import android.widget.Toast;

public class MainActivity extends AppCompatActivity {

    private Button button1;
    @Override
    protected void onCreate(Bundle savedInstanceState) {
        super.onCreate(savedInstanceState);
        setContentView(R.layout.activity_main);

        button1 = (Button)findViewById(R.id.buttonInfo);
        button1.setOnClickListener(new View.OnClickListener() {
            @Override
            public void onClick(View v) {
                Toast.makeText(getApplicationContext(),"Studyopedia is a free learning website!",Toast.LENGTH_LONG).show();
            }
        });
    }
}
activity_main.xml
The activity file is located under the following directory: src\main\res\layout\activity_main.xml.
We’ll add our UI content here, 1 TextView and 1 Button,
<?xml version="1.0" encoding="utf-8"?>
<RelativeLayout xmlns:android="http://schemas.android.com/apk/res/android"
    xmlns:tools="http://schemas.android.com/tools"
    android:layout_width="match_parent"
    android:layout_height="match_parent"
    tools:context="com.studyopedia.exampleapplication.MainActivity">

    <TextView
        android:layout_width="30dp"
        android:layout_height="33dp"
        android:text="@string/title"
        android:textSize="25sp"
        android:id="@+id/textView"
        android:textAlignment="center"
        android:layout_alignParentEnd="true"
        android:layout_alignParentStart="true" />

    <Button
        android:layout_width="wrap_content"
        android:layout_height="wrap_content"
        android:text="@string/information"
        android:id="@+id/buttonInfo"
        android:layout_gravity="center_vertical"
        android:layout_centerVertical="true"
        android:layout_centerHorizontal="true" />

</RelativeLayout>
AndroidManifest.xml
The content of \src\main\AndroidManifest.xml, provides key information of your app to the system. The system needs this to run your code,
<?xml version="1.0" encoding="utf-8"?>
<manifest xmlns:android="http://schemas.android.com/apk/res/android"
    package="com.studyopedia.exampleapplication">

    <application
        android:allowBackup="true"
        android:icon="@mipmap/ic_launcher"
        android:label="@string/app_name"
        android:roundIcon="@mipmap/ic_launcher_round"
        android:supportsRtl="true"
        android:theme="@style/AppTheme">
        <activity android:name=".MainActivity">
            <intent-filter>
                <action android:name="android.intent.action.MAIN" />

                <category android:name="android.intent.category.LAUNCHER" />
            </intent-filter>
        </activity>
    </application>

</manifest>
strings.xml
Here’s the code for res/values/strings.xml. The app name and any hardcoded strings will be visible.
We hardcoded string “Studyopedia Demo App” and used @string/title in activity_main.xml. Here, it gets mentioned under <resources>,
<resources>
    <string name="app_name">ExampleApplication</string>
    <string name="title">Studyopedia Demo App</string>
    <string name="information">Info</string>
</resources>
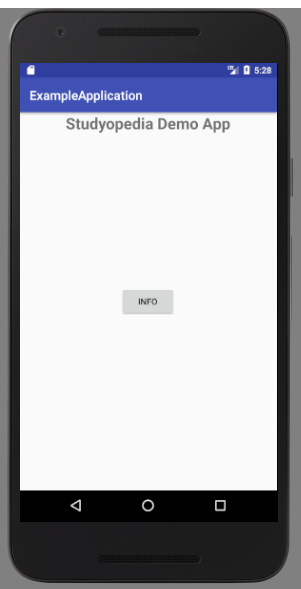
Output
We created an AVD, so now we will run our app using the same AVD. Go to Run > Run app or press the run button or Shift + F10. This will install your app on the AVD and the following emulator with your app opens up,
On button click, a toast appears with the message,
If you liked the tutorial, spread the word and share the link and our website Studyopedia with others.
For Videos, Join Our YouTube Channel: Join Now
No Comments