26 Mar How to Install MySQL on Windows 10/ 11
In this post, we will see how to download and install MySQL on Windows 10/ 11. The current version is MySQL 8.0.42. We will also install MySQL Workbench.
Before moving further, we’ve prepared a video tutorial to install MySQL on Windows 10/ 11:
Let us first see the pre-requisites:
Pre-requisites
For MySQL to work correctly, at first you need to install Microsoft Visual C++ Redistributable for Visual Studio 2019. Let us download Microsoft Visual C++ Redistributable for Visual Studio 2019.
Visit the above link and go to Other Tools, Frameworks, and Redistributables and download as shown below:
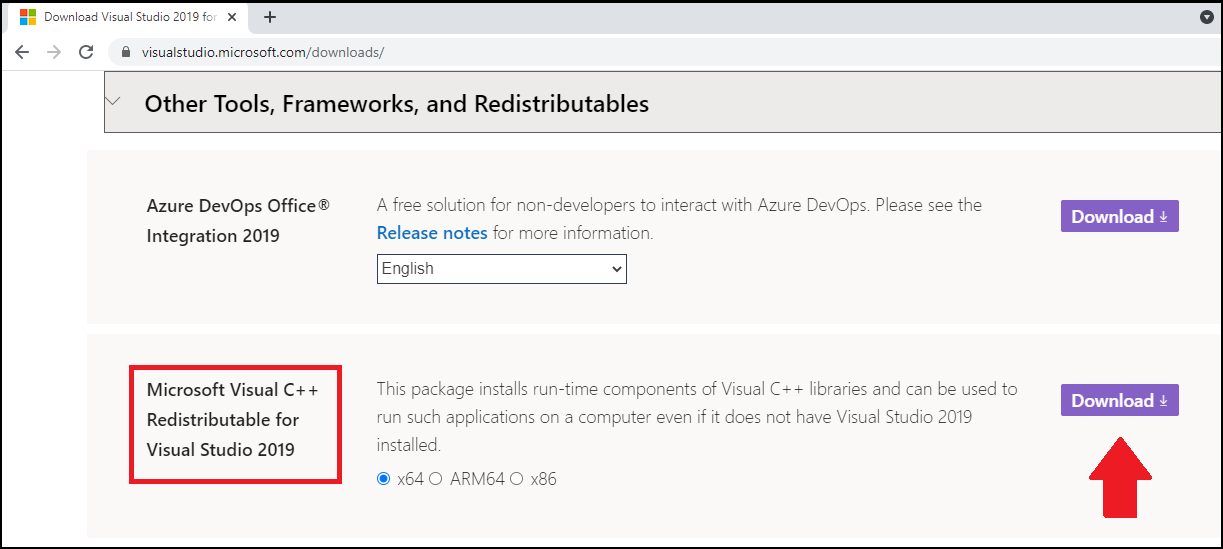
After downloading, install the Redistributable on your Windows 10 system.
Download MySQL
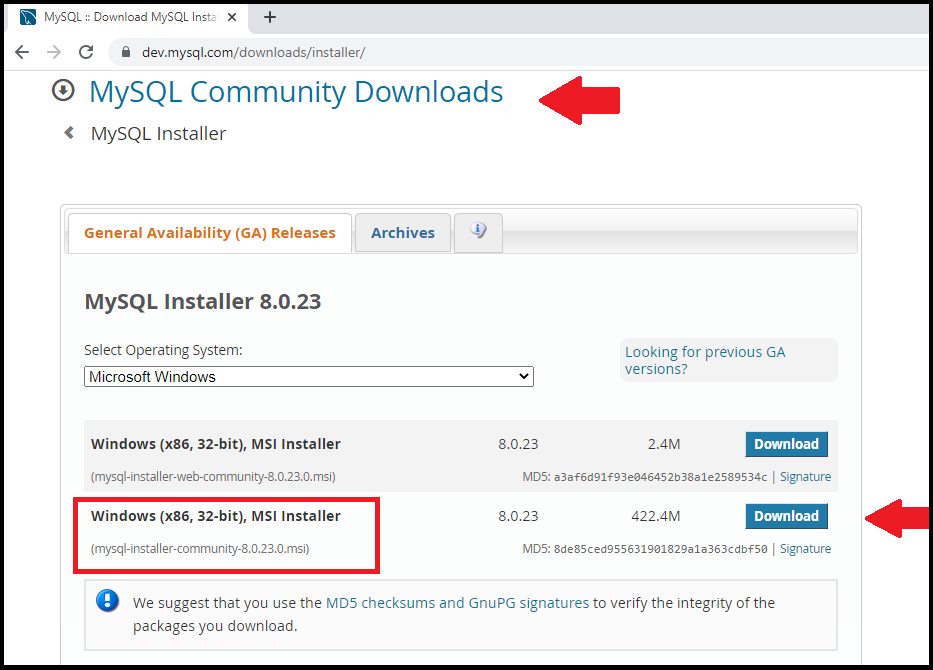
Step 1: Let us begin downloading the MySQL .msi file. To download the MySQL installer, visit the below link:
https://dev.mysql.com/downloads/installer/
From the link, go to “MySQL Community Downloads”, click the following MySQL version, and download “mysql-installer-community-8.0.23.0.msi”:
Install MySQL on Windows 10
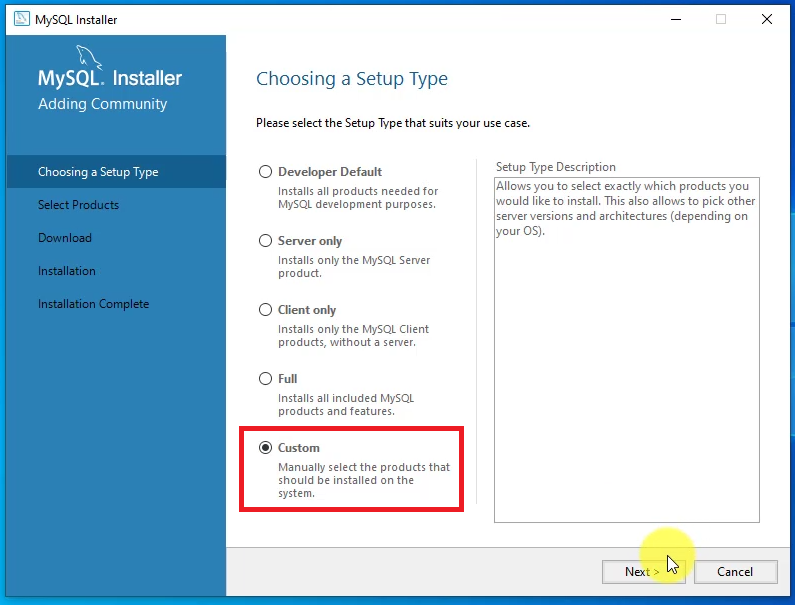
Step 2: After downloading “mysql-installer-community-8.0.23.0.msi”, double click on the exe file. Installation begins, and you will reach the “Choosing a Setup Type” dialog box.
Select “Custom” and click Next:
Step 3: Now, you will reach the “Select Products” section.
Drag and drop the following from “Available Products” to “Products To Be Installed”:
- MySQL Server
- MySQL Workbench
- MySQL Shell
Here’s the screenshot:
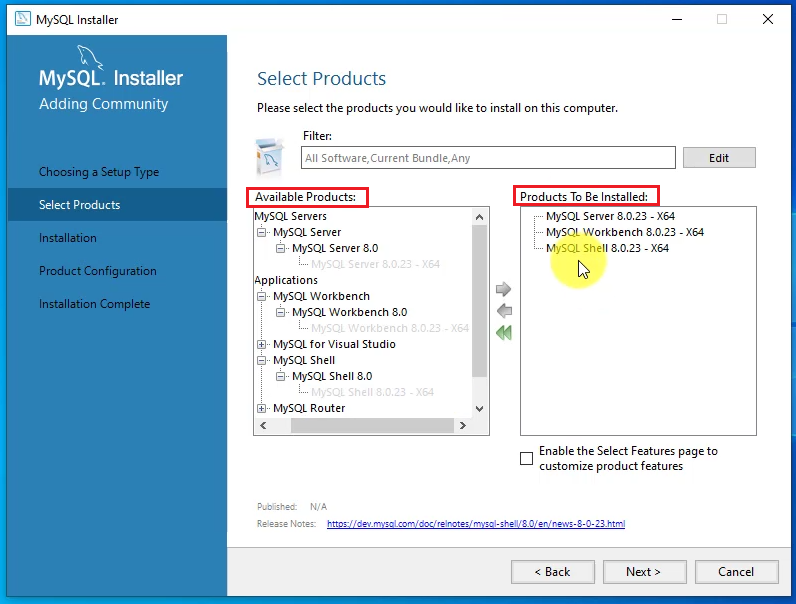
After dragging all 3 as shown above, click “Next”.
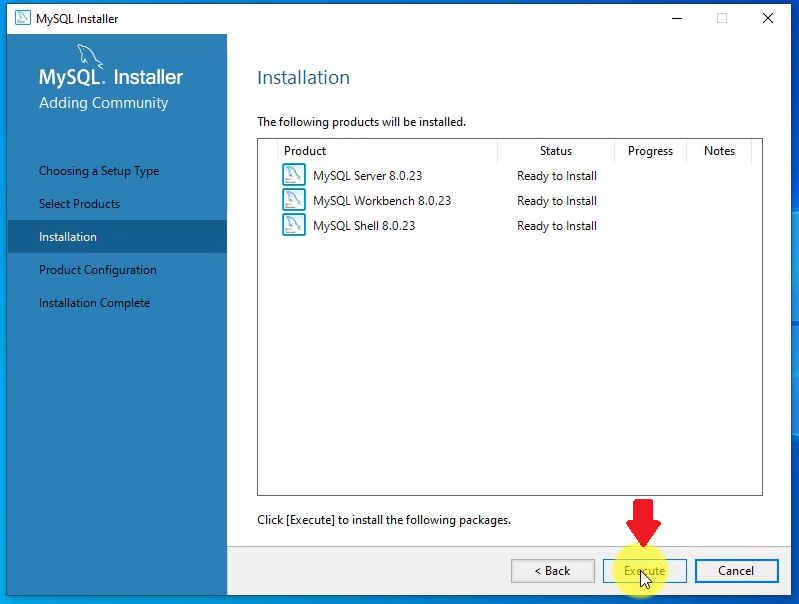
Step 4: Now, on clicking “Execute”, all the 3 products will get installed one by one:
Step 5: After execution completes, click “Next” and configure.
Now, you will reach the “Type and Networking” dialog box. Keep it as it is and click “Next”:

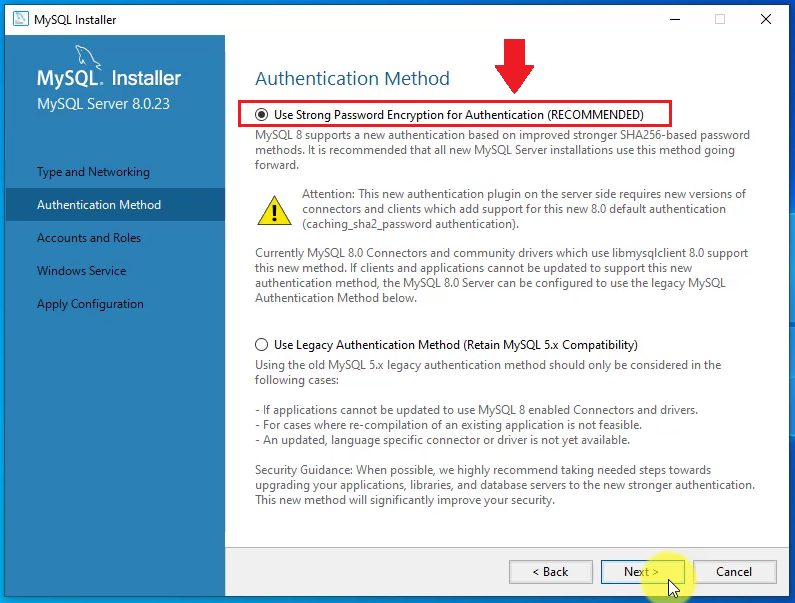
Step 6: Now, you will reach the “Authentication Method” section.
Select “Use Strong Password Encryption for Authentication (RECOMMENDED) and click Next as in the below screenshot:
Step 7: Now, you will reach the “Accounts and Roles” section.
Enter a password of your choice under “MySQL Root Password” and click “Next”:
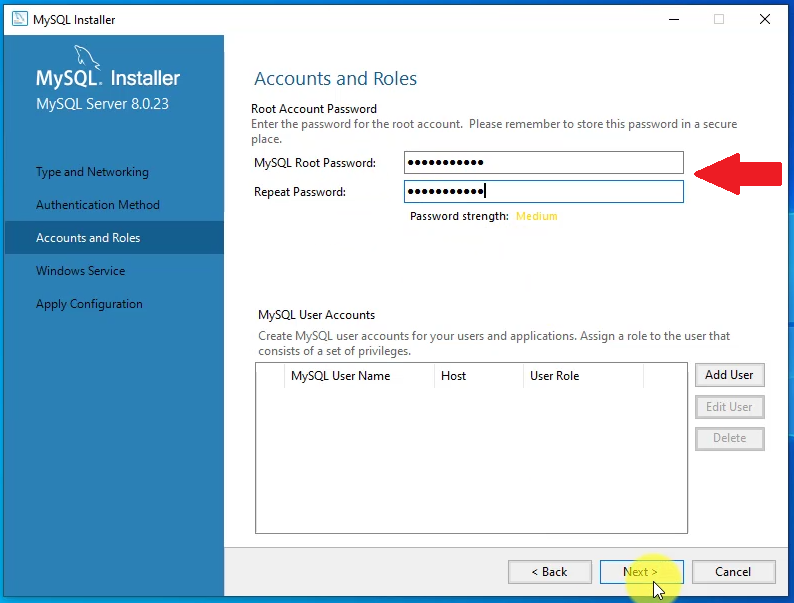
Above, you can also add a new user, but we will keep it the default i.e. root.
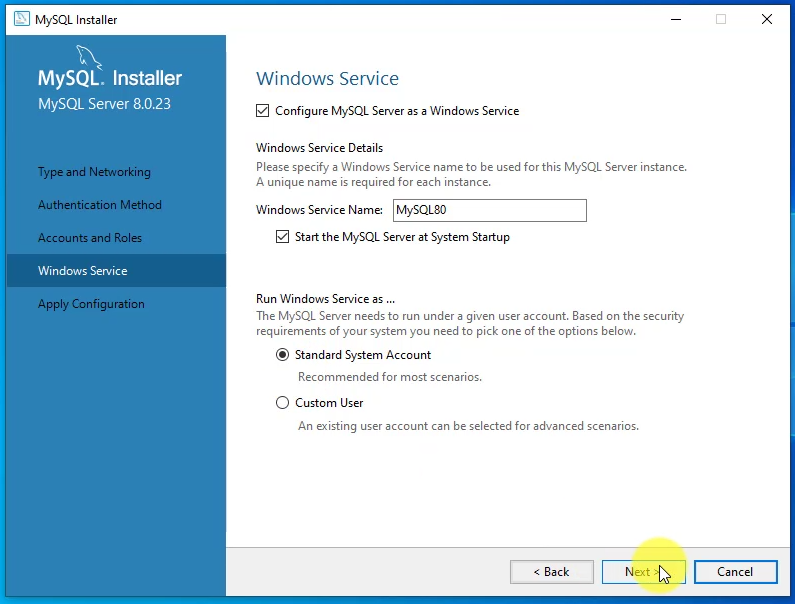
Step 8: Now, the “Windows Service” section can be seen. Keep it as it is and click “Next”.
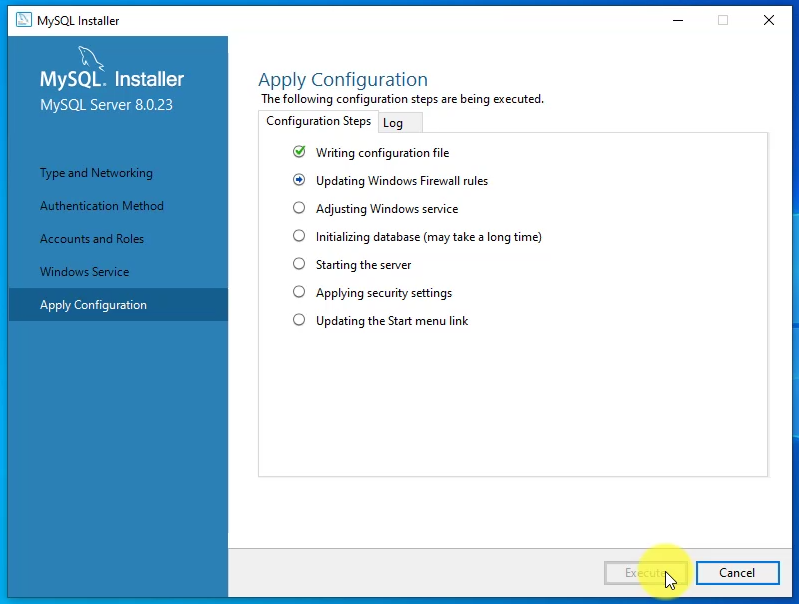
Step 9: The “Apply Configuration” section is visible.
Click “Execute” to apply the confirmation steps as shown below:
Step 10: All the steps executed successfully with tick marks and MySQL installed as shown below:
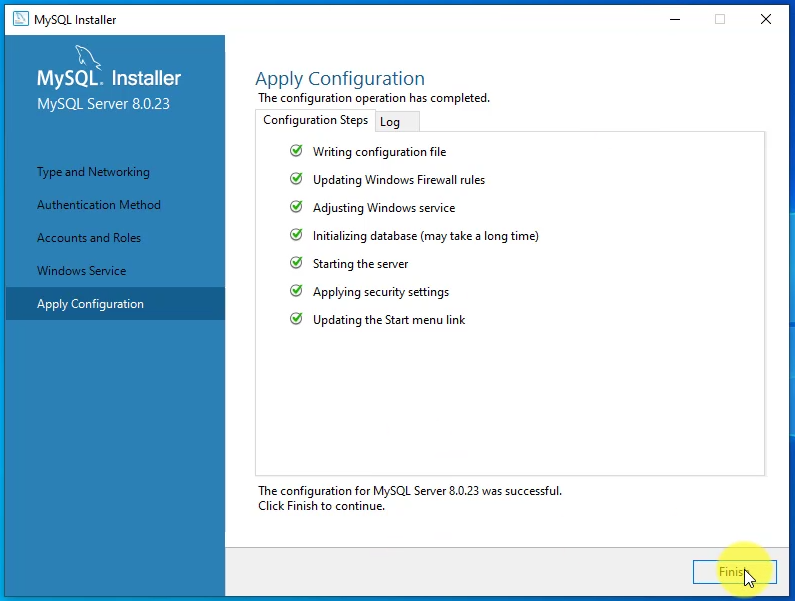
Click “Finish”
Step 11: On reaching the next step, it automatically selected “Start MySQL Workbench” and “Start MySQL Server”. Keep it as it is and click “Finish”:

The above will begin with the “MySQL Server” and “MySQL Workbench”.
Click on “Local instance MYSQL80” and enter the same password you created in Step 7 above:
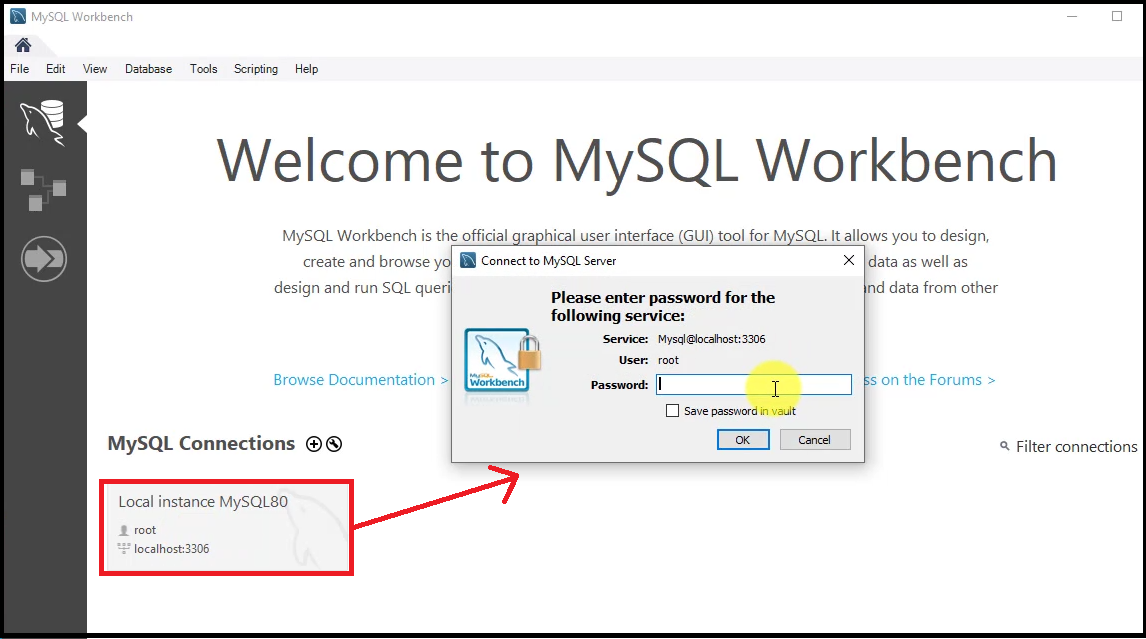
After entering the password, click OK and you will enter Workbench.
Follow the below videos for MySQL Server and Workbench:
- Create a new database and table in MySQL Workbench
- Create a new database in MySQL
- Complete MySQL Tutorial
If you liked the tutorial, spread the word and share the link and our website Studyopedia with others.
Read More:
No Comments