01 Apr LangChain for RAG – Final Coding Example
For our example, we have implemented a local Retrieval-Augmented Generation (RAG) system for PDF documents. This is a comprehensive implementation that uses several key libraries to create a question-answering system based on the content of uploaded PDFs.
The code snippets in the previous lesson were displayed as the process of LangChain. We will now collaborate it with our complete code.
Here is what our code does:
- Setup and Dependencies: The code installs necessary packages including LangChain, PyPDF, sentence-transformers, and FAISS.
- Document Processing Pipeline:
- PDF uploading via Google Colab’s interface
- Document loading and parsing using PyPDFLoader
- Text splitting with RecursiveCharacterTextSplitter to create manageable chunks
- Vector Database Creation:
- Uses sentence-transformers (specifically “all-MiniLM-L6-v2”) to generate embeddings
- Creates a FAISS vector store from the document chunks
- Local LLM Integration:
- Sets up a Hugging Face model (default is “google/flan-t5-base”). It is publicly accessible on Hugging Face. It does not require an access token for basic usage, as it’s an openly available model. You can easily load it in your project using libraries like Hugging Face’s transformers without authentication.
- Creates a text generation pipeline for answering questions
- Question-Answering System:
- Establishes a RetrievalQA chain that connects the vector store and LLM
- When given a question, it retrieves relevant document chunks and generates an answer
The implementation is organized as a class (LocalRAGSystem) with methods for each step of the process, making it modular and easy to understand.
Step 1: Install the necessary packages
This code installs and imports necessary packages for a natural language processing (NLP) project.
- It uses
!pip installto install packages from the Python Package Index (PyPI). - The installed packages include
langchain,sentence-transformers, andfaiss-cpu. - The code then imports various modules and classes from these packages.
- The imported modules enable functionalities such as text splitting, document loading, embeddings, and language modeling.
Here is the code snippet:
# Install necessary packages
!pip install langchain langchain-community pypdf sentence-transformers faiss-cpu

import os
import logging
from google.colab import files
from langchain.text_splitter import RecursiveCharacterTextSplitter
from langchain_community.document_loaders import PyPDFLoader
from langchain_community.embeddings import HuggingFaceEmbeddings
from langchain_community.vectorstores import FAISS
from langchain.chains import RetrievalQA
from langchain_community.llms import HuggingFacePipeline
from transformers import AutoTokenizer, AutoModelForSeq2SeqLM, pipeline
Step 2: Set up logging<>
The given code snippet is used to configure the logging module in Python. Here’s a breakdown of what each line does:
The line logging.basicConfig(level=logging.INFO)sets the basic configuration for the logging module.
logging.basicConfig(): This function is used to configure the logging module.level=logging.INFO: This sets the logging level toINFO. This means that all log messages with a level ofINFOor higher (WARNING,ERROR,CRITICAL) will be processed.
The line logger = logging.getLogger(__name__)creates a logger instance:
logging.getLogger(): This function returns a logger instance.__name__: This is a built-in Python variable that holds the name of the current module. Passing__name__togetLogger()creates a logger instance with a name that corresponds to the current module.
Here is the code snippet:
logging.basicConfig(level=logging.INFO)
logger = logging.getLogger(__name__)
Step 3: Create a class representing a local RAG (Retrieval-Augmented Generation) system.
Within this class, we will add all our functions to create a RAG mode:
class LocalRAGSystem:
Step 4: Initialize the LocalRAGSystem object
The following are the attributes:
- documents (list): A list to store the loaded documents.
- vector_store: A vector store to store the document embeddings.
- embeddings: An embeddings model to generate embeddings for the documents.
- llm: A local language model to generate answers.
- qa_chain: A QA chain to retrieve answers from the vector store
Here is the code snippet:
def __init__(self):
    self.documents = []
    self.vector_store = None
    self.embeddings = None
    self.llm = None
    self.qa_chain = None
Step 5: Upload PDFs from the local machine to Colab
This code defines a method upload_pdfs to upload PDF files from a local machine to Google Colab.
- It uses the files.upload() function from Google Colab.
- The uploaded file names are logged and returned.
- Any exceptions during upload are caught, logged, and re-raised.
- The method is part of a class and uses a logger for logging messages.
- It returns a list, i.e., a list of uploaded PDF paths.
Here is the code snippet:
def upload_pdfs(self):
        """Upload PDFs from the local machine to Colab."""
        try:
            uploaded = files.upload()
            pdf_paths = list(uploaded.keys())
            logger.info(f"Uploaded {len(pdf_paths)} PDFs: {pdf_paths}")
            return pdf_paths
        except Exception as e:
            logger.error(f"Error uploading PDFs: {e}")
            raise
Step 6: Load and parse the PDF documents
This code defines a method load_documents to load and parse PDF documents from given file paths.
- It iterates through each PDF file path, attempts to load the document using PyPDFLoader, and appends the loaded pages to the self.documents list.
- Any exceptions during loading are caught, logged, and the method continues with the next file.
- The number of loaded pages for each file and the total number of pages are logged.
- The method updates the self.documents list with the loaded document pages.
The following is the code snippet:
def load_documents(self, pdf_paths):
        """Load and parse the PDF documents."""
        for pdf_path in pdf_paths:
            try:
                loader = PyPDFLoader(pdf_path)
                documents = loader.load()
                self.documents.extend(documents)
                logger.info(f"Loaded {len(documents)} pages from {pdf_path}")
            except Exception as e:
                logger.error(f"Error loading {pdf_path}: {e}")
        logger.info(f"Loaded {len(self.documents)} document pages in total.")
Step 7: Split documents into chunks
This code splits loaded documents into chunks using a RecursiveCharacterTextSplitter.
- It takes optional parameters
chunk_size(default 1000) andchunk_overlap(default 200). - The splitter divides the documents into chunks, which are stored in
self.document_chunks. - The number of chunks created is logged.
- Any exceptions during splitting are caught, logged, and re-raised.
Here is the code snippet:
 def split_documents(self, chunk_size=1000, chunk_overlap=200):
        """Split documents into chunks."""
        try:
            text_splitter = RecursiveCharacterTextSplitter(
                chunk_size=chunk_size,
                chunk_overlap=chunk_overlap
            )
            self.document_chunks = text_splitter.split_documents(self.documents)
            logger.info(f"Split into {len(self.document_chunks)} chunks.")
        except Exception as e:
            logger.error(f"Error splitting documents: {e}")
            raise
Step 8: Set up the embedding model
This code sets up an embedding model using Hugging Face’s Transformers.
- It takes an optional model_name parameter (defaulting to a specific MiniLM model).
- The chosen model is used to create a HuggingFaceEmbeddings instance.
- The setup process is logged, including the model name used.
- Any exceptions during setup are caught, logged, and re-raised.
Here is the code snippet:
def setup_embeddings(self, model_name="sentence-transformers/all-MiniLM-L6-v2"):
        """Set up the embedding model."""
        try:
            self.embeddings = HuggingFaceEmbeddings(model_name=model_name)
            logger.info(f"Set up embeddings using {model_name}")
        except Exception as e:
            logger.error(f"Error setting up embeddings: {e}")
            raise
Step 9: Create a vector store from the document chunks
This code creates a vector store from document chunks using the FAISS library.
- It uses the previously set up embeddings model to generate vectors from the document chunks.
- The
FAISS.from_documentsmethod creates the vector store. - The creation process is logged with a success message.
- Any exceptions during creation are caught, logged, and re-raised.
Here is the code snippet:
 def create_vector_store(self):
        """Create a vector store from the document chunks."""
        try:
            self.vector_store = FAISS.from_documents(self.document_chunks, self.embeddings)
            logger.info("Created FAISS vector store.")
        except Exception as e:
            logger.error(f"Error creating vector store: {e}")
            raise
Step 10: Set up a local LLM using Hugging Face
This code sets up a local Large Language Model (LLM) using Hugging Face’s Transformers.
- It loads a pre-trained model and tokenizer using the specified model_id.
- A text-to-text generation pipeline is created with the loaded model and tokenizer.
- The pipeline is wrapped in a HuggingFacePipeline instance and stored in self.llm.
- The setup process is logged, and any exceptions are caught, logged, and re-raised.
Here is the code snippet:
 def setup_local_llm(self, model_id="google/flan-t5-base", device="auto"):
        """Set up a local LLM using Hugging Face."""
        try:
            tokenizer = AutoTokenizer.from_pretrained(model_id)
            model = AutoModelForSeq2SeqLM.from_pretrained(model_id, device_map=device)

            pipe = pipeline(
                "text2text-generation",  # Changed from "text-generation" to match T5's task
                model=model,
                tokenizer=tokenizer,
                max_new_tokens=512,
                temperature=0.7
            )

            self.llm = HuggingFacePipeline(pipeline=pipe)
            logger.info(f"Set up local LLM using {model_id}")
        except Exception as e:
            logger.error(f"Error setting up local LLM: {e}")
            raise
Step 11: Create a QA chain using the vector store and LLM
This code sets up a Question Answering (QA) chain using the vector store and Large Language Model (LLM).
- It creates a RetrievalQA instance with the specified LLM and vector store as retriever.
- The retriever is configured to return the top k results (defaulting to 3).
- The QA chain setup process is logged with the value of k.
- Any exceptions during setup are caught, logged, and re-raised.
Here is the code snippet:
 def setup_qa_chain(self, k=3):
        """Create a QA chain using the vector store and LLM."""
        try:
            self.qa_chain = RetrievalQA.from_chain_type(
                llm=self.llm,
                chain_type="stuff",
                retriever=self.vector_store.as_retriever(search_kwargs={"k": k})
            )
            logger.info(f"Set up QA chain with k={k}.")
        except Exception as e:
            logger.error(f"Error setting up QA chain: {e}")
            raise
Step 12: Answer a question using the RAG system
This code defines a method to answer a question using a Retrieval-Augmented Generator (RAG) system.
- It takes a
questionas input and uses theqa_chainto generate an answer. - The question and answer are logged for tracking purposes.
- The answer is returned by the method.
- Any exceptions during the answering process are caught, logged, and re-raised.
Here is the code snippet:
def answer_question(self, question):
        """Answer a question using the RAG system."""
        try:
            answer = self.qa_chain.run(question)
            logger.info(f"Q: {question}\nA: {answer}")
            return answer
        except Exception as e:
            logger.error(f"Error answering question: {e}")
            raise
Step 13: Run the complete setup process
This code defines a method run_setup to execute the complete setup process for a Retrieval-Augmented Generator (RAG) system.
- It calls various methods in sequence to upload PDFs, load documents, split documents, set up embeddings, create a vector store, set up a local LLM, and set up a QA chain.
- The method takes optional parameters to customize the setup process.
- The completion of the setup process is logged.
- Any exceptions during setup are caught, logged, and re-raised.
Here is the code snippet:
def run_setup(self, chunk_size=1000, chunk_overlap=200, model_id="google/flan-t5-base", k=3):
        """Run the complete setup process."""
        try:
            pdf_paths = self.upload_pdfs()
            self.load_documents(pdf_paths)
            self.split_documents(chunk_size=chunk_size, chunk_overlap=chunk_overlap)
            self.setup_embeddings()
            self.create_vector_store()
            self.setup_local_llm(model_id=model_id)
            self.setup_qa_chain(k=k)
            logger.info("RAG system is ready to use!")
        except Exception as e:
            logger.error(f"Error during setup: {e}")
            raise
Step 14: Example Usage
This code creates an instance of the LocalRAGSystem class and runs its setup process.
- The setup process configures the system with specific parameters, such as chunk size and language model.
- After setup, the code asks two questions to the system and prints the answers.
- The questions demonstrate the system’s ability to understand the main topic and summarize key points from the documents.
- The answers are generated using the Retrieval-Augmented Generator (RAG) system.
Here is the code snippet:
if __name__ == "__main__":
    rag = LocalRAGSystem()
    rag.run_setup(chunk_size=1000, chunk_overlap=200, model_id="google/flan-t5-base", k=3)

    # Now you can ask questions
    question = "What is the main topic of these documents?"
    answer = rag.answer_question(question)
    print(f"Q: {question}\nA: {answer}")

    # Additional example
    question = "Summarize the key points from the documents."
    answer = rag.answer_question(question)
    print(f"Q: {question}\nA: {answer}")
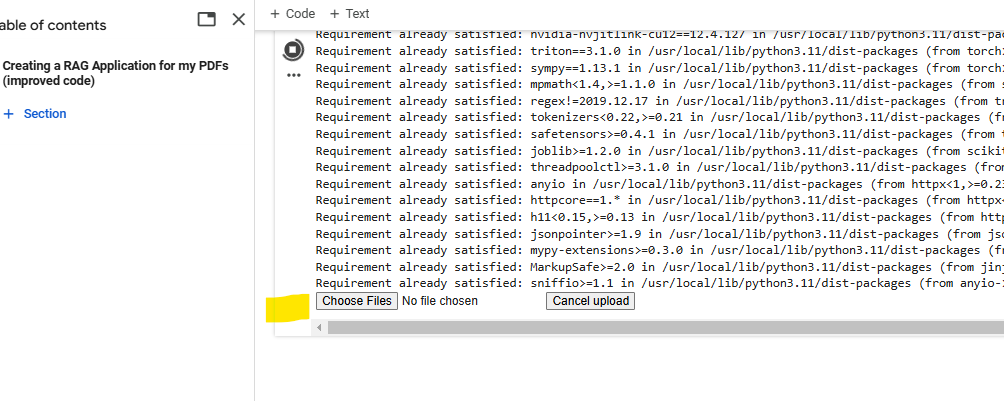
Let us run the above code on Google Colab. After running the following upload button will be visible:
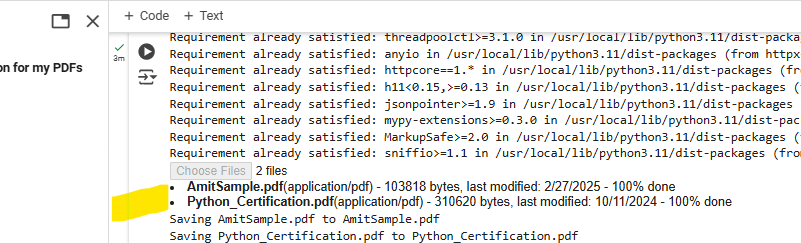
Upload the PDFs you want to use. We uploaded two PDFs from our local system:
Here, it is showing us the answer to the two prompts we mentioned in the code:
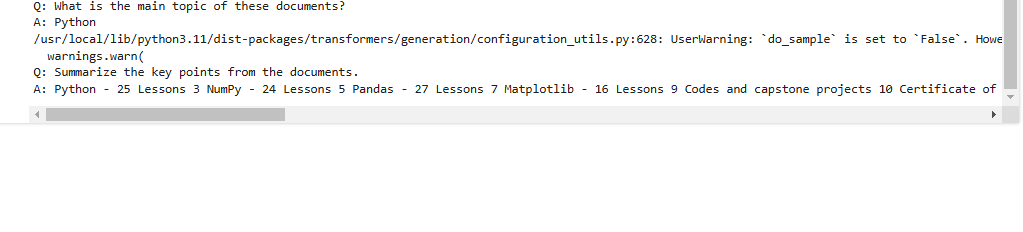
Note 1: It is showing us the following warning:
do_sample is set to False. However, temperature is set to 0.7 — this flag is only used in sample-based generation modes. You should set do_sample=True or unset temperature.
Here is what we can do:
- Use do_sample=True if you want the model to generate diverse and creative responses. This is useful for tasks like creative writing or open-ended question answering.
- Use temperature=0 or remove it if you want deterministic and reproducible responses. This is useful for tasks where consistency is important, such as factual question answering.
Note 2: Above, we did not create the token since we are accessing public models for our basic example.
As said above, the secret HF_TOKEN does not exist in our Colab secrets. To authenticate with the Hugging Face Hub, create a token in your settings tab (https://huggingface.co/settings/tokens), set it as secret in your Google Colab, and restart your session.
Authentication is recommended but still optional to access public models or datasets.
Let us understand this more.
When a Hugging Face token is required
Hugging Face access tokens are only required in specific cases:
- When accessing private or gated models
- When using the Inference API for remote model hosting
- When downloading models with usage restrictions
- When using some enterprise features
For this local RAG implementation, all processing happens on your machine after downloading the models once, with no need to authenticate with Hugging Face’s servers for continued use. You don’t need a Hugging Face access token in the above implementation because it’s using publicly available models and resources that don’t require authentication.
When the code loads models with AutoTokenizer.from_pretrained() and AutoModelForSeq2SeqLM.from_pretrained(), it’s accessing:
- The “google/flan-t5-base” model for text generation
- The “sentence-transformers/all-MiniLM-L6-v2” model for embeddings
Both of these are open-source models that Hugging Face hosts for public use without authentication. They’re downloaded automatically when you run the code.
Key points about the above code
1. Error Handling:
Error handling is added for common issues, such as:
- Failed PDF uploads.
- Incorrect model names or paths.
- Issues with document splitting or embedding generation.
2. Dynamic Chunk Size:
Allows the user to specify chunk_sizeand chunk_overlap dynamically when calling run_setup. This makes the system more flexible for different types of documents.
3. Customizable Search Parameters:
Allow the user to customize the search_kwargs(e.g., k value) in the setup_qa_chain This can improve the relevance of retrieved documents.
If you liked the tutorial, spread the word and share the link and our website Studyopedia with others.
For Videos, Join Our YouTube Channel: Join Now
Read More:
- RAG Tutorial
- Generative AI Tutorial
- Machine Learning Tutorial
- Deep Learning Tutorial
- Ollama Tutorial
- Retrieval Augmented Generation (RAG) Tutorial
- Copilot Tutorial
- ChatGPT Tutorial
No Comments